Should You Enable Targeted Content Recommendations in Windows 11 Privacy Settings

Targeted content recommendations in Windows 11 are privacy settings that let Microsoft use your app usage, the websites you visit, and your language choices to show you personalized ads and promotional suggestions. Turning the feature on gives Microsoft permission to use your daily computer habits for marketing purposes.
Most people switch these settings off to keep their habits private. Turning them off does not change how your computer runs. No performance, security or app features are lost. Once you know what each setting does, you can decide whether to protect your privacy or accept tailored ads on your screen.
No. Targeted content recommendations let Microsoft track your app usage, websites, and language choices to show personalized ads. Turning them off in Settings Privacy & security General by switching off “Let apps show me personalized ads by using my advertising ID” does not affect performance, security, or features—only removes promotional suggestions and protects your privacy.
Pros and Cons of Enabling Content Recommendations
Whether to keep targeted recommendations on depends on what you value. Here is a plain look at both sides. The settings are tied to your user account, so each person on a shared PC can choose differently.
Pros:
- You might discover helpful apps and shortcuts you did not know existed.
- Settings suggestions can sometimes point you quickly to features you want to use.
- The Start menu and Settings app feel more active and tuned to your general interests.
Cons:
- Your computer habits, such as which apps you launch, are watched to build the suggestions.
- You will see more ads, promotional offers, and pop-ups.
- Clutter on the Start menu and inside the Settings app can distract you from your tasks.
- Some suggestions push paid services or Microsoft account features you may never need.

Step-by-Step Guide: How to Turn Off Targeted Content Recommendations
The steps below cover Windows 11 and need no extra software. Every change can be undone by flipping the same switch back on.
Step 1Open Windows Settings
- Click the Start button on your taskbar .
- Select the Settings app icon (the gear).
You can also press the Win plus I to open Settings right away. The Settings window should now be open, with a list of categories on the left.

Step 2Navigate to Privacy and Security
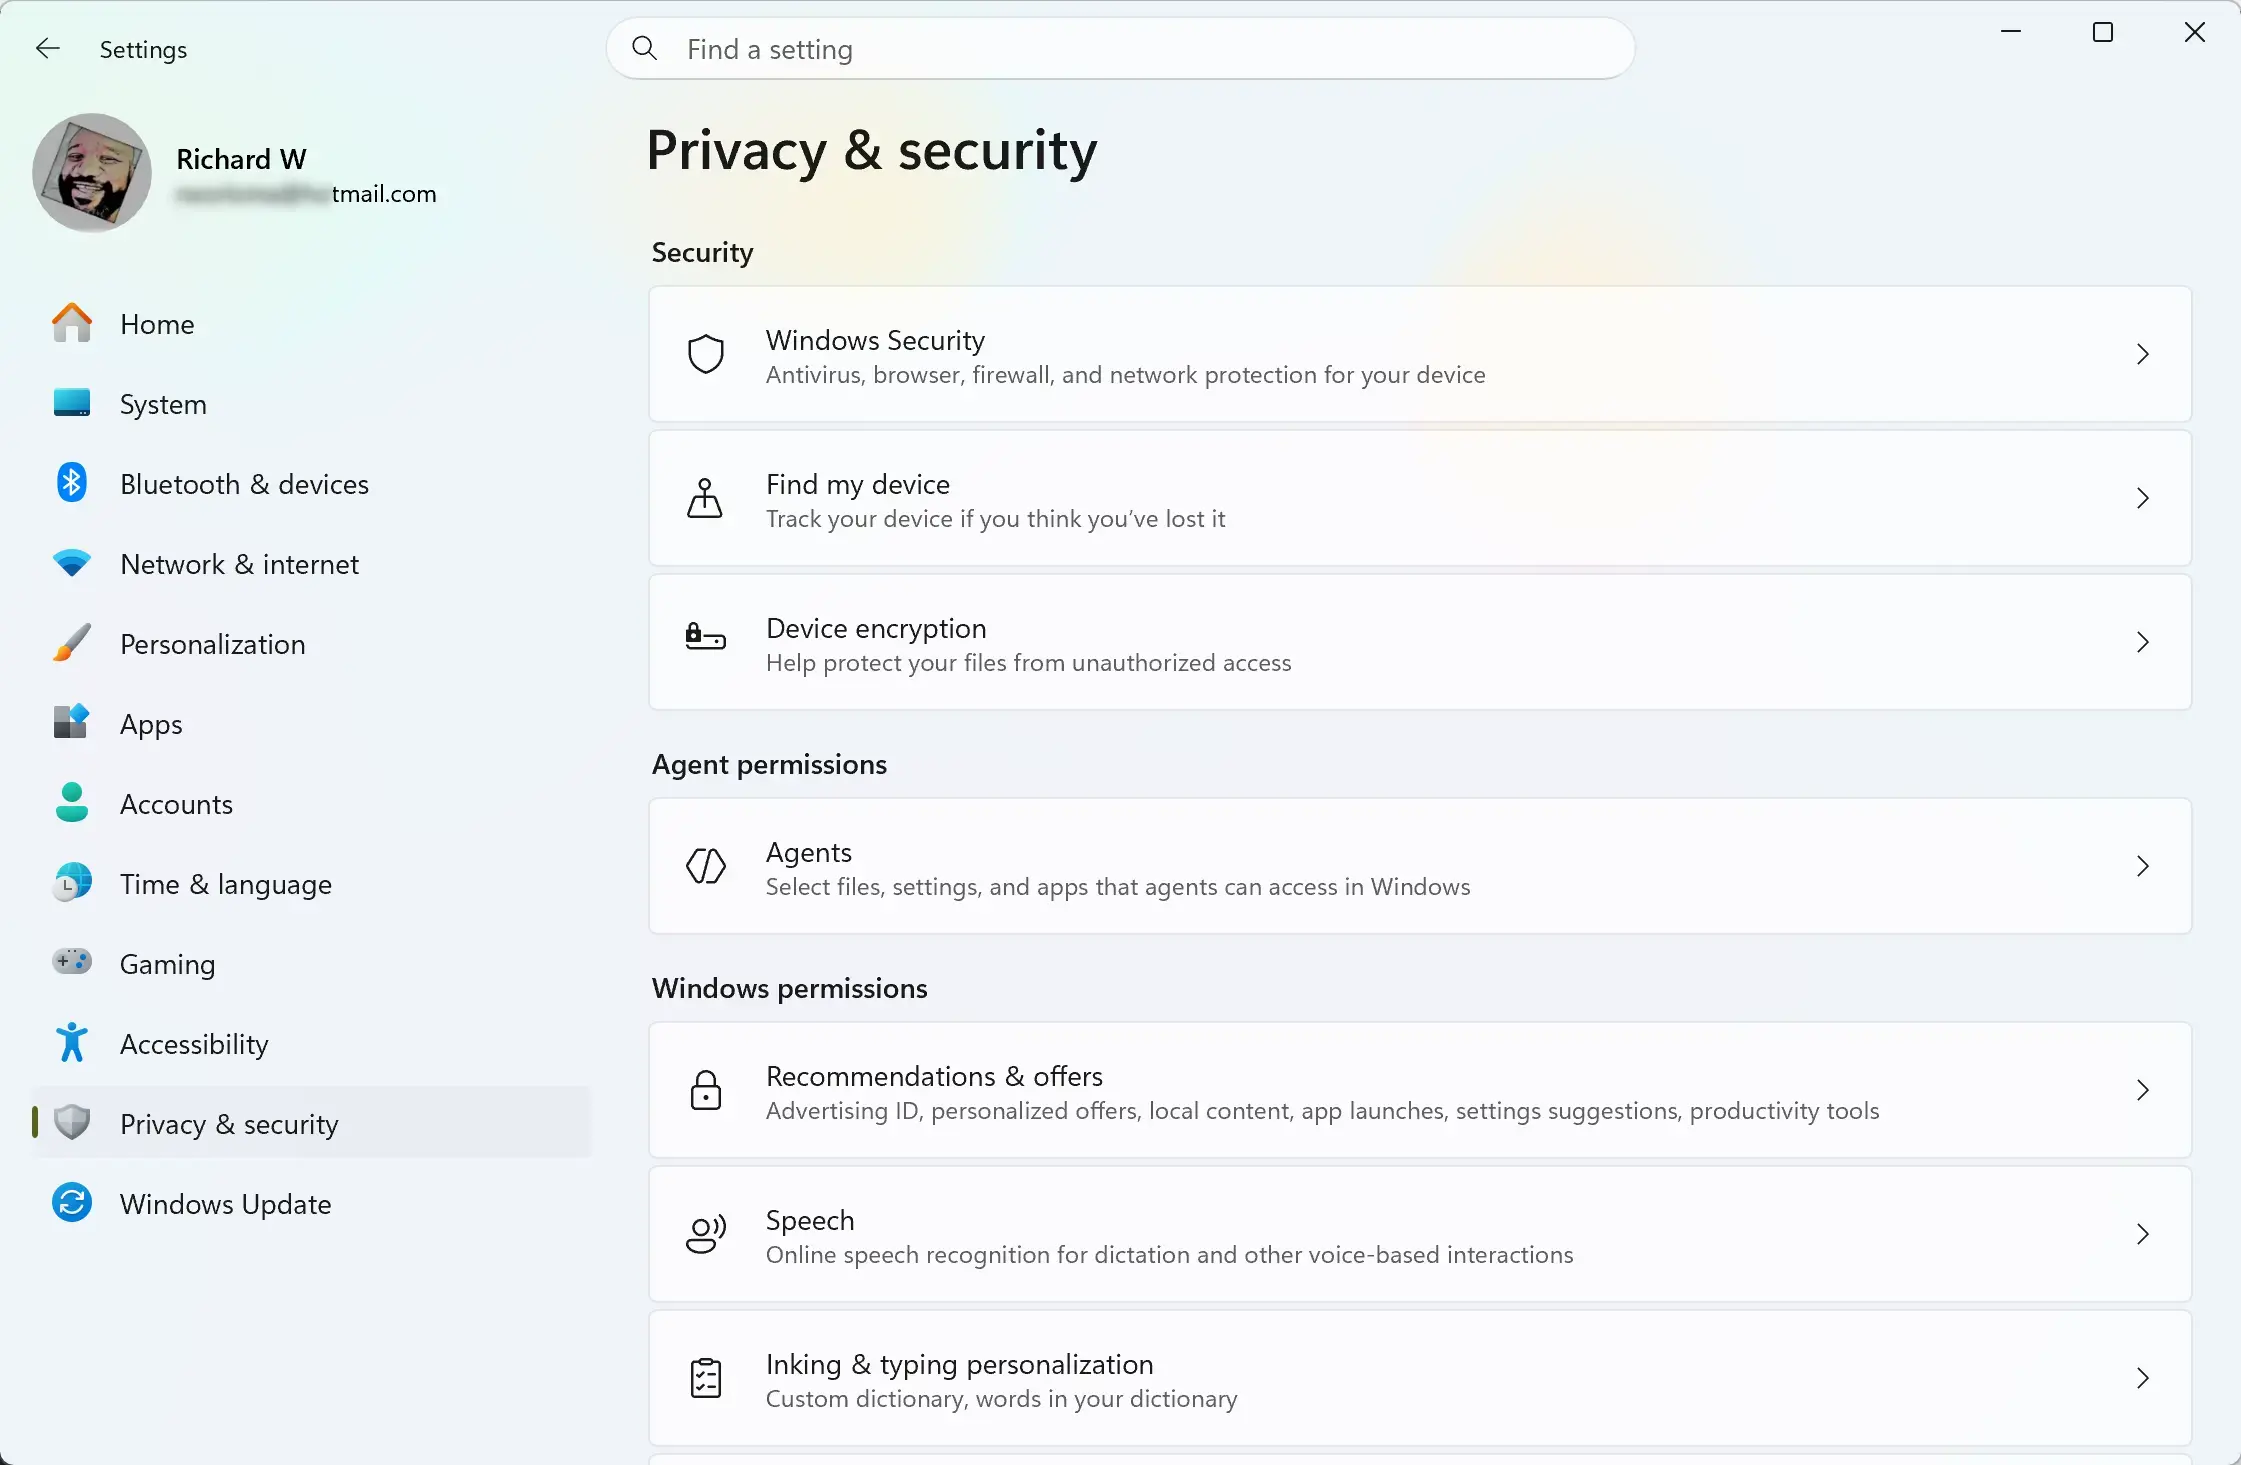
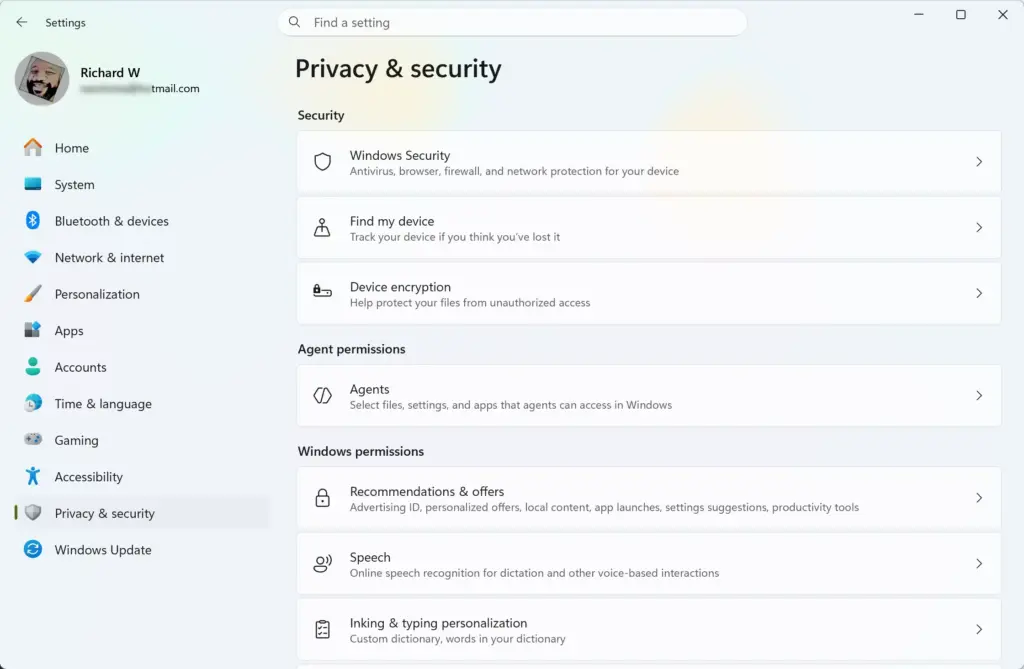
- In the menu on the left side of the Settings window, click Privacy & security.
If you do not see the menu, the window may be too narrow. Click the menu icon (three horizontal lines) in the top left corner to open it. The right side of the window should now list privacy and security categories.
Step 3Access General Privacy Settings
- Scroll down to the Windows permissions section and click General.
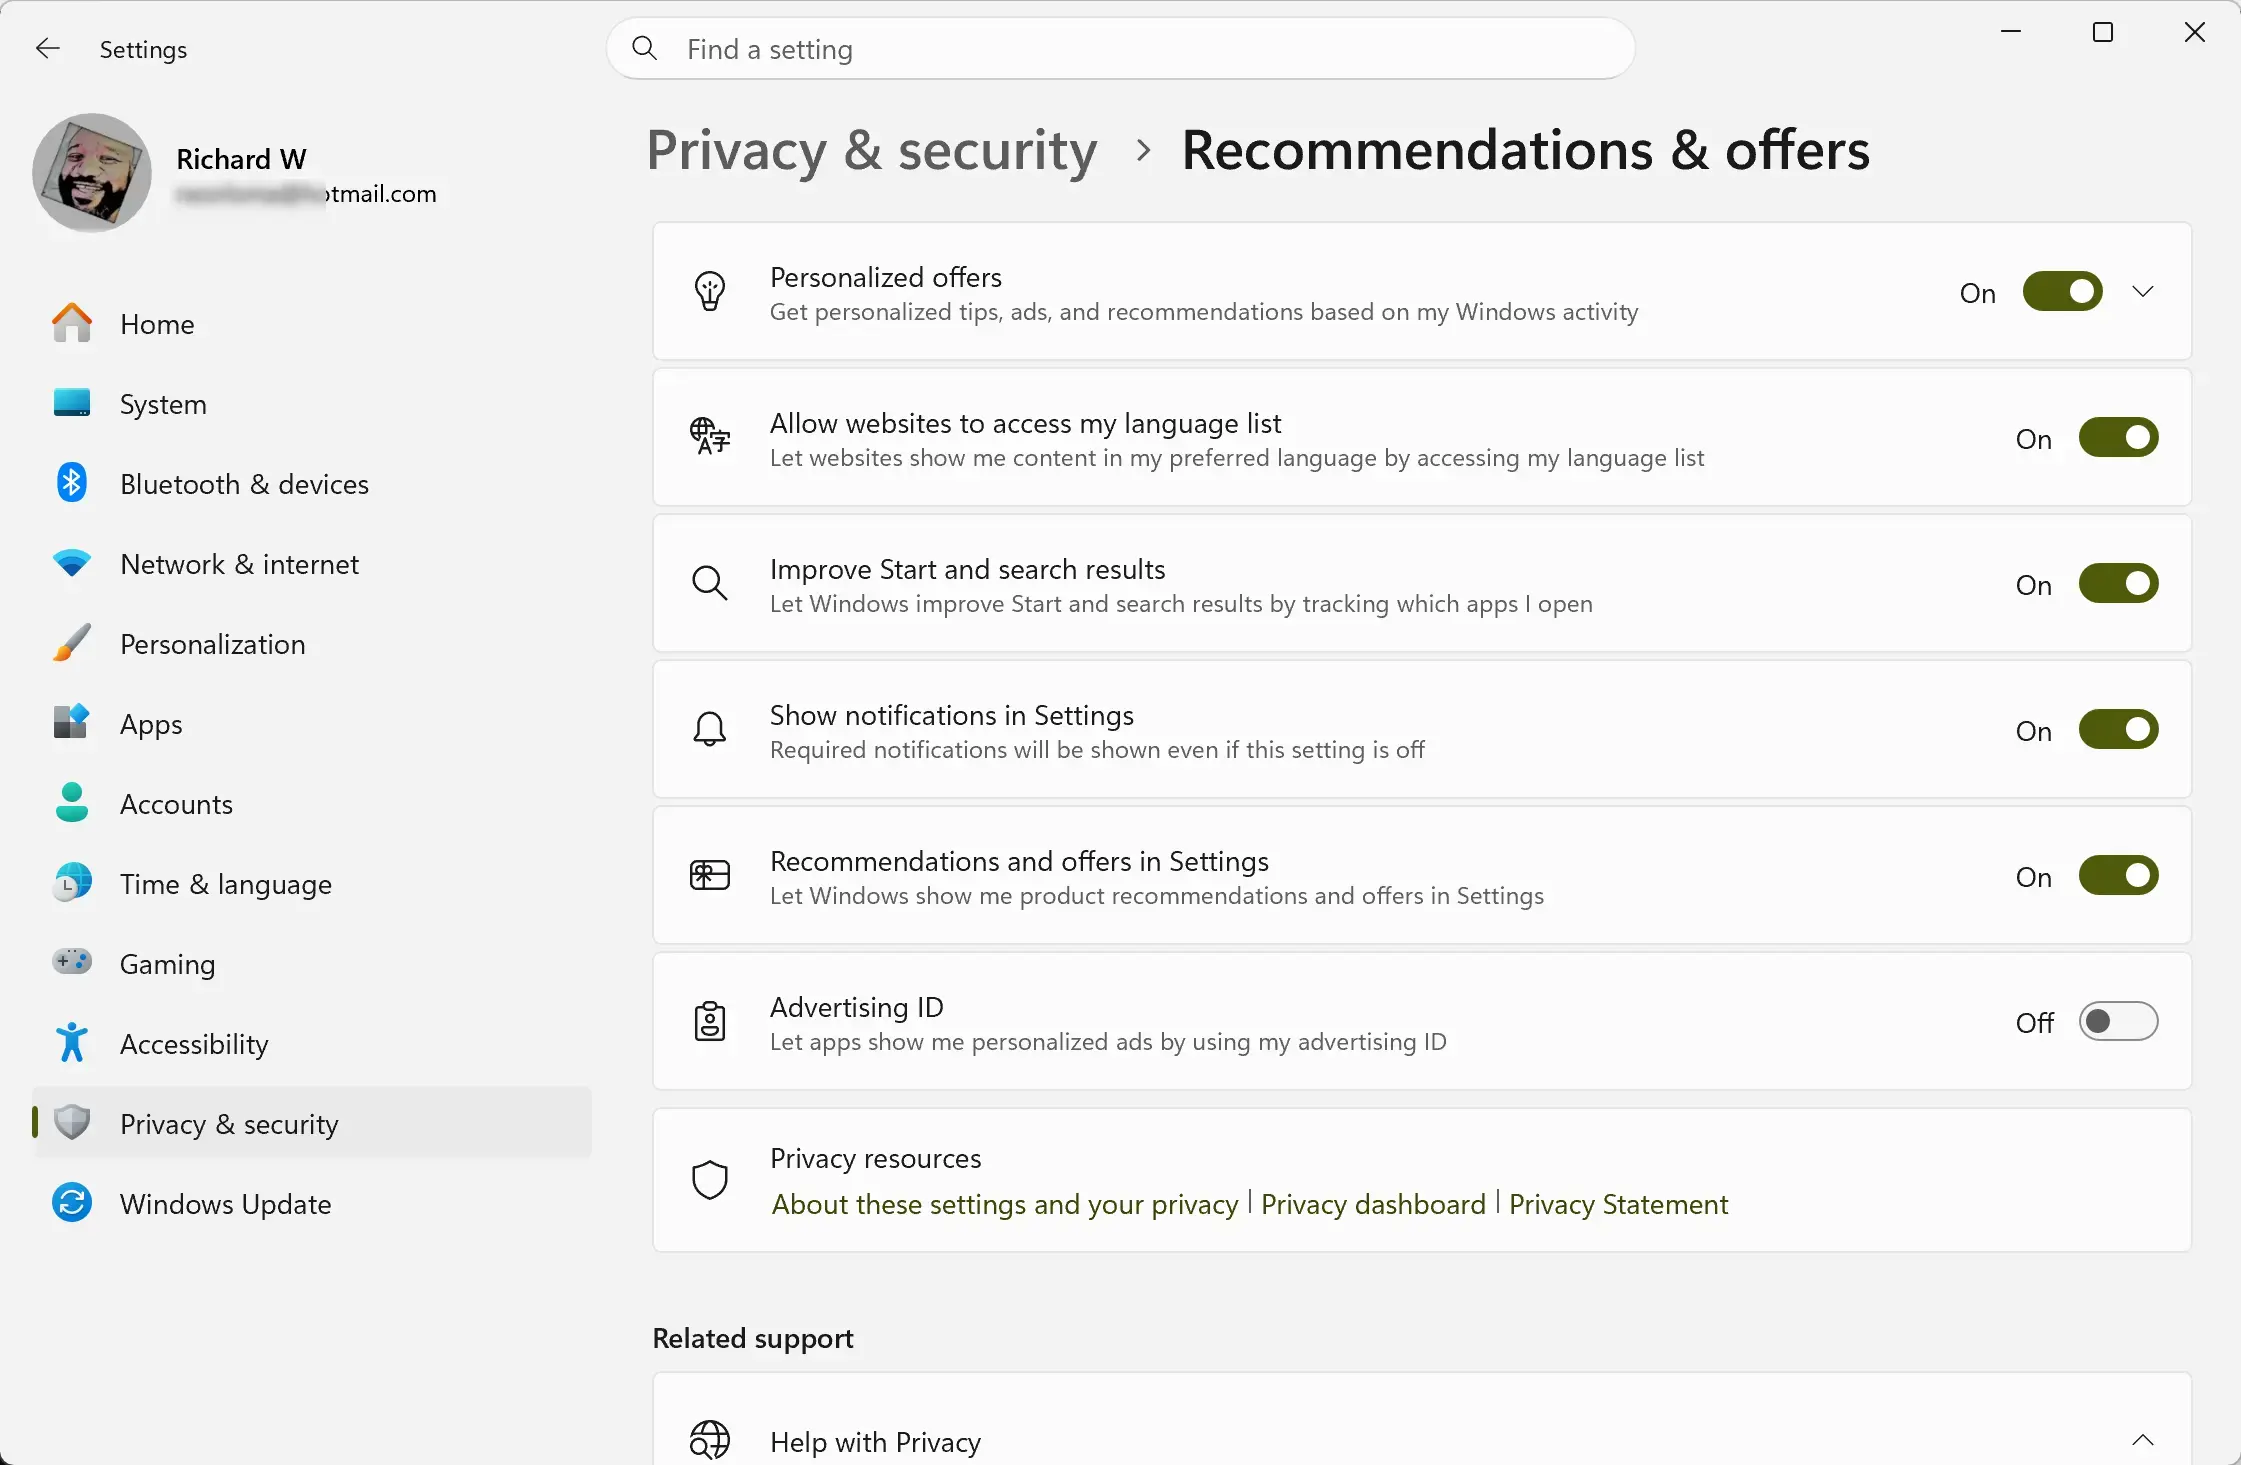
This page has several switches that control how apps and Windows use your language list, track app launches, and offer suggested content. The exact wording and number of switches can differ slightly between Windows 11 versions, so read each label before you change it.
Step 4Turn Off Suggested Content
- Find the setting named Let apps show me personalized ads by using my advertising ID and set its switch to Off.
- Look at the other switches on the page, such as the ones for websites using your language list, Windows tracking app launches to improve Start and search results, and showing suggested content in the Settings app. Set each one you do not want to Off.
Each switch should now read Off. The change takes effect straight away, and you do not need to restart.
On a work or school PC, an administrator may manage these options, and a switch may be greyed out or locked. If so, ask your IT department.
Managing Additional Privacy Settings for a Cleaner Experience
Managing a few extra settings gives you a cleaner experience in Windows 11. It stops the system from using your app habits to show unwanted suggestions. These changes live in other parts of Settings, so work through the items below.
Start menu and search:
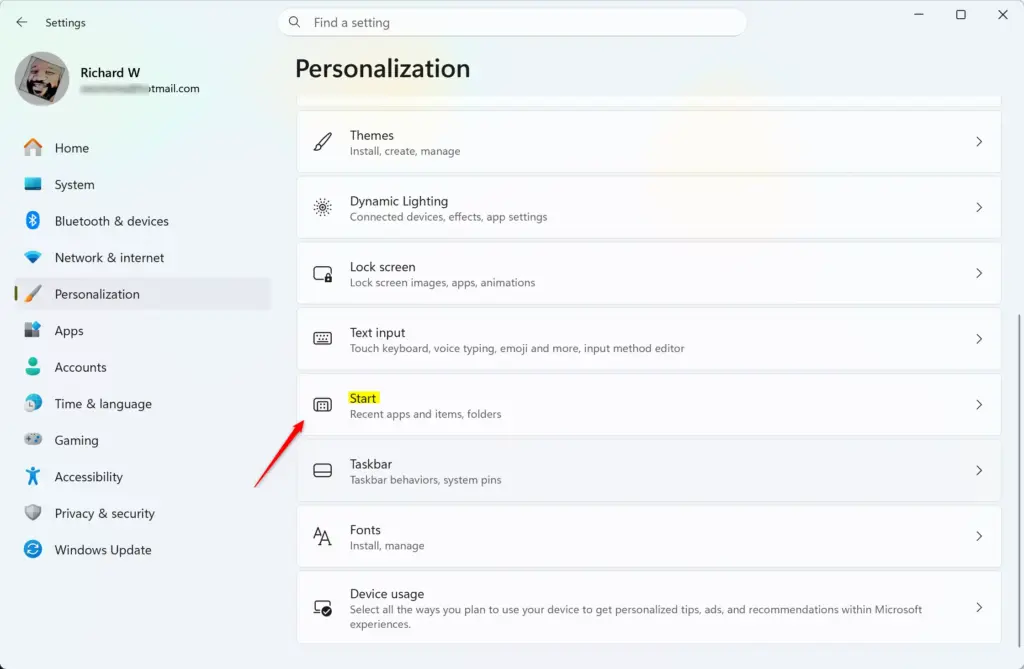
- Open Settings and go to Personalization Start.
- Turn off the options that show recently added apps and most used apps.
- Turn off the option that shows recommendations for tips, shortcuts, new apps, and more.
Open the Start menu afterward. The recommendation area should be quieter. Labels here vary a little between Windows 11 versions, and the Recommended section itself may stay on screen even when it has less in it.
Settings app banners: On the Settings home page, Microsoft often shows promotional banners for cloud storage or Microsoft accounts. You cannot always remove the banner space completely. Keeping your privacy settings strict reduces personalized offers.
Advertising ID: To turn it off, open Settings, go to Privacy & security General, and switch off the advertising ID setting. This stops apps from using a unique code to track your behavior across different programs for targeted ads. You will still see ads in apps that show them. They just will not be tailored to that code.
Summary
Whether to enable targeted content recommendations in Windows 11 depends on whether you want personalized tips or more privacy. Most users should turn them off. The settings use your computer habits to show ads and clutter your daily routine with suggestions you never asked for.
In your privacy settings, you can turn off these suggestions and stop ad tracking, which gives you a cleaner, more focused computer. If you miss the suggestions, go back to the same pages and switch them on again. Spending a few minutes on these settings gives you much more control over your Windows 11 setup.
Was this guide helpful?

About the Author
Richard
Tech Writer, IT Professional
Richard is a writer at Geek Rewind who turns complex IT tasks into clear, step-by-step guides. He draws on years of hands-on experience in system administration and enterprise IT operations, focusing on Windows, Linux and WordPress: the problems people actually run into, and the fixes that work. His server and WordPress guides come from systems he runs himself. Richard builds and maintains the platform behind Geek Rewind, from its Ubuntu servers and Nginx configuration to its custom WordPress plugins. Many new tutorials start with readers' questions, and he's always glad to answer them in the comments.


No comments yet — be the first to share your thoughts!