Why Does Windows 11 Show Recommended Apps in the Start Menu

Recommended apps in the Windows 11 Start menu are suggested software and recent files that Microsoft shows automatically to help you pick up where you left off. The feature uses your recent activity to guess what you might want to open next. It can clutter the screen, and it can show your recent files to anyone standing behind you.
Windows 11 puts these suggestions in a dedicated Recommended section in the bottom half of the Start menu , right below your pinned shortcuts. You can turn them off in Settings if you want a cleaner look and more privacy. The steps below go from a quick one-item fix to a full shutdown of the feature.
Windows 11 shows recommended apps and files in the Start menu because it tracks your recent activity—installed programs, opened documents, and frequently used apps—to help you return to items you use often. You can remove individual recommendations by right-clicking them and selecting Remove from list, or disable the entire Recommended section in Settings under Personalization Start Recommendations to get a cleaner Start menu .
Understanding the 🪟 Windows 11 Start Menu Layout
The Windows 11 Start menu is split into two main areas. The top half is the Pinned section, which holds shortcuts you chose. The bottom half is the Recommended section, which holds recent files and new programs that Windows picked for you.
You control the Pinned section completely. You can add, remove and rearrange programs there so your most-used tools are always one click away.
The Recommended section is different. It is dynamic and updates on its own based on what you do. Windows 11 notices which files you open and which software you install, and it adds shortcuts to those items. You do not manage this list directly. You can only remove items from it or tell Windows to stop filling it.
The Recommended section is meant to make the computer feel smart and personal, but in practice it often feels like clutter. It depends entirely on your recent file and app history. That makes it easy to manage once you know where the history comes from: stop the history, or clear it, and the suggestions go away.
Why Does 🪟 Windows 11 Show Recommended Apps and Files?
Windows 11 shows recommended apps and files so you can jump back to things you recently opened or installed. It tracks your daily activity and puts new programs, frequent files and cloud documents where you can see them. Here is what can appear:
- Recently installed apps: When you install a program from the Microsoft Store or from a website, Windows highlights it in the Start menu so you can find it easily.
- Recently opened files: Documents, spreadsheets, photos and PDFs that you open in apps such as Microsoft Word or Adobe Reader often appear here so you can reopen them quickly.
- Frequently used applications: Programs you open often but have not pinned to the top grid may occasionally show up here.
- Cloud suggestions: If you sign in to Windows with a Microsoft account, cloud documents from services such as OneDrive may also appear.
- Promotional content: Sometimes Microsoft uses this space to suggest apps or features from the Microsoft Store.
These suggestions are meant to keep your workflow moving, but they can crowd the screen. If you prefer a clean, minimal Start menu, you have several ways to remove or hide them.
How to Clear and Hide the Recommended Section
You do not have to live with a cluttered Start menu. Windows 11 lets you remove single items, turn off the tracking behind the list, and clear the history that feeds it. Pick the method that matches how much you want to change:
- Remove one item if you only want to hide a particular file or app.
- Use the Settings app to switch off whole categories of recommendations.
- Clear File Explorer history if old files keep coming back.
- Use the Registry Editor only if the normal settings are not enough.
Method 1Manually Remove Individual Items
Removing individual items clears specific files or apps from the Start menu without turning off the feature. This works best when you want to keep most recommendations but need to hide a few private or unwanted ones.
- Press the Windows key on your keyboard to open the Start menu.
- Find the file, folder or app in the Recommended section that you want to remove.
- Right-click that item. A small context menu appears.
- Click Remove from list or Hide from this list. The wording depends on the item and your Windows 11 build.
This only removes that one instance of the recommendation. If you open the file or app again later, it may show up in the Start menu again. For a lasting fix, use the Settings method below.
Method 2Clear and Customize via Settings
The Settings app is the easiest way to stop the Start menu from showing recent files and new apps. A few switches in the Personalization settings turn the tracking off. You do not need a restart, and the change applies as soon as you flip a switch. This works the same on Home and Pro.
- Open the Start menu and click the Settings app (the gear icon). You can also press Windows key + I.

Settings - Click Personalization in the left-hand menu.
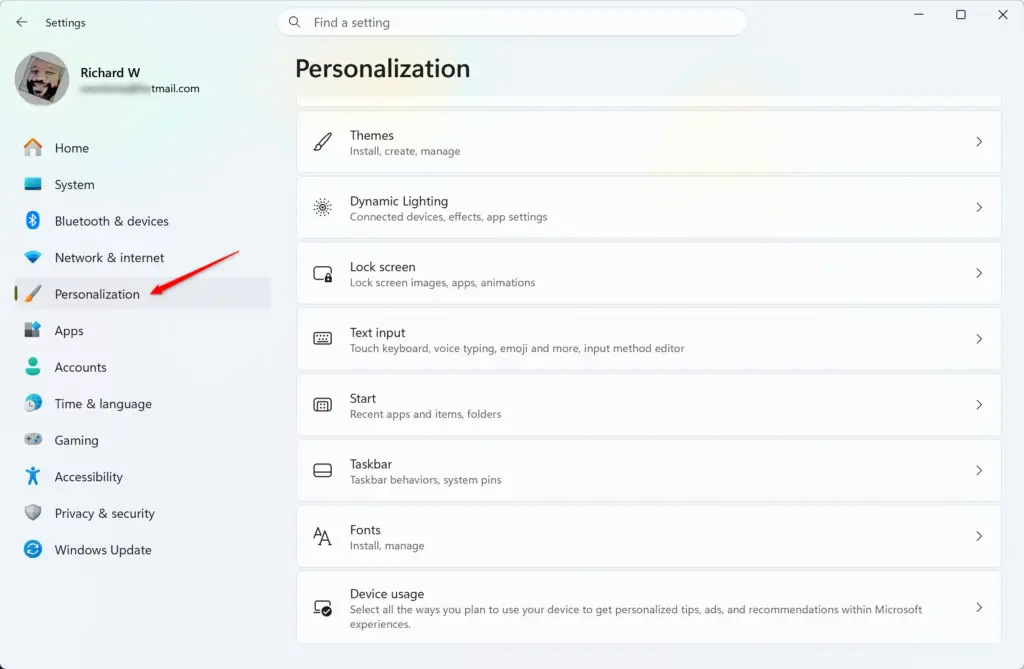
Settings › Personalization - Scroll down and click Start on the right side of the window. You should now see a list of switches for the Start menu.
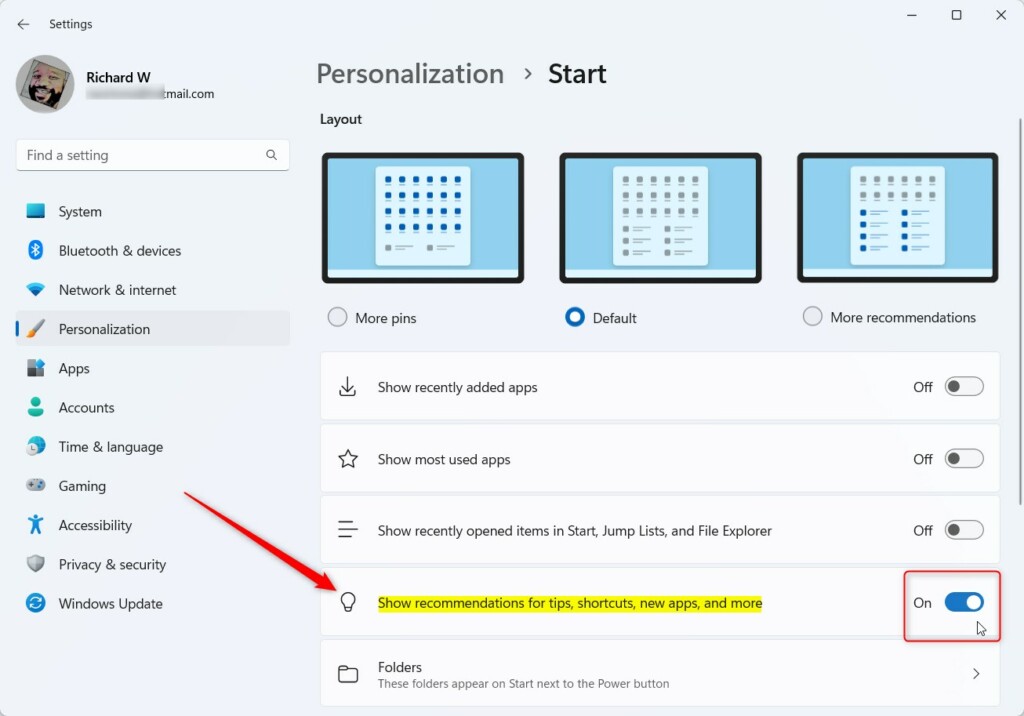
- Turn off the switches for Show recently added apps, Show most used apps, and Show recently opened items in Start, Jump Lists, and File Explorer.
Open the Start menu again and the clutter should be much reduced, with a simpler and more private Recommended area. On newer builds of Windows 11, the last switch may be worded differently, for example "Show recommended files in Start, recent files in File Explorer, and items in Jump Lists". It does the same job. You may also see extra switches for website recommendations or tips and new-app suggestions, and you can turn those off too. If a switch is missing or greyed out, your PC may be managed by an organization, or your build may word it differently.
To undo any of this, return to the same page and turn the switches back on. Remember that the last switch also affects Jump Lists and recent files in File Explorer, not just the Start menu.
Method 3Clear Recent Items via File Explorer
Clearing File Explorer history helps when old files stubbornly stay in your Start menu recommendations. Wiping the history removes the data that keeps those files showing up.
- Open File Explorer by clicking its icon on the taskbar or pressing Windows key + E.
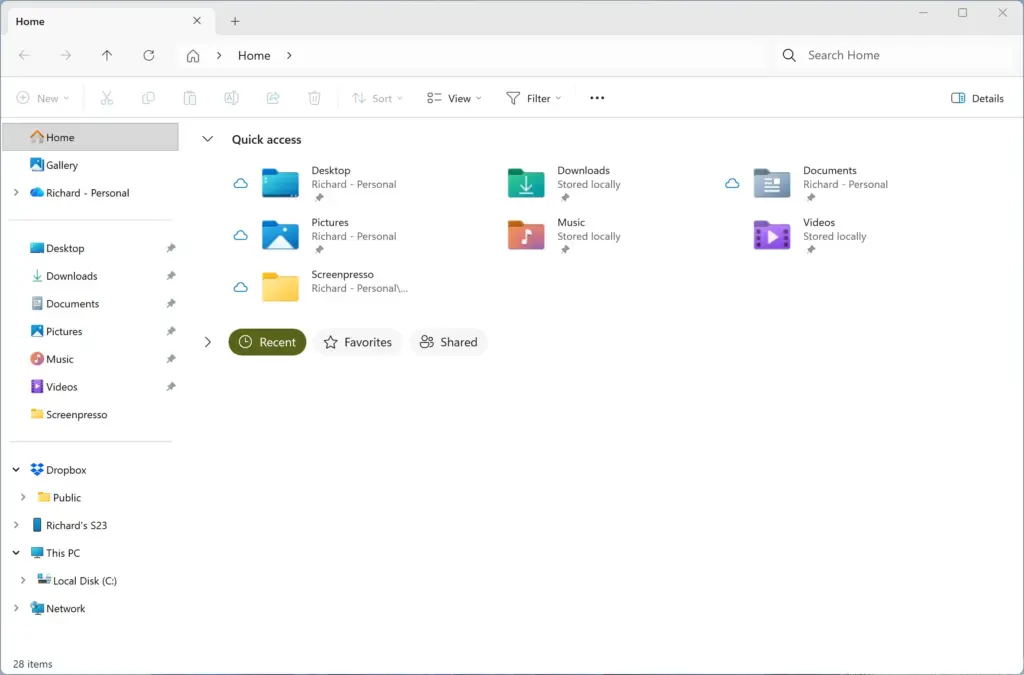
File Explorer - Click the three horizontal dots (...) in the top command bar to open the menu, then click Options. The Folder Options window opens.
- Stay on the General tab.
- Find the Privacy section near the bottom and click the Clear button next to "Clear File Explorer history."
- Click Apply and then OK.
Open the Start menu again and check whether the old items are gone. If new files keep appearing, the tracking is still on. Go back to the Settings method above and turn off the recent-items switch, otherwise the list will refill as you work.
Advanced Methods: Using the Registry Editor
You edit system values directly, which gives you full control over the recommended items. Take care, though. This area controls core settings, and a wrong change can cause problems. Follow each step exactly and only change what this guide tells you to.
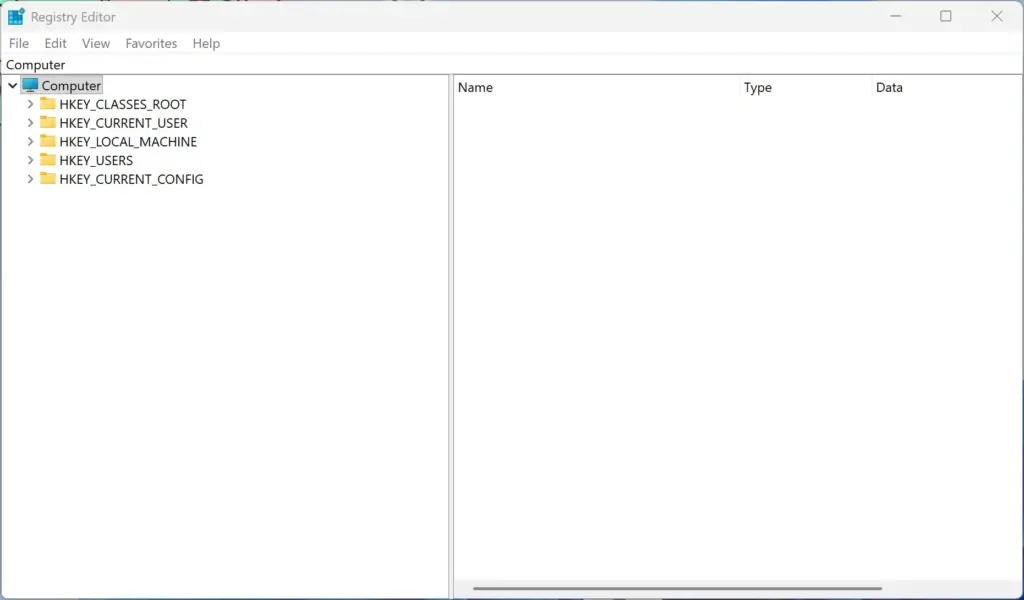
Instead of importing unknown files or running complicated scripts, make these changes by hand in the graphical interface of the Registry Editor. That way you can see exactly what you are changing. A safe routine looks like this:
- Create a restore point first, or at least back up the registry. In the Registry Editor, click File, then Export, and save a copy somewhere safe.
- Open the Start menu, search for Registry Editor, and open it. Click Yes if you see a User Account Control prompt. You need administrator rights to change these values.
- Browse to the key and value shown in this guide, and change only that value.
- Close the Registry Editor and sign out and back in, or restart the PC, so the Start menu picks up the change.
To undo a change, set the value back to what it was, or double-click the .reg file you exported to restore your backup.
How to Disable Start Menu Recommendations via Registry GUI
Disabling Start menu recommendations via the registry GUI is done by opening the built-in registry tool and changing specific system keys. This method forces Windows to stop tracking and showing unwanted files and apps directly through the system database.- Press the Windows key, type regedit into the search bar, and click on Registry Editor. Click Yes if a security prompt asks for permission to make changes to your device.
- Open the Start menu and type Settings in the search bar, then open the app. Click on System, then Storage, or use the Start menu personalization settings as shown in Method 2 to find your preferences. Alternatively, you can open your main settings menu, click on Personalization, and select Start to toggle off individual display options.
- To use the Registry Editor app directly, open your start menu search, type Registry Editor, and open it. Use the left-hand folder tree to expand HKEY_CURRENT_USER, then Software, Microsoft, Windows, CurrentVersion, Policies, and click on Explorer.
- If you do not see the Explorer folder under Policies, right-click on Policies, select New, click Key, and name it Explorer.
- Right-click an empty space in the right pane, select New, and click DWORD (32-bit) Value.
- Name this new value NoRecentDocsMenu.
- Double-click NoRecentDocsMenu, change the "Value data" box from 0 to 1, and click OK.
- Restart your computer for the changes to take full effect.
Enforce a Cleaner Start Menu Layout Using Group Policy
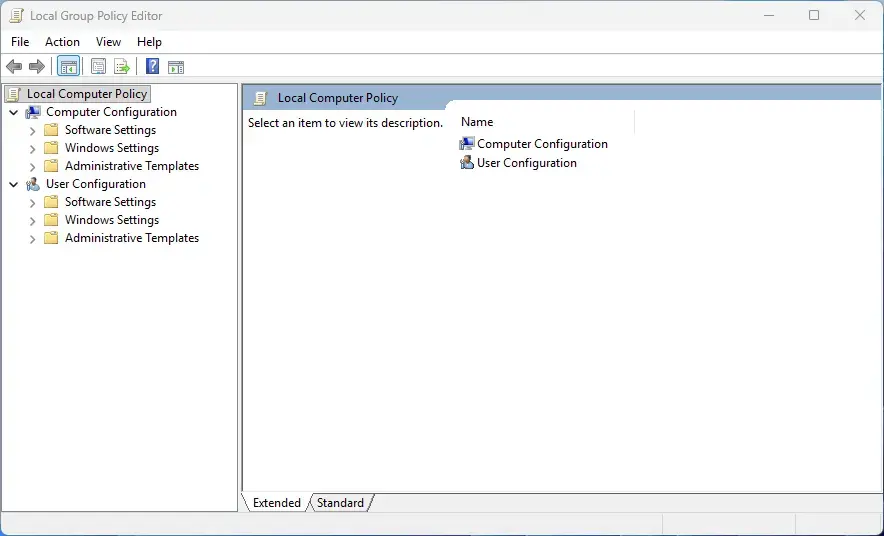
Enforcing a cleaner Start menu layout using Group Policy is a great way to lock down computer settings for multiple users or shared devices. You can use the built-in policy editor to block recommendations entirely across Windows Pro, Enterprise, and Education editions.
- Press the Windows key + R on your keyboard to open the Run dialog box.

Run dialog - Type gpedit.msc into the box and press Enter to open the Group Policy Editor.
- Use the left-hand navigation pane to open User Configuration, then Administrative Templates, then Start Menu and Taskbar.
- Scroll through the settings on the right side to find policies related to removing recent documents or hiding recommended items.
- Double-click the policy you want to change, select Enabled, and click Apply followed by OK.
Summary
The Recommended section in the Windows 11 Start menu shows your recent files and new apps to help you work faster, but it can also clutter your screen. You can easily hide or clear these items by changing your system settings, clearing file history, or removing individual files one by one.
Have a question about this guide?
Answered by AI from this guide. Good questions may be added to this page — please don't include personal details.
Did this guide fix your problem?

About the Author
Richard
Tech Writer, IT Professional
Richard is a writer at Geek Rewind who turns complex IT tasks into clear, step-by-step guides. He draws on years of hands-on experience in system administration and enterprise IT operations, focusing on Windows, Linux and WordPress: the problems people actually run into, and the fixes that work. His server and WordPress guides come from systems he runs himself. Richard builds and maintains the platform behind Geek Rewind, from its Ubuntu servers and Nginx configuration to its custom WordPress plugins. Many new tutorials start with readers' questions, and he's always glad to answer them in the comments.
No comments yet — be the first to share your thoughts!