How to Change Your App Recommendation Settings in Windows 11

App recommendation settings in Windows 11 control where your PC lets you get new software. Windows 11 can be set to accept only apps from the Microsoft Store. That keeps unvetted downloads off your computer.
If you want to install desktop programs from anywhere on the internet, you can change this rule in the Settings app at any time. Changing it lets you run downloaded installers freely, but you lose the Microsoft Store check on new apps. The change applies to your PC, takes effect right away, and doesn’t need a restart. You can switch it back whenever you like.
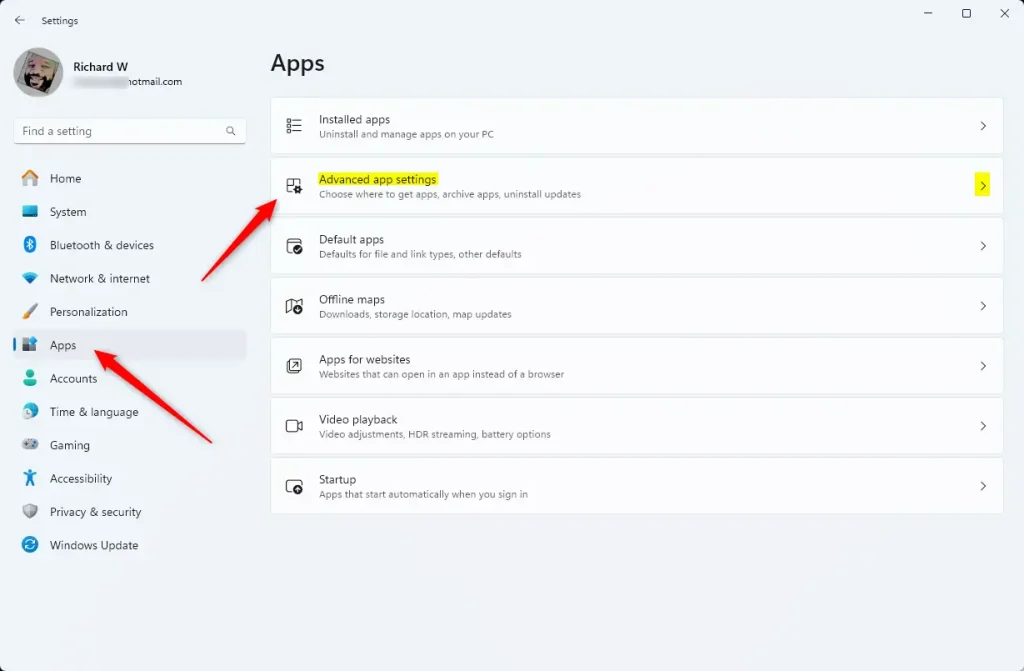
Open Settings , go to Apps, then click Advanced app settings. Look for the Choose where to get apps setting to control whether Windows accepts apps from the Microsoft Store only, anywhere with notifications, or anywhere without restrictions. Your choice takes effect immediately.
Where to Find Your App Settings
The setting lives in the main Settings app , in the Apps section. That area controls how and where programs install on your computer. It is the same on Windows 11 Home and Pro.
Here’s how to get there:
- Open Settings . Click the Start button (the Windows logo on your taskbar ), then click the gear-shaped Settings icon. If it isn’t pinned, press the Win and type Settings. You can also press
Windows key + Ion your keyboard. The Settings window opens with a list of categories on the left. - Go to Apps. On the left side of the Settings window, click Apps. The right pane shows options such as installed apps and default apps.
- Open Advanced app settings. In the Apps section, click Advanced app settings. This is where Windows controls app recommendations and where apps can come from.
What Your App Source Options Mean
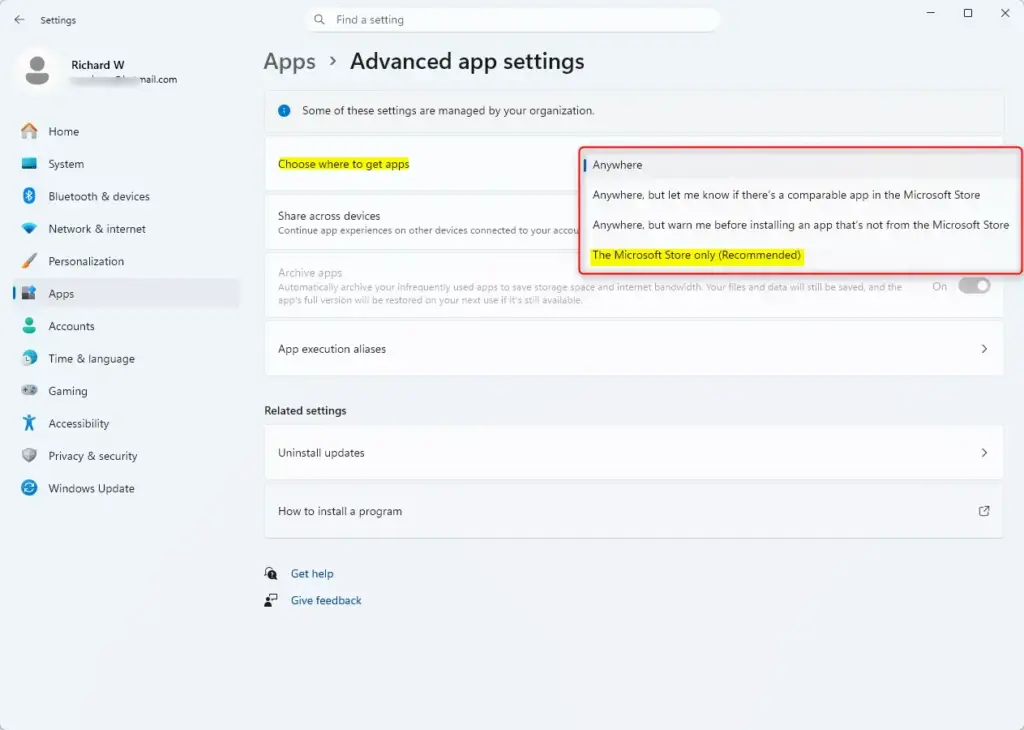
Once you are on the Advanced app settings page, look for the setting that decides where Windows gets apps from and whether it makes recommendations. It is called Choose where to get apps. The exact wording can differ slightly between Windows 11 builds, but the core choices are the same. Here is what each one does.
First, your PC may be running Windows 11 in S mode, which only runs Store apps. Second, your PC may be managed by an employer or school, in which case an administrator controls the option. On a managed PC you will usually see a note that some settings are managed by your organization. Ask your IT team before trying to change it.
Option 1The Microsoft Store Only (Recommended)
The Microsoft Store only option limits your PC to installing programs from the official store. This is the safest choice because Microsoft reviews every app available there. If you try to run a setup file downloaded from a web browser, Windows blocks the installation.
- What Happens: Windows stops you from installing any app that isn't in the Microsoft Store. If you try to install an app from somewhere else, you will probably get a message saying the app isn't from the Store and can't be installed.
- Who it suits: Shared family PCs, a computer used by a child, or any machine where you want a strict barrier against unknown software.
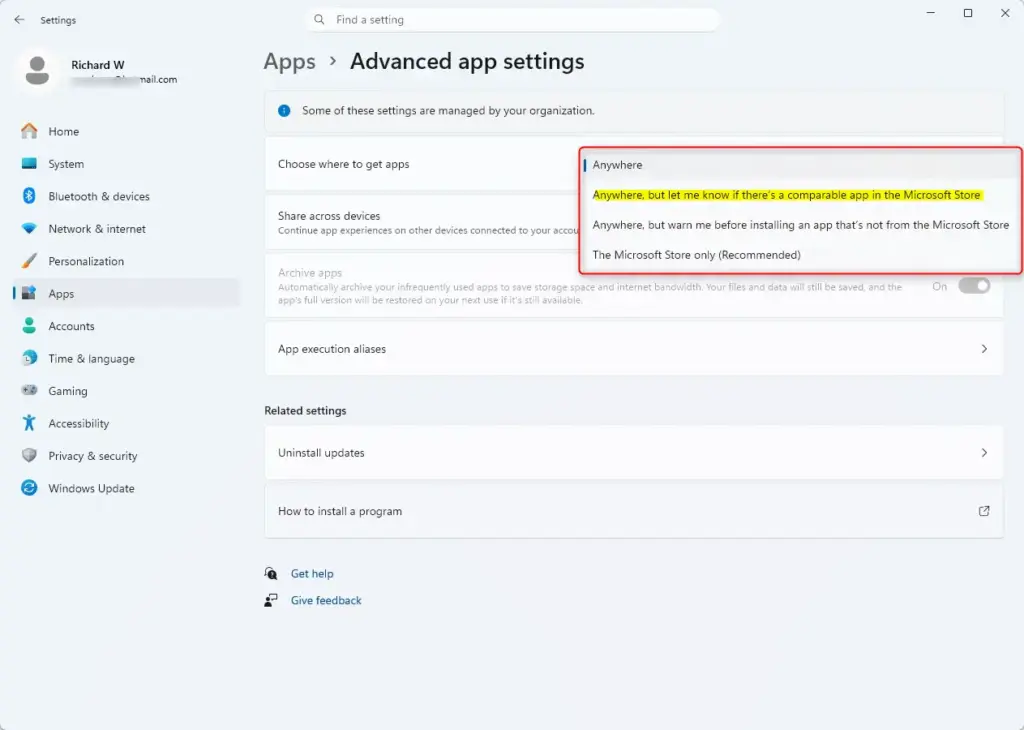
Option 2Anywhere, but let me know if there's a comparable app in the Microsoft Store
This option lets you download software from any website. If a similar app exists in the official store, Windows tells you about it. You keep the freedom to use outside installers, but Windows suggests a verified alternative before you finish setup.
- What Happens: You can install apps from websites or other sources as usual. If Windows sees you installing an app that isn't from the Store and a similar app is available there, it shows a message. That message usually points you to the Store version.
- Who it suits: People who mostly install from the web but are happy to take a Store version when one exists. Store apps update themselves and are easy to remove.
Option 3Anywhere
You can install software from websites, USB drives, or any other source without warnings. Windows will not block your downloads or suggest alternative apps, so you decide what runs on your computer.
- What Happens: You can download and install apps from any source, such as websites, discs, or USB drives. Windows doesn't try to stop you or suggest other apps. You're basically telling Windows, "I know what I'm doing."
- Keep in mind: Only download installers from sources you trust, such as the software maker's own site. Keep your antivirus (Microsoft Defender is built in) turned on.
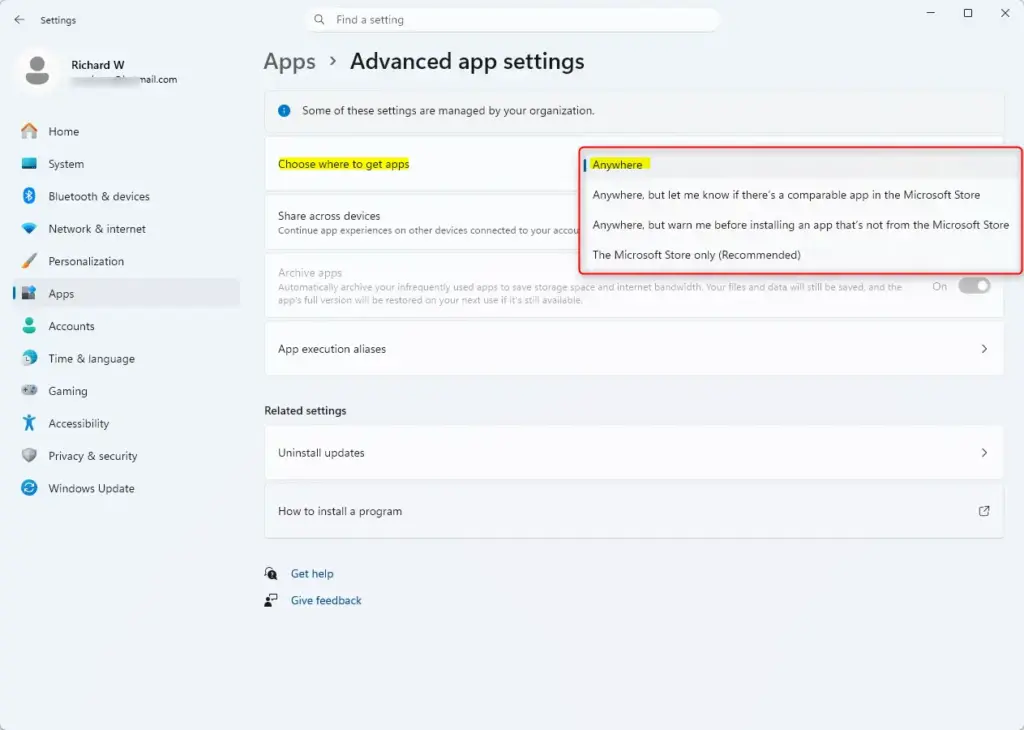
Option 4Anywhere, but warn me before installing an app that's not from the Microsoft Store
This choice lets you install software from any source. Windows shows a warning box before you open a file from outside the official store. It adds a little safety for downloads you don't know well, while still letting you install whatever programs you want.
- What Happens: You can install apps from any source. Instead of only suggesting a Store app, Windows warns you that you are about to install an app that is not from the Microsoft Store. It works like an "Are you sure?" prompt. Whether it also shows a Store alternative depends on your Windows version and what Windows can detect.
- Who it suits: A good middle ground if you install outside apps now and then and want a moment to stop and check before you run one.
How to Make the Change
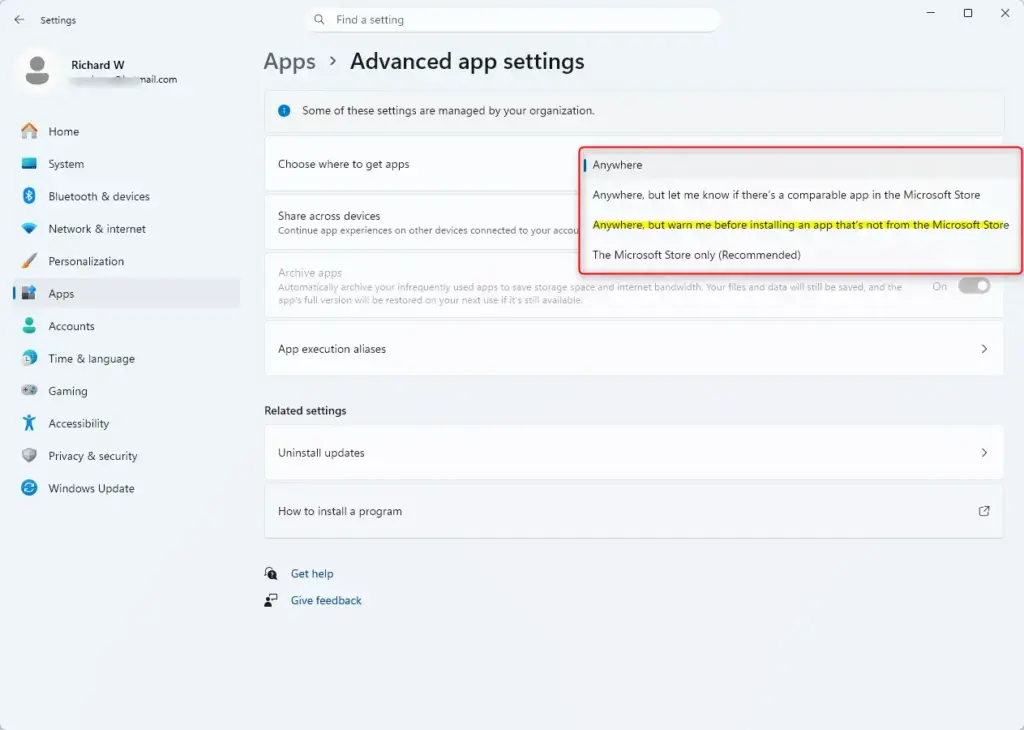
Changing the setting takes a few clicks. Open Settings, select Apps, click Advanced app settings, then pick your option from the menu next to Choose where to get apps.
- Go to the setting. Follow the steps above to get to Settings Apps Advanced app settings You should see the list of advanced options for apps.
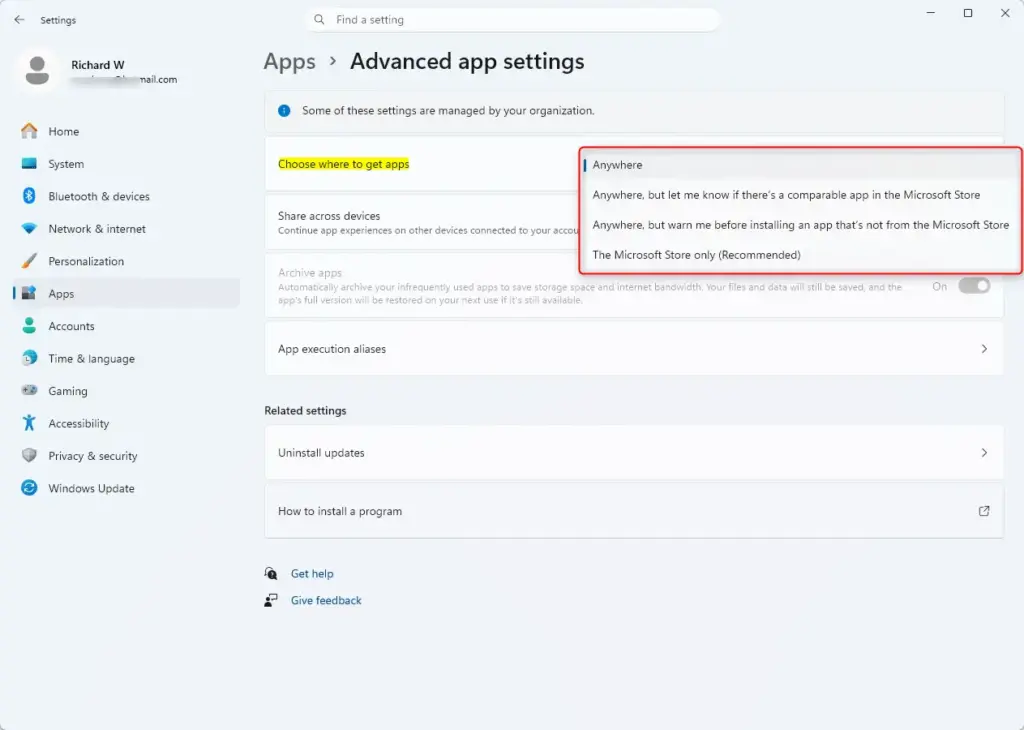
- Find the "Choose where to get apps" option. Look for the setting named Choose where to get apps. It has a dropdown menu on the right. If you don't see it, check the notes above about S mode and managed PCs.
- Select your preferred option. Click the dropdown menu next to this setting. A list opens with the choices described above:
- The Microsoft Store only (Recommended)
- Anywhere, but let me know if there's a comparable app in the Microsoft Store
- Anywhere, but warn me before installing an app that's not from the Microsoft Store
- Anywhere
- Close Settings. That's it. Windows saves the change automatically, so there is no Save button and no restart. You can close the Settings window. To undo the change, come back to this page and pick a different option.
Reference:
https://support.microsoft.com/en-us/windows/apps/change-your-app-recommendation-settings-in-windows
Summary
Windows 11 lets you control where your apps come from. The options range from Microsoft Store only, which is the safest, to installing from any source. Pick the one that fits how you use your PC, and remember you can change it later.
Was this guide helpful?

About the Author
Richard
Tech Writer, IT Professional
Richard is a writer at Geek Rewind who turns complex IT tasks into clear, step-by-step guides. He draws on years of hands-on experience in system administration and enterprise IT operations, focusing on Windows, Linux and WordPress: the problems people actually run into, and the fixes that work. His server and WordPress guides come from systems he runs himself. Richard builds and maintains the platform behind Geek Rewind, from its Ubuntu servers and Nginx configuration to its custom WordPress plugins. Many new tutorials start with readers' questions, and he's always glad to answer them in the comments.
No comments yet — be the first to share your thoughts!