How to Stop Windows 11 from Suggesting Apps in Recommendations and Offers

Start menu ads in Windows 11 build 22621 and newer push apps and promotional offers into the Start menu. They show up as games, trial services and “tips” you never asked for.
You can turn most of them off in the Settings app. You don’t need extra software, and none of the changes need a restart. This guide covers the Start menu , notifications, the lock screen, File Explorer , search and widgets.
Open Settings Personalization Start and turn off Show recommendations for tips, shortcut reminders, new apps, and more. This hides unwanted app suggestions and promotional offers from your Start menu , keeping your screen clean without needing any special software or advanced technical skills to help you.
Understanding 🪟 Windows 11 Recommendations
The Recommended section sits at the bottom of the Start menu . It lists recently opened files, recently added apps and, by default, suggested apps from the Microsoft Store. Microsoft turns these on out of the box, and they apply to both Home and Pro.
Each suggestion comes from a separate setting. You can’t switch off one master toggle, so you work through a handful of switches in different parts of Settings. Every change is reversible: go back to the same place and turn the setting on again.
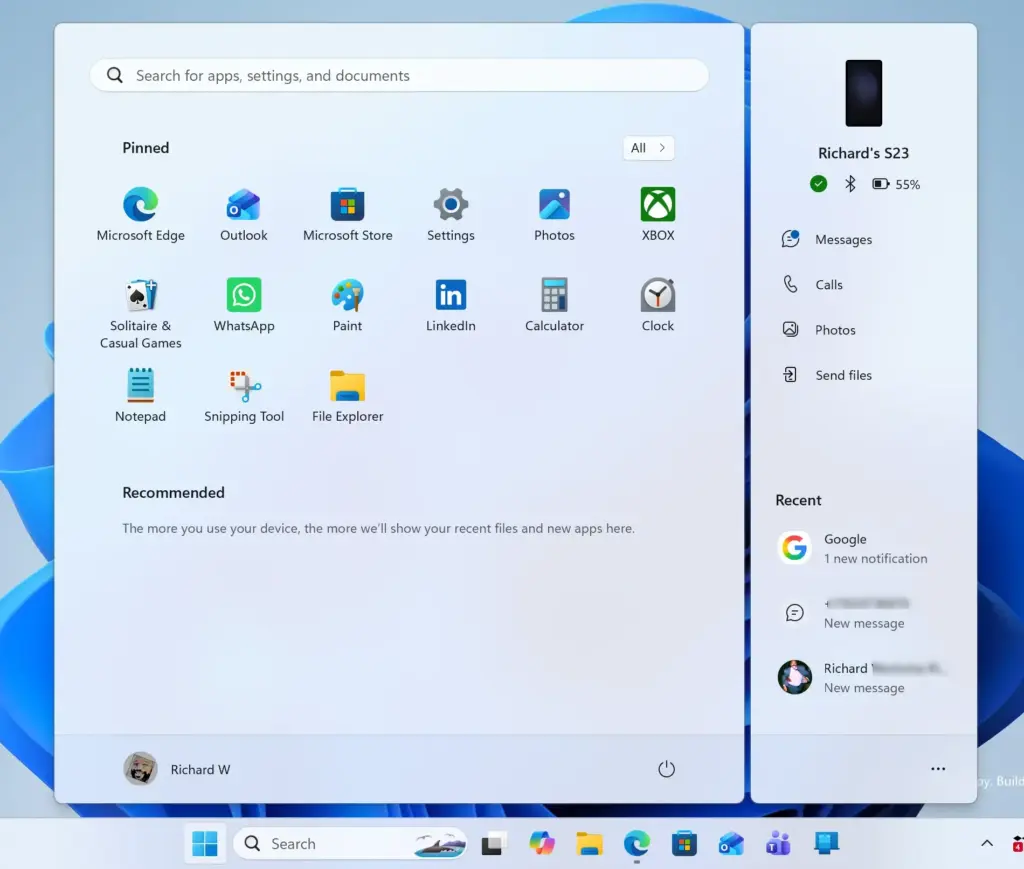
The Recommended section takes up a lot of room, and it often shows programs you will never use. A cleaner Start menu takes about five minutes. Everything below uses built-in Windows 11 settings, so you don’t need advanced skills.
The labels below match recent Windows 11 builds. Microsoft rewords some options between feature updates, so yours may read slightly differently. Look for the closest match.
How to Hide Recent Files and New Apps in the Start Menu
Start with the Start menu itself. These switches control what appears in the Recommended section, including new apps, promotional tips and recent files.
- Click the Start button and select Settings (the gear icon). You can also press Windows key + I.
- Click Personalization in the left menu.
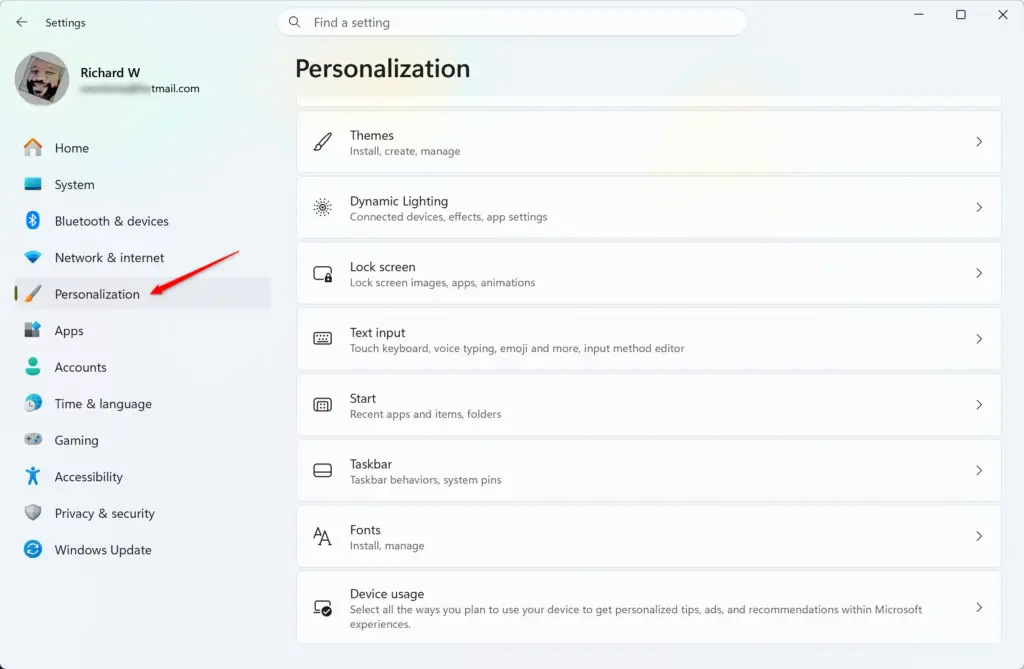
Settings › Personalization - Click Start in the right-hand list. You should see a list of switches for the Start menu.
- Turn off the switch next to Show recently added apps.
- Turn off the switch next to Show recommendations for tips, shortcut reminders, new apps, and more. On some builds this reads "tips, app promotions and more".
- Turn off the switch next to Show recently opened items in Start, Jump Lists, and File Explorer. On newer builds this reads "Show recommended files in Start, recent files in File Explorer, and jump lists".
Open the Start menu again. It now shows far fewer items. The Recommended section stays on screen, because Windows 11 doesn't let you remove it from the Settings app. It stays mostly empty instead of filling with software suggestions.
If a switch is greyed out, the device is probably managed by an organization. Work and school PCs often have these options locked by policy.
Controlling App Recommendations Through System Settings
Windows also pushes app suggestions through notifications and "finish setting up your device" prompts. You turn these off in the notification settings.
- Click the Start button and open Settings.
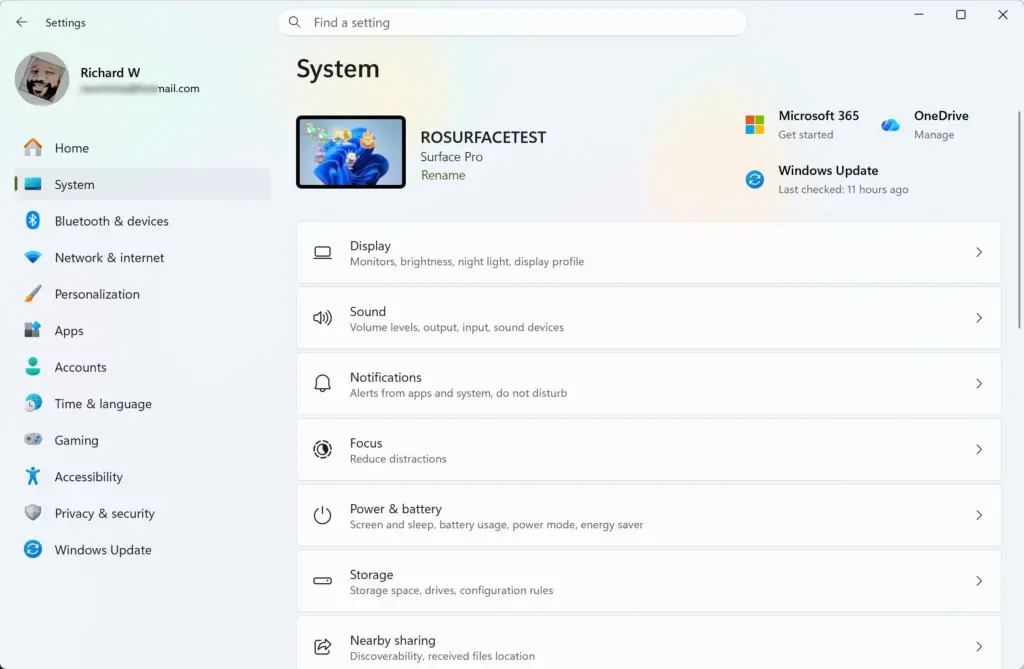
- Click System in the left menu.
- Click Notifications.
- Scroll to the bottom of the page and click Additional settings to expand it. Several checkboxes appear.
- Uncheck Suggest ways to get the most out of Windows and finish setting up this device.
- Uncheck Get tips and suggestions when using Windows.
Windows no longer pops up sudden offers and reminders to try new apps or cloud services. Some builds also list a "Show the Windows welcome experience" checkbox in the same place. It controls the "here's what's new" screen after updates, so you can uncheck it too if you want.
Stopping Promotional Content on the Lock Screen and Desktop
The lock screen is another place where promotions appear. The Windows spotlight option rotates photos and often adds tips, fun facts and links to apps or services. Switching to a plain picture or slideshow removes them.
- Open Settings from your Start menu.

Settings - Click Personalization.
- Click Lock screen.
- Click the drop-down menu next to Personalize your lock screen and change it from Windows spotlight to Picture or Slideshow. The page updates with picture options.
- Uncheck the box that says Get fun facts, tips, tricks, and more on your lock screen. If you don't see it, make sure you've already switched away from Windows spotlight.
The lock screen now shows only your own images. Spotlight cycles through background images that often come with app promotions or clickable links, and those are gone from your sign-in screen. To go back, choose Windows spotlight from the same drop-down.
Stopping Suggestions in File Explorer
File Explorer keeps its own list of recent files and frequent folders, and on some accounts it also shows online content. You change this in Folder Options. Clearing these settings keeps your file history private and removes online recommendations.
- Open File Explorer from your taskbar.
- Click the three dots icon (See more) at the top of the window and select Options. The Folder Options window opens.
- Click the General tab.
- Look for the Privacy section near the bottom.
- Uncheck the box next to Show recently used files.
- Uncheck the box next to Show frequently used folders.
- If you see a box for Show files from Office.com, uncheck it too. It only appears on some builds and account types.
- Click Apply, then click OK.
To wipe the history that's already stored, click the Clear button in the same Privacy section before you close the window. Turning the boxes off only stops new items from being added.
Unique Expert Tips: Cleaning Up Taskbar Search and Widgets
The taskbar has two more sources of unwanted content: search highlights and the Widgets board. Search highlights add trending topics and promoted items to the search box. Widgets adds a news and weather feed. You turn both off in Settings.
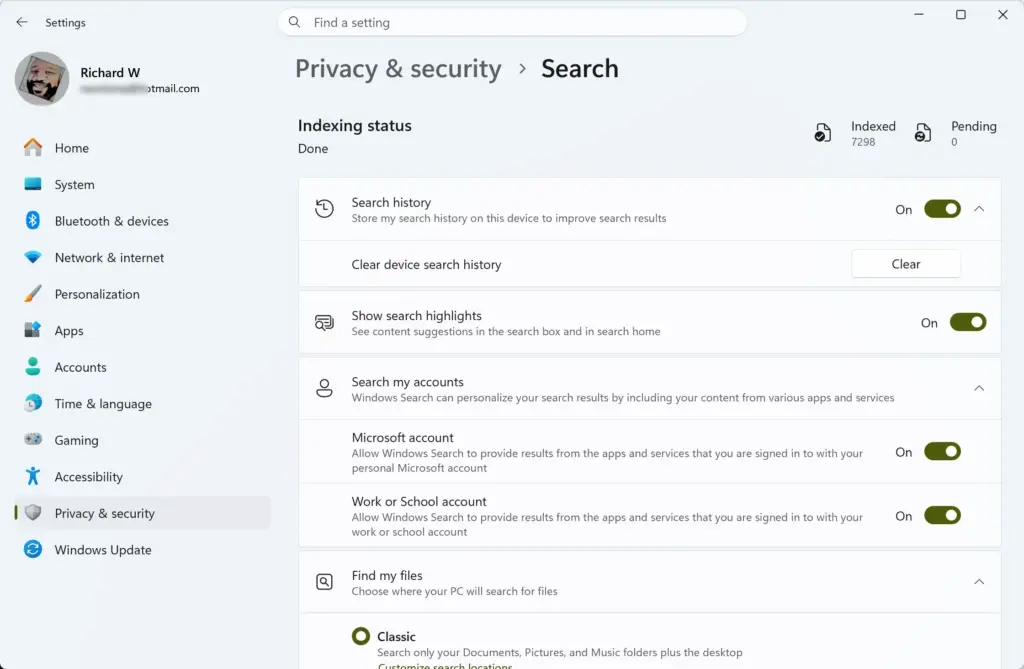
To clear out unwanted search highlights:
- Open Settings and click Privacy & security.
- Click Search permissions.
- Scroll down to the More settings section and turn off the switch for Show search highlights.
To control the Widgets board:
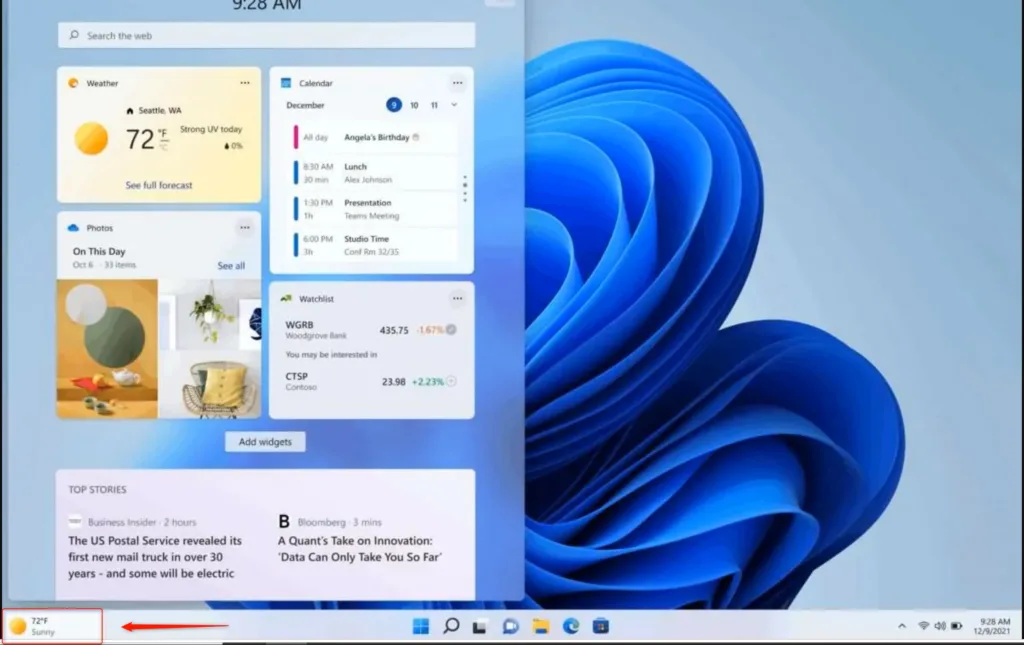
- Open Settings and click Personalization.
- Click Taskbar.
- Find the Widgets item and turn its switch to Off. The widgets icon disappears from the taskbar.
These steps remove the floating weather icon and the news feed, which often point you to sponsored web apps or Microsoft Store games. If you ever want them back, turn the same switches on again.
Summary
You have now turned off app suggestions in the Start menu, notifications, the lock screen, File Explorer, search and the taskbar. If new suggestions appear after a big Windows update, recheck the Start and Notifications pages first, because feature updates sometimes add new options or reset old ones.
Did this guide fix your problem?

About the Author
Richard
Tech Writer, IT Professional
Richard is a writer at Geek Rewind who turns complex IT tasks into clear, step-by-step guides. He draws on years of hands-on experience in system administration and enterprise IT operations, focusing on Windows, Linux and WordPress: the problems people actually run into, and the fixes that work. His server and WordPress guides come from systems he runs himself. Richard builds and maintains the platform behind Geek Rewind, from its Ubuntu servers and Nginx configuration to its custom WordPress plugins. Many new tutorials start with readers' questions, and he's always glad to answer them in the comments.
No comments yet — be the first to share your thoughts!