Share Files Across Devices with Nearby Sharing in Windows 11

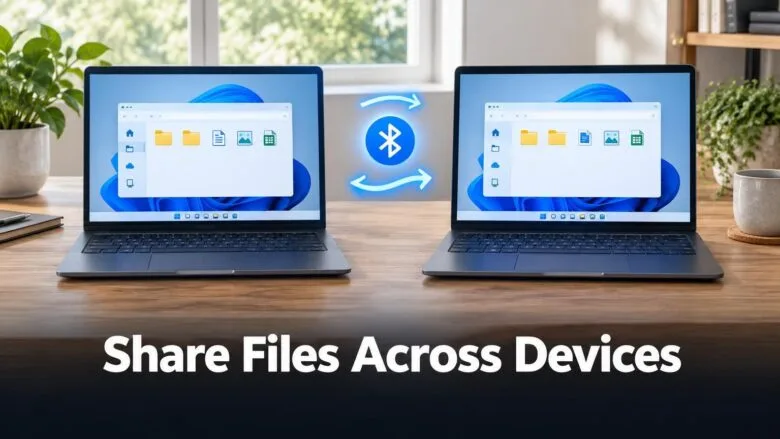
Nearby sharing in Windows 11 lets you share across devices by sending files, photos and web links from one PC to another. It works over Bluetooth or Wi-Fi , with no cable, USB drive or email attachment. Open Settings, select System, then select Nearby sharing to turn it on. Then use the Share button in File Explorer to pick the other PC.
Nearby sharing (Microsoft’s built-in wireless transfer feature) works between Windows PCs only. Both PCs need Bluetooth 4.0 or later, and both must be running Windows 11 or Windows 10 version 1803 or later. The checks later in this article explain how to confirm your Bluetooth version. It works on Home and Pro editions alike.
This tutorial covers the full process on both PCs, how to choose who can send you files and how to change where received files go. It also shows how to fix the common reasons the feature fails to appear or find a device.
Nearby sharing in Windows 11 lets you share files across devices between two Windows PCs over Bluetooth or Wi-Fi , with no cable or USB drive. Turn it on under Settings System Nearby sharing on both PCs. Then select the file in File Explorer , select the Share button, and pick the receiving PC by name. Both PCs need Bluetooth 4.0 or later.
What You Need Before You Start
Nearby sharing uses the Bluetooth hardware in each PC, the wireless part that talks to other devices, to find them. It then moves the data over Bluetooth or Wi-Fi , depending on what is available. Check these points first to save time later.
- Two PCs running Windows 11 (or Windows 10 version 1803 or later).
- Bluetooth 4.0 or later with Low Energy support. Low Energy (LE) is the low-power Bluetooth mode that PCs use to find each other. Most laptops from the last several years have it. Many older desktops and budget USB adapters do not.
- Turn on Wi-Fi on both PCs. Connecting both to the same network gives the fastest transfers.
- Airplane mode off on both PCs, because it switches off Bluetooth and Wi-Fi .
- The PCs close together, within a few metres, with the receiving PC awake and unlocked.
If the Nearby sharing page is missing on your PC, skip ahead to the troubleshooting section. It explains how to check whether your Bluetooth adapter supports LE.
How to Share Across Devices with Nearby Sharing
These steps turn on Nearby sharing on both PCs and send a file from one to the other, so you can share accross devices without any extra software. Follow the numbered steps below on both PCs. Steps 1 to 6 set up each PC once. Steps 7 to 14 cover each file you send.
- Open Settings on the sending PC. Press the Windows key + I.
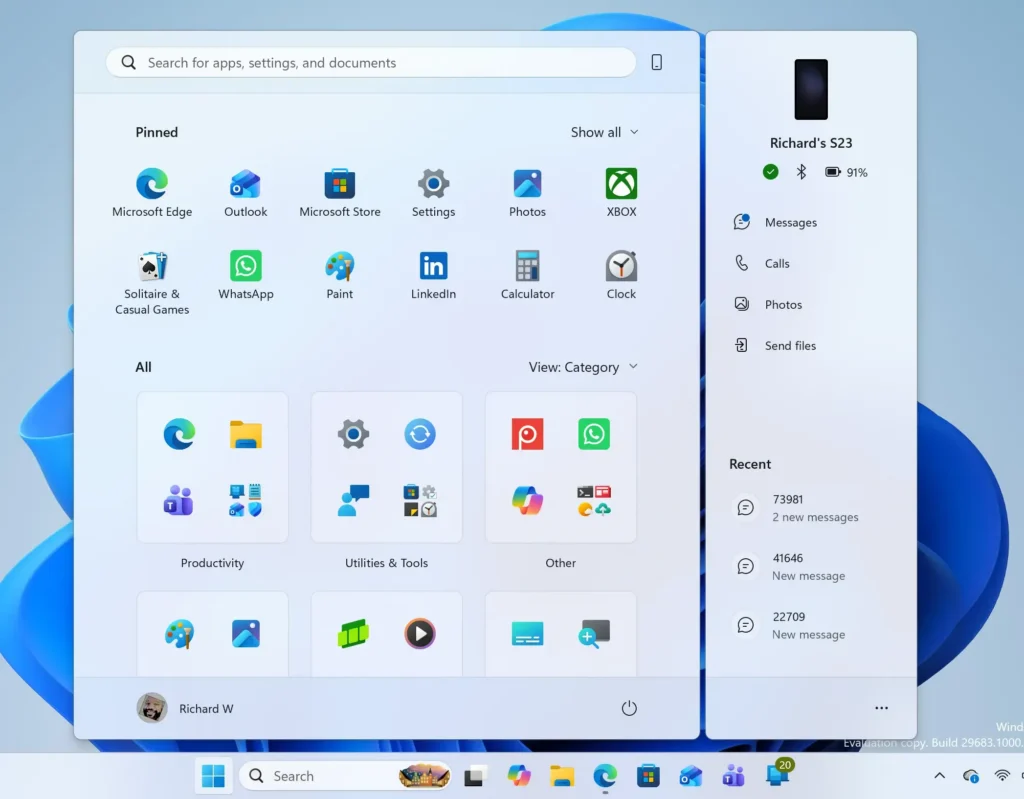
- Go to Settings System Nearby sharing The Nearby sharing page opens and shows a list of options for who can share with this PC.
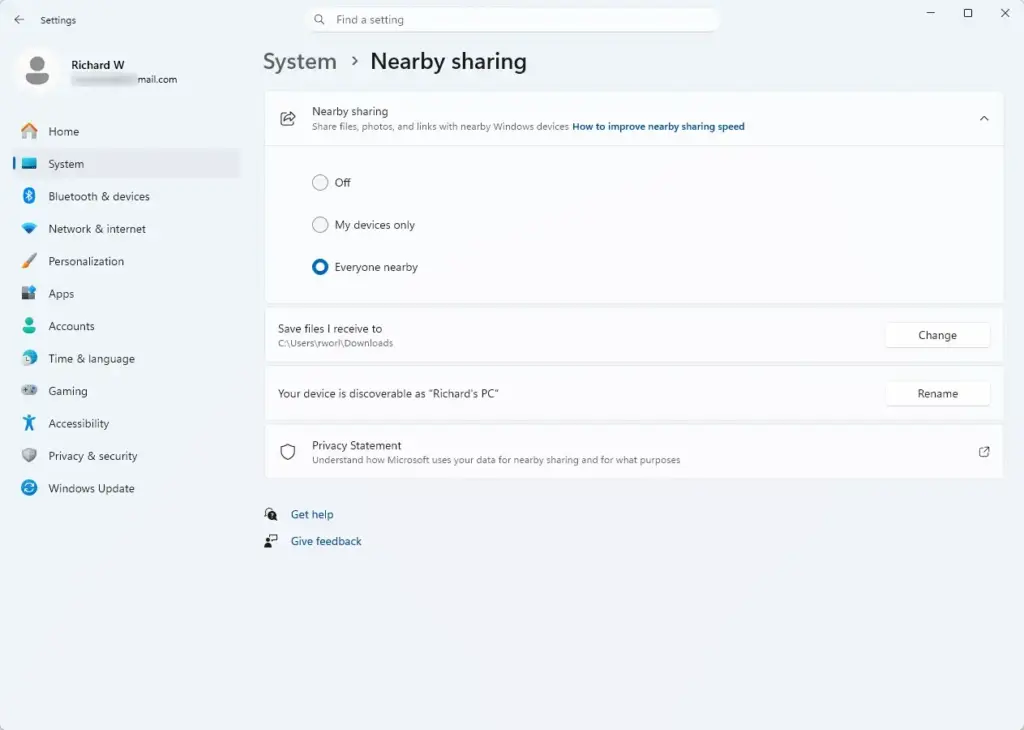
Settings › System › Nearby sharing - Select My devices only or Everyone nearby. Use My devices only if both PCs sign in with the same Microsoft account. Use Everyone nearby if they do not. The next section explains the difference.
- Repeat steps 1 to 3 on the receiving PC. Both PCs must have Nearby sharing set to something other than Off, or the sender will not see the receiver.
- Go to Settings Bluetooth & devices on each PC. Set the Bluetooth toggle to On. If the Bluetooth toggle is missing, the PC has no working Bluetooth adapter and Nearby sharing cannot run on it.
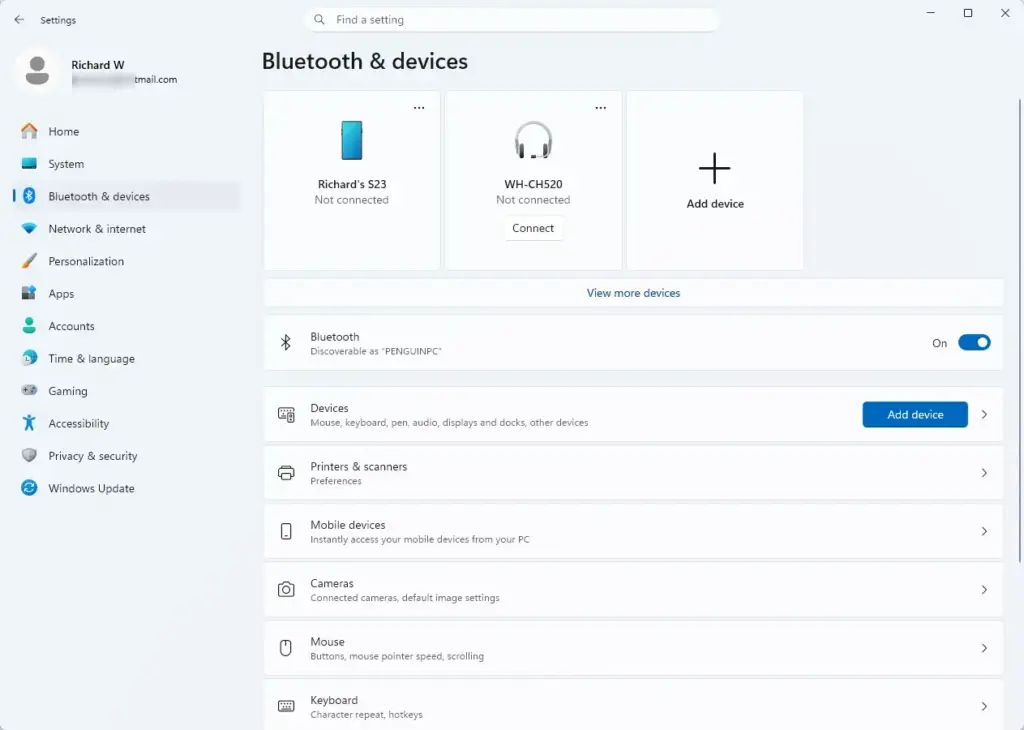
Windows Settings menu highlighting the Bluetooth and devices option for printers - Connect both PCs to Wi-Fi. Select the network icon on the taskbar, choose a network, and select Connect. Both PCs on one network is best, but Bluetooth can carry the transfer if they are not.
- Open File Explorer on the sending PC. Press the Windows key + E, then browse to the file you want to send.
- Select the file, then select the Share button. In Windows 11 it appears as an icon in the row along the top of the right-click menu, and also on the File Explorer command bar. A Share window opens.
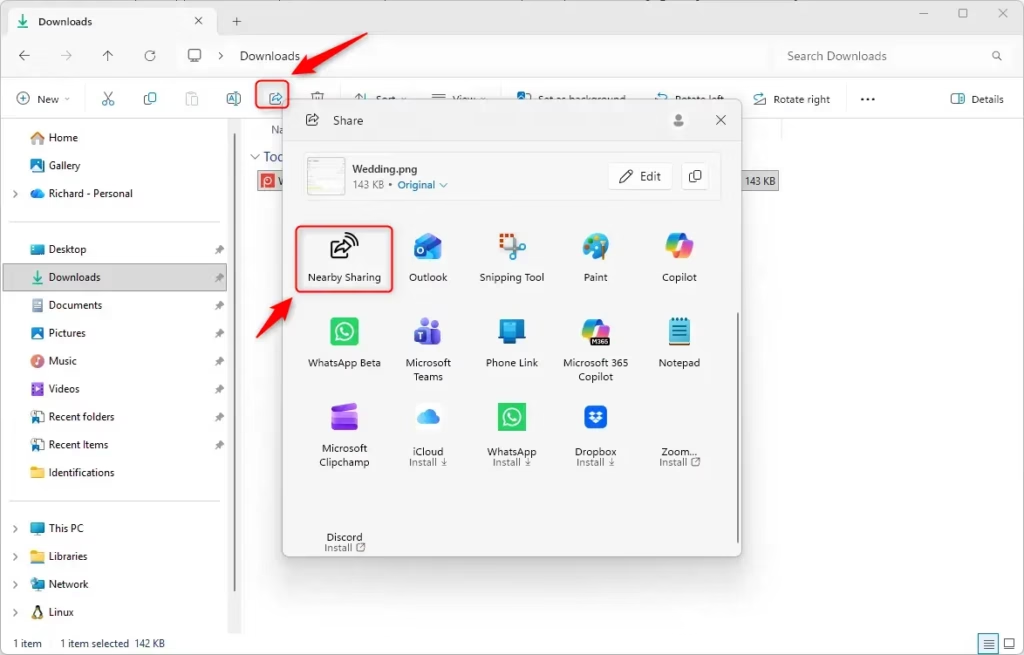
- Wait for devices to appear in the Nearby Sharing section. The Share window scans for a few seconds. If a Turn on nearby sharing prompt appears instead, select it and wait for the scan to start.
- Select the receiving PC by name. The Share window shows a progress message such as waiting for the other PC to accept. If the receiving PC is not listed, go to the troubleshooting section below.
- Look at the receiving PC for a notification. It appears at the bottom right of the screen and names the sender and the file.
- Select Save or Save & open in the notification. Choose Decline to reject the file. If you miss the notification, open the notification area from the right end of the taskbar and look for it there.
- Wait for the transfer to finish. Large files take longer, and speed depends on whether the PCs are using Bluetooth or Wi-Fi. Both PCs show a confirmation message when it completes.
- Open the Downloads folder on the receiving PC to find the file. This is the default save location. The next section shows how to change it.
Choose Who Can Send You Files
The Nearby sharing page has three settings. The one you pick controls who can see your PC in their Share window and send you things.
Off
Your PC cannot receive files through Nearby sharing. Other PCs do not see it in their Share window. Pick this when you are not using the feature, for example on a shared or public PC.
My devices only
Your PC accepts files only from your own devices, meaning PCs signed in with the same Microsoft account. This is the safest setting for everyday use. It also removes the need to accept each file, because Windows knows the sender is you. If your PCs use local accounts (sign-ins not tied to a Microsoft account), they will not match, so choose Everyone nearby instead.
Everyone nearby
Any Windows PC close to yours with Nearby sharing turned on can see your PC and send you a file. You still decide whether to save each file, because a notification asks you first. Use this setting to share with a colleague or friend, or between PCs with different accounts. Switch back to My devices only when you finish, so strangers in a café or office cannot send you unwanted files.
Share Links and Photos, Not Only Files
Nearby sharing shows up in the Share window of most apps. The steps are the same as for files from step 8 onward: open the Share window, then select the receiving PC.
Share a Web Page from Microsoft Edge
Open the page in Edge, select the Settings and more button (the three dots at the top right), and look for Share. Edge offers Windows sharing options, and the receiving PC appears under Nearby Sharing. The exact menu layout changes between Edge versions, so if you do not see Share there, look for a Share icon next to the address bar.
Share a Photo from the Photos App
Open the picture in Photos and select the Share button in the toolbar. The Share window opens with the same list of nearby PCs. Select the receiving PC and accept the photo on the other end.
Change Where Received Files Are Saved
Windows saves received files to the Downloads folder by default. Change this if you want incoming files to land on another drive or in a project folder.
- Go to Settings System Nearby sharing on the receiving PC.
- Find Save files I receive to and select Change. A folder picker opens.
- Browse to the folder you want, then select Select Folder. The new path appears on the Nearby sharing page.
To go back, change the location again and select the Downloads folder in your user profile.
Rename Your PC So It Is Easy to Pick
The Share window lists other PCs by their device name. Names such as DESKTOP-4K2L9QX are hard to tell apart in an office. A clear name like COMPUTER-NAME or LAPTOP-LIVINGROOM removes the guesswork.
Save your work first, then follow the steps below.
- Go to Settings System About
- Select Rename this PC. A dialog opens. Approve the User Account Control prompt if one appears.
- Type the new name and select Next.
- Select Restart now. After the restart, the new name appears in other PCs' Share windows.
When Nearby Sharing Is Missing, Greyed Out or Finds Nothing
Most failures come from Bluetooth, from mismatched settings on the two PCs, or from a PC that is managed by an organisation. Work through the cases below in order.
The Nearby Sharing Page Is Missing
If Settings System has no Nearby sharing entry, the PC may be missing a compatible Bluetooth adapter. Check the adapter this way:
- Right-click the Start button and select Device Manager.
- Expand Bluetooth. If this category is missing, the PC has no Bluetooth adapter, or its driver is not installed.
- Right-click your Bluetooth adapter and select Properties, then open the Details tab.
- Open the Property drop-down and look for an entry that mentions Low Energy Central Role. Windows labels for this entry vary by driver, so treat the exact wording as approximate. If it shows a value of True, the adapter supports LE.
If the adapter does not support LE, Nearby sharing will not work. A USB Bluetooth adapter that supports Bluetooth 4.0 or later with LE is the usual fix for a desktop PC. Updating the Bluetooth driver through Windows Update or the PC maker's website can also help.
The Options Are Greyed Out
Contact your IT team if the options are locked and you cannot change them. Your IT team can tell you which Nearby sharing settings are restricted and why.
The Other PC Does Not Appear in the Share Window
Work through these five checks in order, starting with the Nearby sharing setting on both PCs.
- Confirm Nearby sharing is set to My devices only or Everyone nearby on both PCs. Off on either one hides it.
- If you chose My devices only, confirm both PCs sign in with the same Microsoft account. If they do not, switch the receiving PC to Everyone nearby.
- Confirm Bluetooth is On and Airplane mode is off on both PCs.
- Move the PCs closer together and wake the receiving PC. A locked or sleeping PC may not show a notification.
- Restart Bluetooth by turning the toggle off, waiting a few seconds, and turning it on again. Restart both PCs if that does not help.
The Transfer Starts but Stalls
Large files can stall when the PCs fall back to Bluetooth, which is much slower than Wi-Fi. Connect both PCs to the same Wi-Fi network and try again. Keep both PCs awake for the whole transfer, since sleep can interrupt it. For very large files, a USB drive or a cloud service such as OneDrive is more reliable.
What Nearby Sharing Cannot Do
Nearby sharing connects Windows PCs that are physically close to each other. It does not send files to phones or tablets, and it does not work across the internet to a PC in another building. For a phone, use the Phone Link app instead. For a distant PC, use cloud storage or email.
Turn Nearby Sharing Off
Turn the feature off when you no longer need it, or when you want to stop other PCs from seeing yours. This does not delete anything you already received.
- Go to Settings System Nearby sharing
- Select Off. Your PC disappears from other PCs' Share windows.
To bring it back, return to the same page and choose My devices only or Everyone nearby.
What to Do Next
If your Bluetooth adapter does not support Low Energy, fit a compatible USB Bluetooth adapter, or move files with OneDrive or a USB drive until you do. Set Nearby sharing back to My devices only after each time you use Everyone nearby, so the setting does not stay open. To move photos or files between a PC and a phone, set up Phone Link next.
Have a question about this guide?
Answered by AI from this guide. Good questions may be added to this page — please don't include personal details.
Did this guide fix your problem?

About the Author
Richard
Tech Writer, IT Professional
Richard is a writer at Geek Rewind who turns complex IT tasks into clear, step-by-step guides. He draws on years of hands-on experience in system administration and enterprise IT operations, focusing on Windows, Linux and WordPress: the problems people actually run into, and the fixes that work. His server and WordPress guides come from systems he runs himself. Richard builds and maintains the platform behind Geek Rewind, from its Ubuntu servers and Nginx configuration to its custom WordPress plugins. Many new tutorials start with readers' questions, and he's always glad to answer them in the comments.
No comments yet — be the first to share your thoughts!