How to Upgrade from Windows 10 to Windows 11
You can upgrade your PC from Windows 10 to Windows 11 for free, using either Windows Update or the Windows 11 Installation Assistant.
This upgrade replaces your current Windows 10 operating system with the newer Windows 11, unlocking fresh features like Snap Layouts and enhanced security protocols.
To successfully upgrade, your computer must meet Microsoft’s specific hardware requirements, including having a TPM 2.0 module and Secure Boot enabled; most PCs manufactured after 2017 include these essentials.
The process ensures your files remain intact while giving you a modernized interface and improved PC performance.
Upgrade to Windows 11 via Settings > Update & Security > Windows Update and click “Check for updates.” If available, select “Feature update to Windows 11” and click “Download and install.” Your PC must meet minimum hardware requirements.
Check if your PC is ready
Before starting the free Windows 10 to 11 upgrade, check if your PC is ready for Windows 11 using Microsoft’s PC Health Check app. This tool will tell you if your computer meets the requirements for the new operating system. If it’s ready, you can proceed with the upgrade.
- Click the Search box on your taskbar.
- Type
healthinto the box. - Select PC Health Check App from the results.
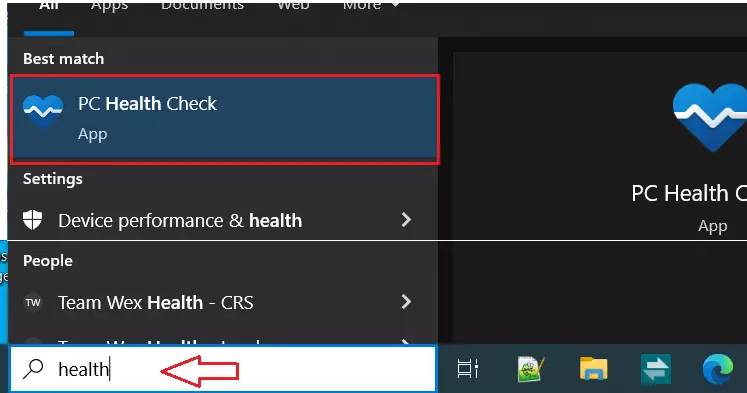
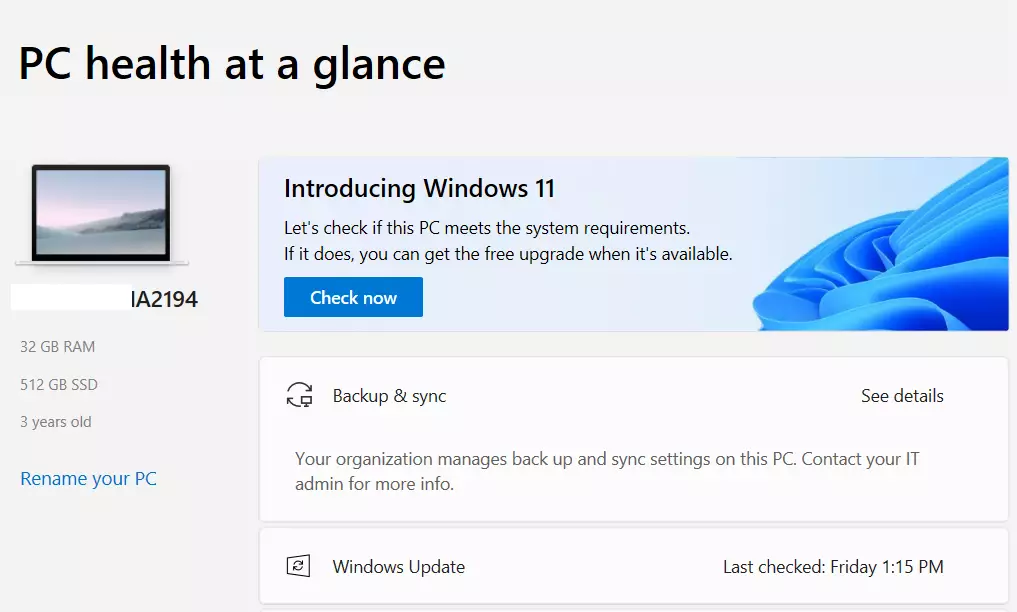
Once the app opens, click the Check now button under the “Introducing Windows 11” section.
Installation Methods Comparison
| Method | Best For | Difficulty |
|---|---|---|
| Windows Update | Standard users | Easy |
| Installation Assistant | Forcing an update | Medium |
| Media Creation Tool | Clean install | Advanced |
How to upgrade to 🪟 Windows 11
Upgrading from Windows 10 to Windows 11 is simple once you know your PC is ready, and you can do it directly from your Windows 10 settings. Just go to Windows Update to start the download and installation for the free Windows 10 to 11 upgrade. It’s a quick process that gets you the latest features.
- Click the Start button and select Settings (the gear icon).
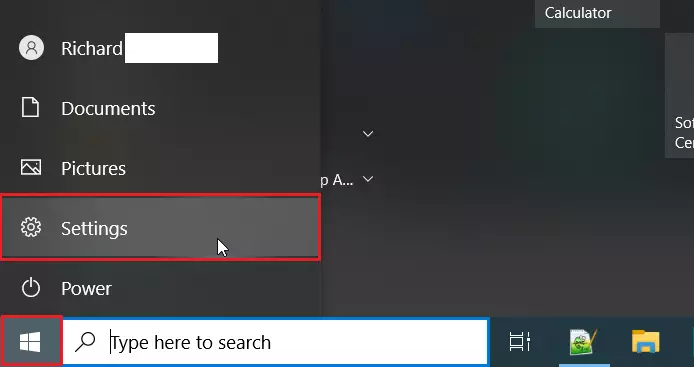
- Click on Update & Security.

- Select Windows Updates and click Check for updates.
- If you see “Feature update to Windows 11,” click Download and install.

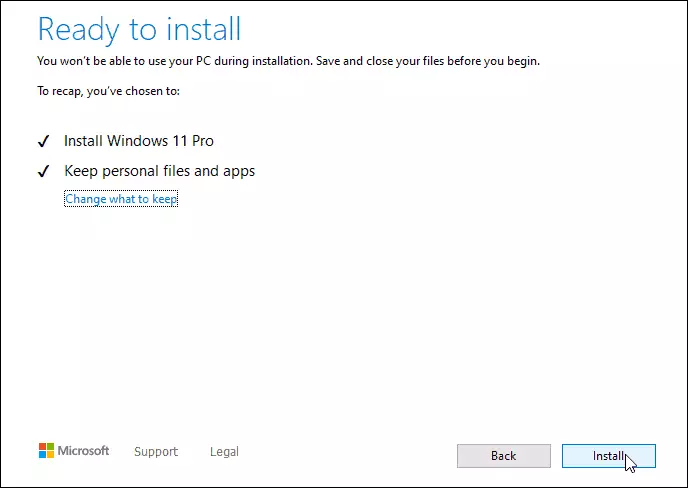
After the files download, restart your computer when prompted. The installer will open to guide you through the final setup.
- Click Next to continue the setup process.

- Choose which files and apps you want to keep, then click Next.
- Click Install to begin. This may take some time depending on your internet speed.
Troubleshooting and Errors
If you run into problems during the free Windows 10 to 11 upgrade, like a ‘What needs your attention’ message, it often means a setting like Secure Boot or TPM 2.0 is off.


No comments yet — be the first to share your thoughts!