How to Split Screen Using Windows 11 Snap Layouts

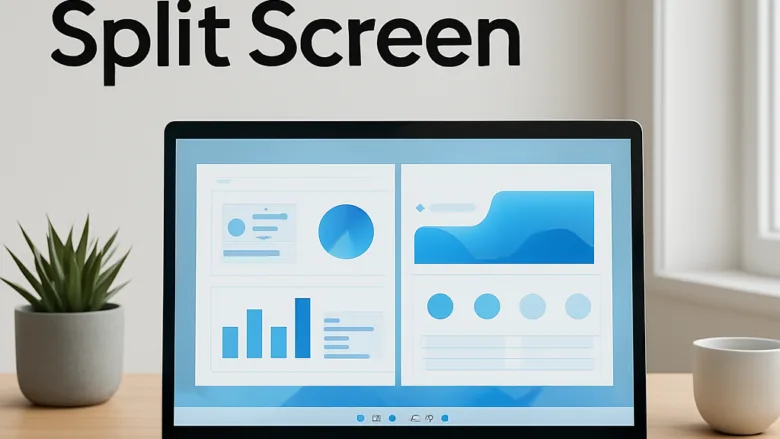
Snap layouts in Windows 11 arrange several open app windows into a tidy grid, so you stop resizing and dragging windows by hand. A layout splits the display into two, three or four sections with a few clicks or key presses. The feature is built in and works the same on Home and Pro.
This tutorial covers three ways to use it: the mouse, the keyboard, and the Settings page that controls it. It also shows how to undo a snap if you change your mind.
Hover your mouse over the maximize button in the top-right corner of an open app window, without clicking, and pick a grid zone from the pop-up that appears. The window snaps into that section, and Snap Assist shows your other open apps as thumbnails so you can fill the remaining zones.
Using Snap Layouts to Organize Windows
Snap Layouts lets you hover over the maximize button of any open window and pick a grid position from a small menu. The arrangement stays in place until you close or move the windows.
Before you start, check the requirements. Snap Layouts need a Windows 11 PC with a display large enough to hold a grid. Windows 11 version 22H2 or later adds the newer suggestions that appear when you drag a window to the top of the screen.
Which layouts you see depends on your screen. Small or low-resolution displays show only a few options, and the three-column layouts usually appear only on wider screens. With more than one monitor, each monitor shows layouts that fit its own size.
Hover Over the Maximize Button
The layout menu is hidden until you ask for it. The most common way is to hold your mouse pointer over the maximize button in the top-right corner of a window, without clicking. A small pop-up then appears with the grid templates.
- Open the app window you want to place on your screen.
- Move your mouse pointer over the square maximize icon in the upper-right corner of the window frame. Do not click it, because a click maximizes the window instead.
- Wait a moment. A small pop-up appears showing several grid layouts, with one zone highlighted in each.
If nothing appears, the option may be switched off. See the settings section further down.
There are two other ways to open the layouts. For a keyboard-only method, make the window active and press the Win+Z. The layout menu opens, and each zone carries a number. Press the number of the zone you want, and the window snaps there.
For a mouse method that skips the maximize button, drag a window by its title bar to the top edge of the screen. On Windows 11 version 22H2 or later, the snap layouts appear at the top of the screen. Drop the window onto the zone you want.
Select Your Desired Screen Position
Click the zone in the pop-up that matches where you want the window. The active app snaps into exactly that section of the display, so you never have to drag borders to size it.
- In the layout menu, click the region where you want the app, such as the left half or the top-right quadrant.
- Watch the window snap into that area and resize to fit it.
- Look at the rest of the screen. The other open apps appear as thumbnails in Snap Assist, which shows your other open windows so you can fill the empty space.
If you do not want to fill the other zones right now, press Esc or click an empty spot to dismiss Snap Assist. The first window stays snapped.
Fill the Remaining Screen Sections
Snap Assist shows thumbnails of your other open apps in the empty space. Click one to fill that section and finish the layout.
- Click one of the thumbnails shown in the empty part of the display. That app snaps into the zone.
- If your layout has more than two zones, repeat the click for each remaining zone.
- Check that your apps sit side by side, or in your chosen grid, without overlapping.
- Drag the dividing border between two snapped windows if you want to change their relative sizes. Windows resizes the neighboring snapped window along with it, if that option is turned on in Settings.
To undo a snap, drag the window away from its position by the title bar. It returns to its previous size. Pressing the Win+↓ Arrow also restores a snapped window. If it is already restored, the same keys minimize it.
Windows remembers a finished layout as a snap group. Hover over one of the grouped apps on the taskbar and you can bring the whole group back at once. Pressing Alt+Tab also lists the group, so you can return to the full arrangement quickly.
Keyboard Shortcuts for Quick Window Snapping
If you prefer the keyboard, a few key combinations move and snap the active window without the mouse. The Win+Z shortcut from earlier also belongs here, since it opens the layout menu without touching the mouse.
Snap Windows Using the Windows Logo Key
Use the Win with the arrow keys to snap the active app to an edge or corner of the monitor. This is the fastest way to build a split screen layout once you know the combinations.
- Click the title bar of the window you want to move, so it is the active window.
- Press the Win+← Arrow or the Win+→ Arrow to snap the window to the left or right half of the screen.
- With the window on a half, press the Win+↑ Arrow or the Win+↓ Arrow to move it into the top or bottom corner of that half. This is called a quarter snap.
On a window that is not snapped yet, the Up Arrow maximizes it and the Down Arrow restores or minimizes it. To move a snapped window to the other half, press the opposite Left or Right Arrow.
Customizing Snap Behavior in Settings
You can change how Snap Layouts behave when you drag windows or resize them, including across multiple monitors. All the options live in Settings.
Open Multitasking Settings
Open Settings , the central configuration app for Windows 11, to reach the window management controls.
- Press the Win+I on your keyboard to open Settings.
- Click System in the left sidebar.
- Scroll down the main panel and click Multitasking. The snap controls appear on this page.
Adjust Snap Options
The Multitasking page controls how snapping works on your computer. The main Snap windows switch turns snapping on or off as a whole. Below it are separate options for layout suggestions and for how windows resize when snapped.
- Click the dropdown arrow next to Snap windows to expand the sub-options. If the switch is off, turn it on first, or the sub-options stay unavailable.
- Check or uncheck the options you want. Two examples are Show snap layouts when I hover over a window's maximize button and When I snap a window, automatically size it to fill available space. The exact wording and the list of options vary a little between Windows 11 versions, so you may see slightly different labels.
- Close the Settings window once your preferences are set. The changes apply immediately and no restart is needed.
To go back to the defaults, switch the options back on.
What to do next
Now that your apps are organized into split screen layouts, you can set up virtual desktops to separate work and personal tasks. You can also customize your taskbar and pin the apps you most often use together.
Frequently asked questions
How do I enable split screen in 🪟 Windows 11?
Split screen is enabled by default in Windows 11. Open an app window and hover over the maximize button in the top-right corner without clicking. A menu showing grid layouts appears. Click the section where you want the window to snap. Open another app and repeat to fill another section.
Why isn't my split screen working in 🪟 Windows 11?
If Snap Layouts isn't working, check that the window isn't maximized already—snap only works with restored windows. Make sure you're hovering over the maximize button, not clicking it. If the pop-up doesn't appear, try moving your mouse away and hovering again. Restart your computer if the feature remains unresponsive.
How to activate Windows split screen?
Open any app window and hover your mouse over the maximize button (the square icon in the top-right corner) without clicking. Wait a moment for the layout menu to appear. Click the grid section where you want the window to snap. Then open another app and snap it to fill the remaining space.
How do I split my screen on Microsoft Windows?
Open an app window and hover over the maximize button in the top-right corner to reveal Snap Layouts grid options. Click the section where you want the window to position. Open a second app and repeat the process to fill another section. Windows automatically resizes both windows to fit their zones.
Still have a question?
Answered by AI from this guide. Good questions may be added to this page — please don't include personal details.
Did this guide fix your problem?

About the Author
Richard
Tech Writer, IT Professional
Richard is a writer at Geek Rewind who turns complex IT tasks into clear, step-by-step guides. He draws on years of hands-on experience in system administration and enterprise IT operations, focusing on Windows, Linux and WordPress: the problems people actually run into, and the fixes that work. His server and WordPress guides come from systems he runs himself. Richard builds and maintains the platform behind Geek Rewind, from its Ubuntu servers and Nginx configuration to its custom WordPress plugins. Many new tutorials start with readers' questions, and he's always glad to answer them in the comments.
No comments yet — be the first to share your thoughts!