How to Show or Hide Libraries Folder in Windows 11
Showing or hiding the Libraries folder in Windows 11 is a simple change you make in the Registry Editor.
The Libraries folder is a special place that brings together files from different locations on your computer into one view, without actually moving your files.
You can choose to show or hide this folder in File Explorer’s navigation pane. This helps tidy up your view if you don’t use Libraries often.
For example, the default Libraries folder path is usually found at 📂%AppData%\Microsoft\Windows\Libraries. Changing its visibility is a quick way to personalize how you see your folders.
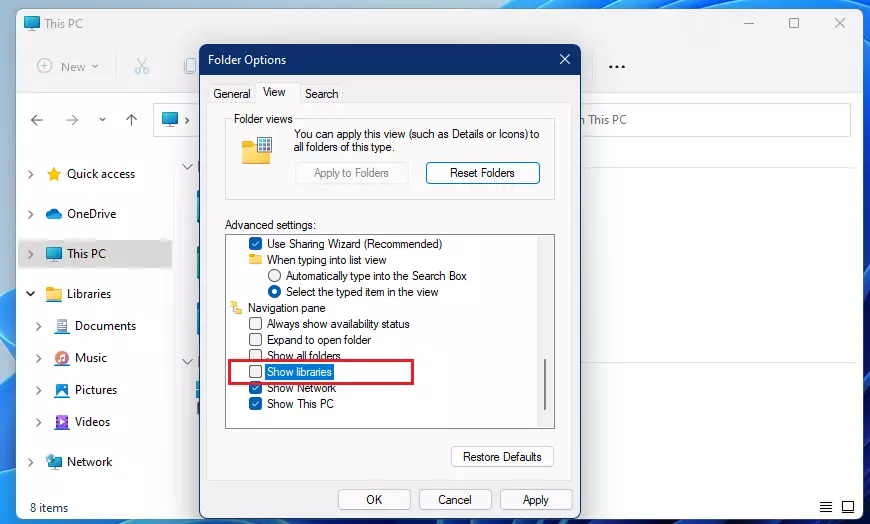
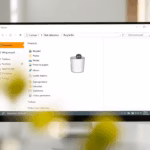
Show or hide the Libraries folder in Windows 11 via File Explorer Options. Open File Explorer, click the three dots, select Options, go to the View tab, and check or uncheck “Show libraries” under Advanced settings.
Before you begin: Back up your Registry
Show the Libraries folder via File Explorer
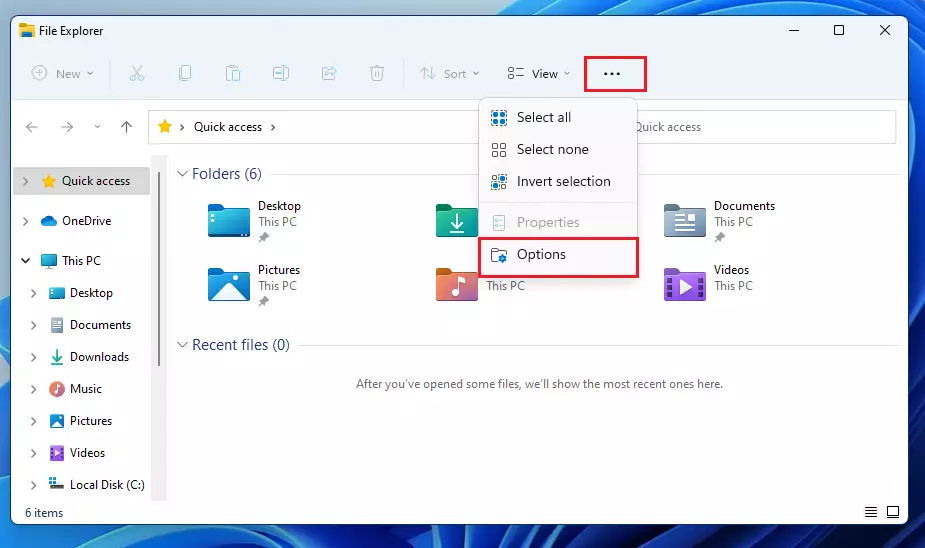
Showing the Libraries folder in Windows 11 is straightforward using a setting within File Explorer. This quick method requires no advanced technical knowledge and is ideal if the Libraries folder has disappeared or you want to re-add it to your navigation pane.
- Open File Explorer.
- Click the three dots (ellipse) in the top menu bar.
- Select Options.
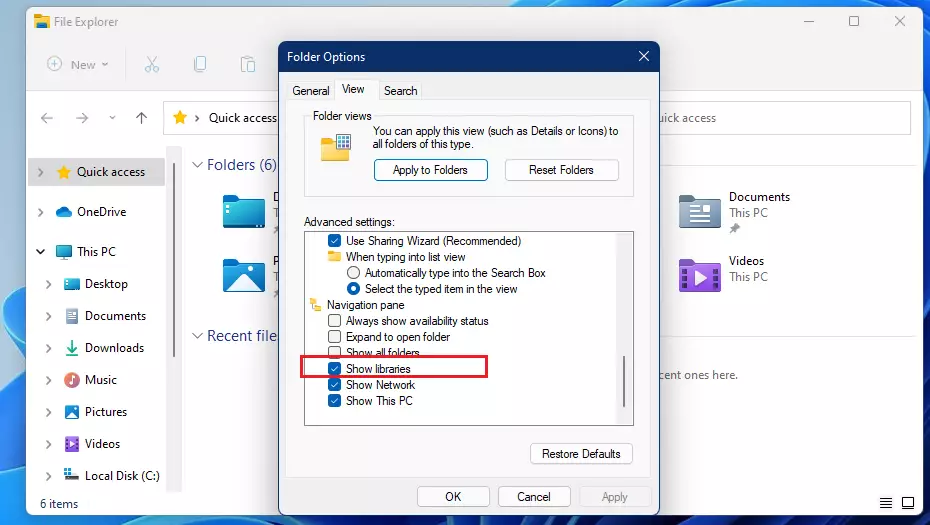
- Click the View tab.
- Under Advanced settings, check the box that says Show libraries.
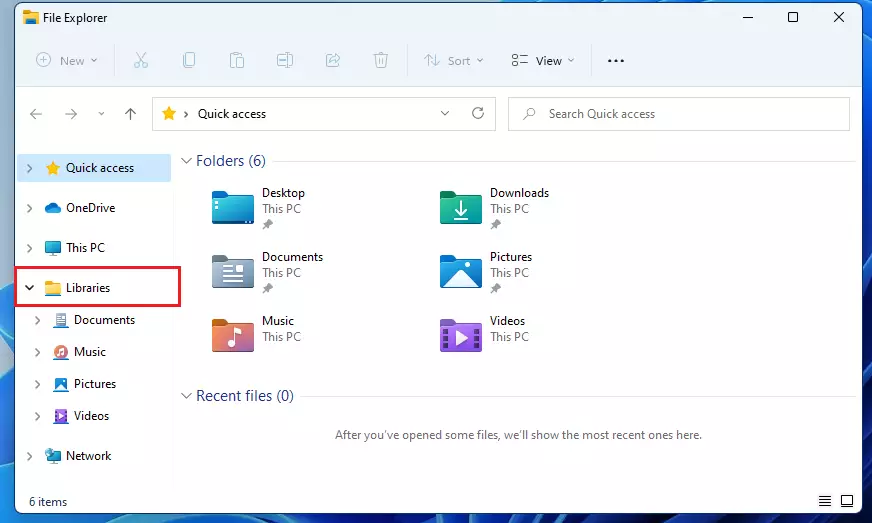
The Libraries folder will now show up in your navigation menu on the left.
Hide the Libraries folder
If you prefer a minimalist look, you can hide the folder:
- Open File Explorer and click the three dots in the menu.
- Select Options.
- Click the View tab.
- Uncheck the box next to Show libraries.
Advanced: Registry Editor modification
If you’re an advanced user and can’t show or hide the Libraries folder in Windows 11 using the standard File Explorer option, the Registry Editor offers an alternative. This method involves making a small change to a specific setting, allowing you to control the visibility of the Libraries folder when the usual methods fail.
- Press ⊞ Win+R, type
regedit, and hit Enter. - Navigate to
HKEY_CURRENT_USER\Software\Classes\CLSID\{031E4825-7B94-4dc3-B131-E946B44C8DD5}. - Locate the System.IsPinnedToNameSpaceTree DWORD.
- Set the value to 1 to show or 0 to hide.
Group Policy Editor settings
For enterprise environments, you can use the Group Policy Editor to enforce this setting.
- Press ⊞ Win+R, type
gpedit.msc, and hit Enter. - Go to User Configuration > Administrative Templates > Windows Components > File Explorer.
- Find Show libraries in the navigation pane and set it to Enabled or Disabled.
Add files or folders to Libraries
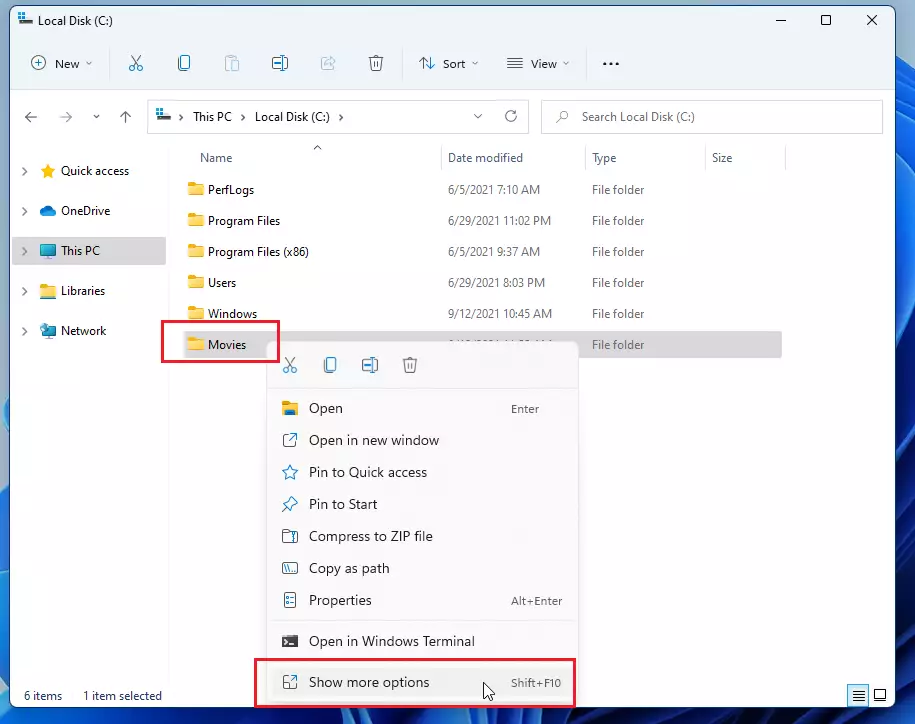
- Right-click the folder you want to add.
- Select Show more options.
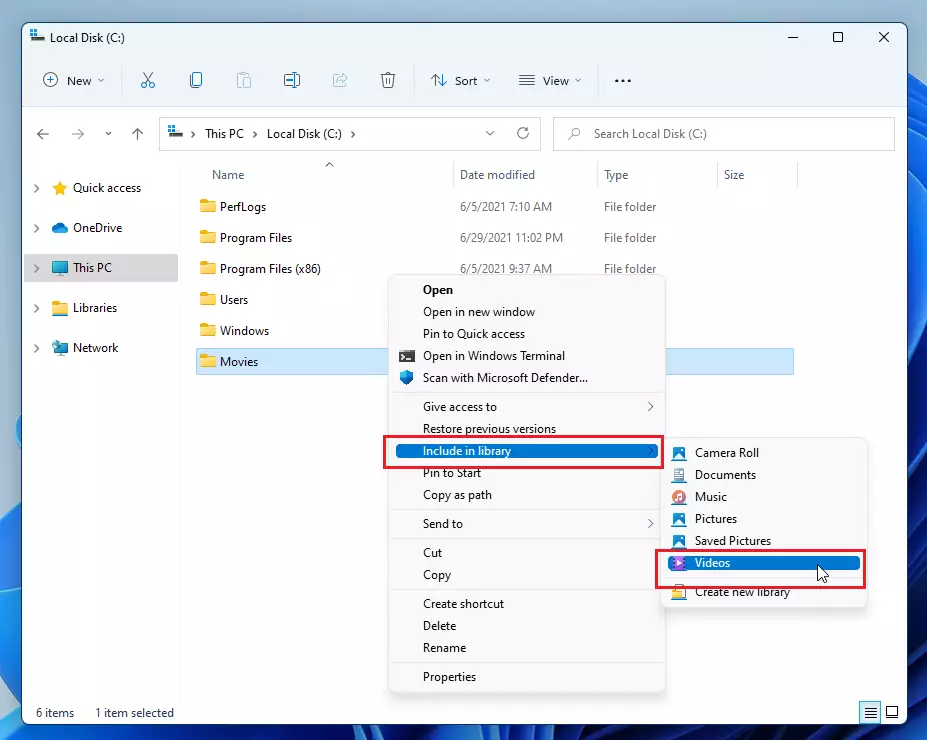
- Choose Include in library.
- Select the specific library where you want the folder to appear.
Summary
Why does the Libraries folder reappear after I hide it?
The folder may reappear if a system update resets your File Explorer preferences or if a third-party application forces a refresh of the navigation pane settings. If this persists, use the Registry Editor method to set the value to zero permanently.
Can I delete the Libraries folder permanently?
You should not delete the actual system files, as they are essential for Windows shell functionality. Instead, hide the folder from the navigation pane using the File Explorer Options or Registry settings. This achieves the same visual result without risking system errors or broken file paths.
Does hiding Libraries affect my file indexing?
No, hiding the Libraries folder does not affect your file indexing. Windows Search continues to index your files regardless of whether the Libraries shortcut is visible in your navigation pane. It is purely a visual setting for the File Explorer interface and does not impact background system processes.
Was this guide helpful?

About the Author
Richard
Tech Writer, IT Professional
Richard, a writer for Geek Rewind, is a tech enthusiast who loves breaking down complex IT topics into simple, easy-to-understand ideas. With years of hands-on experience in system administration and enterprise IT operations, he’s developed a knack for offering practical tips and solutions. Richard aims to make technology more accessible and actionable. He's deeply committed to the Geek Rewind community, always ready to answer questions and engage in discussions.


I can see how that should work but on my Windows 11 installation Explorer takes no notice of this configuration setting do you have any more idea
Thank you so much. Why on earth would this be hidden to start with? Sometimes I wonder if Microsoft has a dedicated team just to make things frustrating for us end-users!
Okay, thanks, gentlemen. I thought it was just me. Pretty sure the teams make ‘improvements’ based on how MS works for them, in their industry and takes no care or thought to the thousands of other industries using the product.
On windows 10 I had all my folders identified with a front photo of various scenes to identify different stages of my entries into photo competitions. In windows 11 the photos on the front of the folders have disappeared. HELP
[…] or change application settings to choose a different folder to save files and new content. Your Music folder is also in your Libraries, which can be enabled using a few […]
[…] or change application settings to choose a different folder to save files and new content. Your Videos folder is also in your Libraries, which can be enabled using a few […]
[…] or change application settings to choose a different folder to save files and new content. Your Pictures folder is also in your Libraries, which can be enabled using a few […]
[…] controlled folder access can be helpful for cases when you don’t store files in the default Windows libraries or have changed the default location of your […]