How to Restrict App Camera Permissions Globally in Windows 11 Camera Settings

Blocking camera access globally in Windows 11 stops every app on your PC from using your webcam at the same time. One master switch cuts off the camera feed for all programs, which protects your privacy from unwanted spying.
The control sits in the main Settings app , so you do not need extra software or system file edits. You can turn the camera off for everything with one click. You can also block specific apps and leave the others alone. The steps are the same on Windows 11 Home and Pro.
Open Settings Privacy & security Camera and toggle the Camera access switch to Off. This blocks all apps from using your webcam at once. You can manage individual app permissions by leaving the master switch on and toggling each app separately.
Understanding Camera Privacy in 🪟 Windows 11
Camera privacy in Windows 11 lets you decide which programs can see through your webcam. Windows checks these settings before it lets any software use the camera. Many apps ask for camera access when you install them, so more programs may have permission than you realize until you review the list.
When you turn off the master camera switch, Windows 11 restricts camera access for all programs. By default, many programs can request camera access as soon as they are installed. With the global switch off, no software on your computer can use the camera until you turn it back on. You can undo the change at any time by flipping the same switch.
How to Access Your 🪟 Windows 11 Privacy Settings
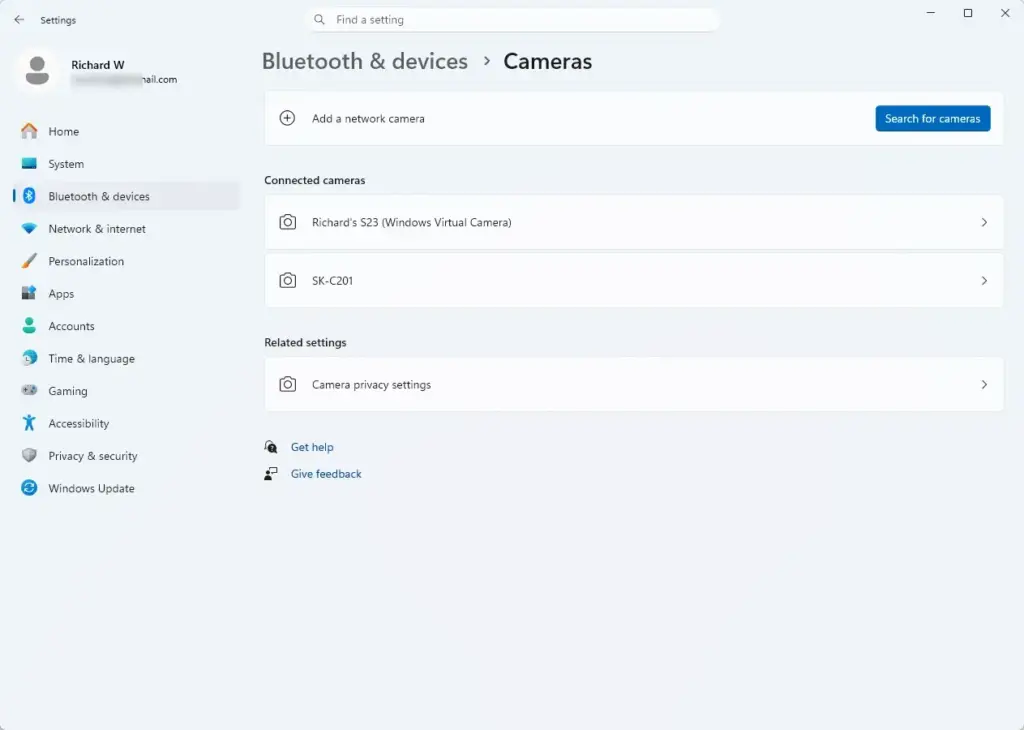
You reach the camera privacy controls through the Start menu and the Settings app. Here is the route.
- Click the Start button on your taskbar . It looks like the Windows logo. You should see the Start menu open.
- Click the Settings icon, which looks like a small gear. You can also press the Win+I to open Settings directly. The Settings window should now open.

- In the Settings window, look at the menu on the left side. Click Privacy & security. The main panel now shows privacy categories.
- Scroll down the main panel until you find the App permissions section.
- Click Camera. You should now see the camera privacy page, with the master switch at the top and a list of apps below it.
How to Turn Off Camera Access Globally
The master switch stops every app on your computer from using your webcam at once. You find it at the top of the camera privacy page. You need to be signed in as an administrator to use it.
If Windows asks for permission or an administrator password, enter it to continue. If the switch is greyed out, you are probably signed in with a standard account. On a work or school PC, the setting may be locked by your organization, and Settings will usually say that some settings are managed by your organization. In that case, ask your IT department.
- Open Settings and go to Privacy & security, then Camera. The camera privacy page should now be on screen.
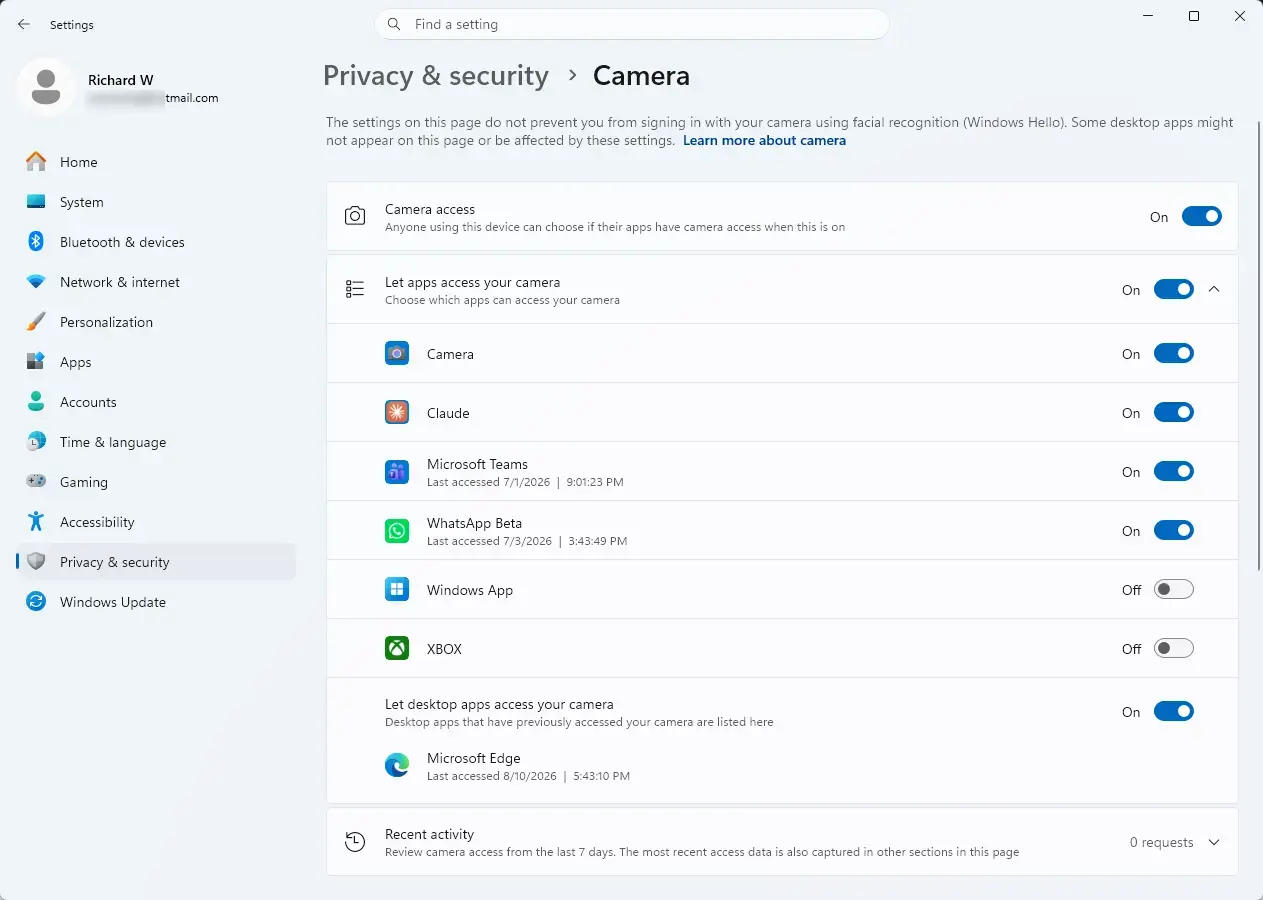
- Find the setting labeled Camera access at the top of the page.
- Click the toggle switch next to Camera access to move it to the left. The switch changes color and the label should read Off. Camera access is now disabled for all apps on the device.
With this switch off, no software, desktop program or background service can use your camera. If an app tries to start a video feed, it will fail or show an error saying the camera is blocked by system privacy settings. To undo this, return to the same page and turn Camera access back on. If an app was already open when you changed the setting, close it and reopen it so it detects the camera again. You do not normally need to restart Windows.
Managing Exceptions: How to Control Individual Apps
If you want to keep your camera working for a few trusted video tools, leave the master switch on and manage apps one at a time. You can block most programs and still allow the ones you need.
- Make sure Camera access is turned On. The app list stays hidden or unavailable while the master switch is off.
- Scroll down the Camera page to the list of individual apps. Each program has its own toggle switch next to its name.
- Flip the toggle for each app you want to block. Leave on the ones you trust, such as your video calling program. An app whose toggle is Off can no longer use the camera, while the others keep working.
Not every program appears in that list. Windows also has a separate setting for classic desktop programs, which you can find on the same page. Check it if a desktop program still reaches your camera when you did not expect it to.
Keep in mind that the master switch overrides all individual app choices. If you want a total global restriction, turn off Camera access. Every app on the list loses access right away, whatever its own toggle says.
How Windows Shows When Your Camera Is in Use
Windows shows you when the camera is in use. A small camera icon appears in the taskbar near the clock whenever an application successfully turns on your camera hardware. This happens automatically.
- Look at the notification area on your taskbar, near the clock, for a small camera icon.
- Hover your mouse pointer over the icon. A small text box should pop up and name the program that is using your camera right now.
If you are unsure, turn off the master switch while you investigate.

Many modern laptops also have a physical hardware light next to the camera lens. It usually glows white or green when the camera sensor is powered on. With the global setting blocking the camera, apps cannot start the camera, so the light should not come on by surprise. If the light comes on and you did not start anything, treat that as a reason to check the taskbar icon and your app list.
Summary
Summary
This guide covered restricting app camera permissions globally in Windows 11 camera settings. You now know how to find the privacy controls, turn the master camera switch off and back on, and manage individual app exceptions. You also know how to spot which program is using the camera and what to check if a switch is greyed out.
Have a question about this guide?
Answered by AI from this guide. Good questions may be added to this page — please don't include personal details.
Did this guide fix your problem?

About the Author
Richard
Tech Writer, IT Professional
Richard is a writer at Geek Rewind who turns complex IT tasks into clear, step-by-step guides. He draws on years of hands-on experience in system administration and enterprise IT operations, focusing on Windows, Linux and WordPress: the problems people actually run into, and the fixes that work. His server and WordPress guides come from systems he runs himself. Richard builds and maintains the platform behind Geek Rewind, from its Ubuntu servers and Nginx configuration to its custom WordPress plugins. Many new tutorials start with readers' questions, and he's always glad to answer them in the comments.
No comments yet — be the first to share your thoughts!