How to Make Dropbox Files Available Offline on Windows 11

Dropbox offline files let you open and edit your cloud documents on a Windows 11 PC without an internet connection. Dropbox keeps a full local copy of the folders and files you choose on your hard drive, so they stay available wherever you take the PC.
When the computer reconnects, Dropbox syncs any changes you made back to the cloud. You only need the Dropbox desktop app to turn this on. Nothing extra to install in Windows itself.
Before you start, check these two things:
- The Dropbox desktop app: The Dropbox program must be installed on your Windows computer and you must be signed in to it. If you don’t have it, go to the Dropbox website and download it . After installing , sign in and let the first sync finish.
- An app to open your files: Offline access only gives you the file. You still need software that can open it. For example, to read a PDF offline, you need a PDF reader installed on the PC. The same goes for Word documents, spreadsheets, images and so on.
One more point that explains most “missing option” problems. The Make available offline choice belongs to Dropbox’s online-only (Smart Sync) feature, which is tied to your plan. If your account doesn’t have it, Dropbox normally keeps all your files on the PC already. In that case there is nothing to switch on.
Right-click a file or folder in your Dropbox folder in File Explorer and select Make available offline. Dropbox downloads a copy to your PC. When a solid green checkmark appears next to the item, it’s saved locally and ready to open without internet.
How to Make Files and Folders Available Offline on Your Windows PC
Making your Dropbox files available offline on Windows 11 takes a few clicks in File Explorer . You mark the files and folders you want to keep on the PC at all times. Then you can open and edit them anywhere. Start by opening File Explorer.
- Open File Explorer . Click the folder icon on your taskbar or press
Windows key + Eon your keyboard. A File Explorer window opens. - Go to your Dropbox folder. Look for Dropbox in the left-hand navigation pane. If it isn’t there, open your main user folder, or the location you chose during installation. You should now see all your Dropbox files and folders.
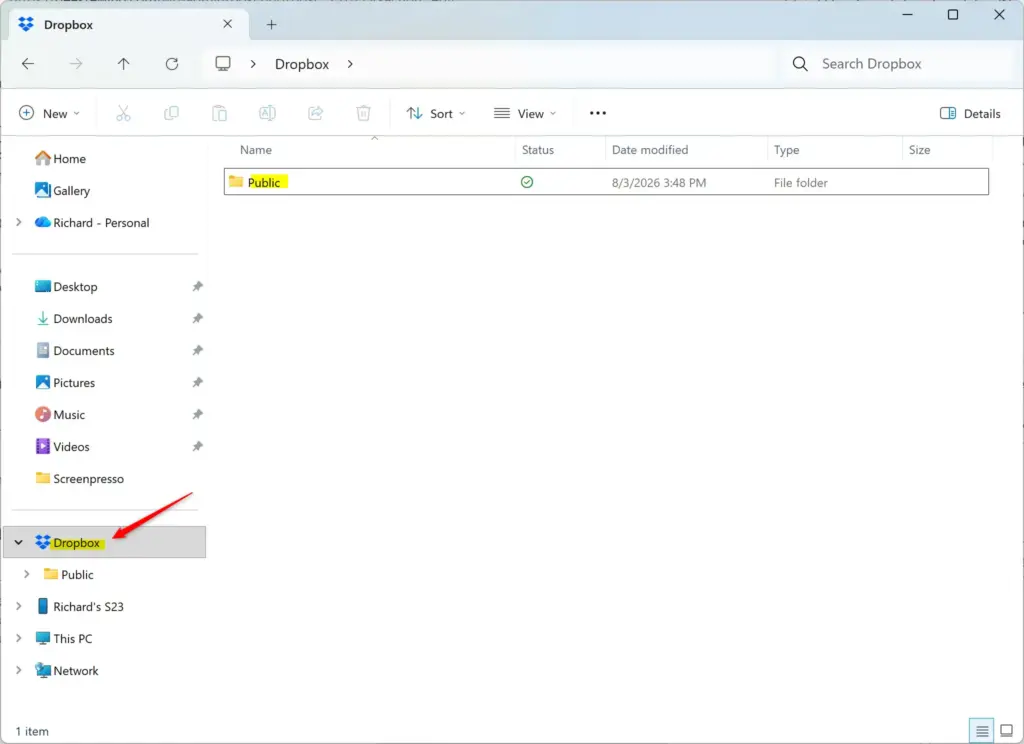
Dropbox folder contents displayed in Windows File Explorer. - Right-click the file or folder. Find the exact item you want to keep offline, point at it and right-click. A context menu appears. Choosing a whole folder is quicker than picking files one by one, and new files added to it later are covered too.
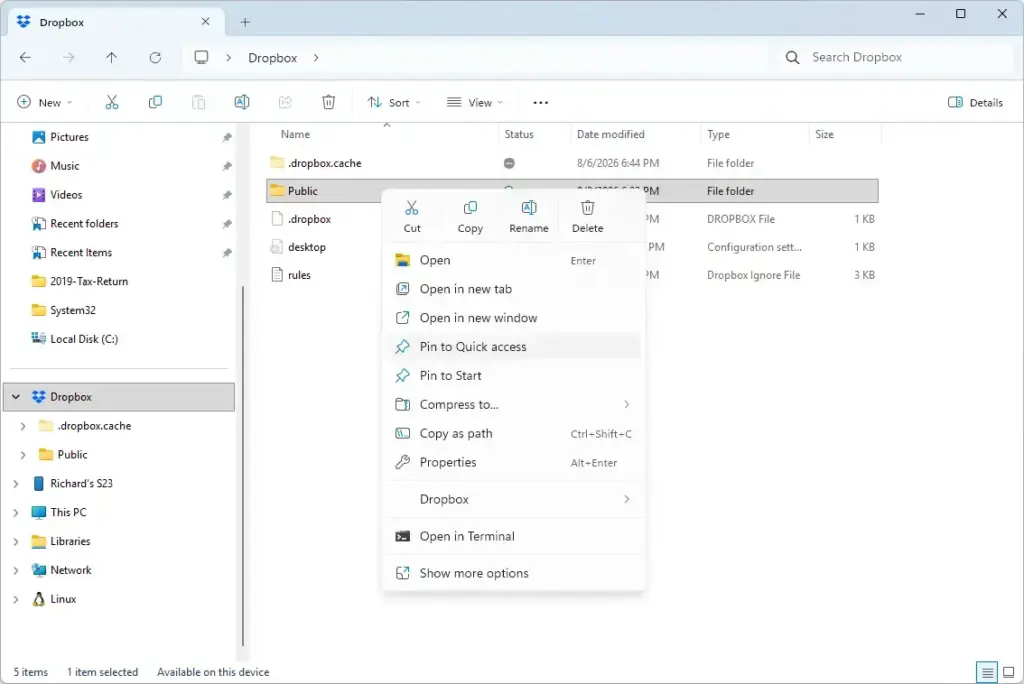
- Click Make available offline. In the menu, find the option named Make available offline and click it. On Windows 11, if you don’t see it in the short menu, click Show more options (or press Shift+F10) to open the full classic menu and look there.
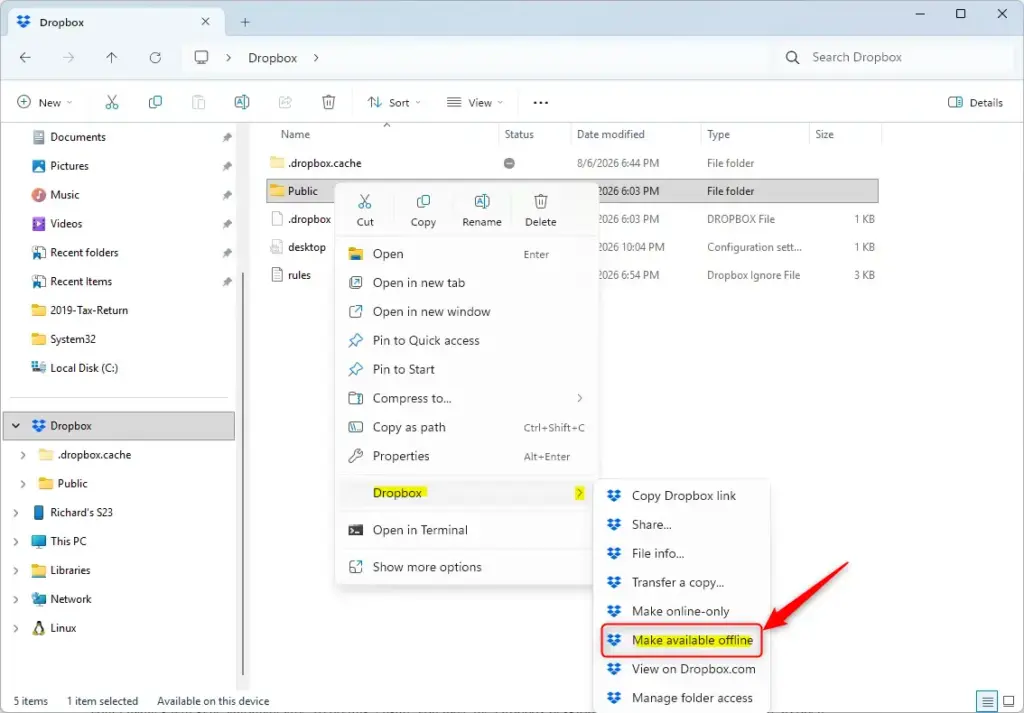
If the option is missing in both menus, check the following:- The Dropbox desktop app is running and you are signed in. Look for the Dropbox icon in the system tray .
- You are right-clicking an item inside your Dropbox folder, not a copy somewhere else.
- Your plan includes online-only files. If it doesn’t, your files are probably already stored on the PC and the option isn’t needed.
- Wait for the sync. Dropbox now downloads the content in the background. A sync icon appears next to the item and changes as the download progresses. Large files and folders can take a few minutes, so give it time on a slow connection.
- Look for the solid green checkmark. When a solid green checkmark appears next to the name in File Explorer , the item is saved on your computer. You can now open it without an internet connection. A cloud icon means the item is still online-only, so it won’t open offline.
Dropbox then removes the local copy and frees up disk space. The file stays safe in your Dropbox account.
References:
Summary
Any change you make while offline is saved on your PC first. Dropbox then updates your cloud storage automatically once the computer is back online. Before a trip, check that the files you need show the solid green checkmark, so you know they will open.
Was this guide helpful?

About the Author
Richard
Tech Writer, IT Professional
Richard is a writer at Geek Rewind who turns complex IT tasks into clear, step-by-step guides. He draws on years of hands-on experience in system administration and enterprise IT operations, focusing on Windows, Linux and WordPress: the problems people actually run into, and the fixes that work. His server and WordPress guides come from systems he runs himself. Richard builds and maintains the platform behind Geek Rewind, from its Ubuntu servers and Nginx configuration to its custom WordPress plugins. Many new tutorials start with readers' questions, and he's always glad to answer them in the comments.

No comments yet — be the first to share your thoughts!