

Exporting passwords from Microsoft Edge saves your saved website usernames and logins into a CSV file (a spreadsheet format used to transfer data) on your computer. This backup lets you move your login details to a different web browser or a secure password manager in a few clicks.
Desktop versions of Microsoft Edge include this built-in export tool, while mobile apps for phones and tablets do not support the feature. You can finish the whole process directly through the Edge profile settings menu. It works the same on Windows 11 Home and Pro, and you do not need to restart anything.
Open Microsoft Edge, click the three-dot menu, select Settings Profiles Passwords, click the three dots next to Saved passwords, choose Export passwords, confirm with your Windows credentials, then save the CSV file to a private folder on your computer.
Step 1Open Edge Settings
Sign into a Microsoft account in Edge first, so the profile you are exporting from is the one that holds your saved passwords. Export only covers the profile you are currently using. If you keep separate Edge profiles for work and home, switch to the right one before you start.
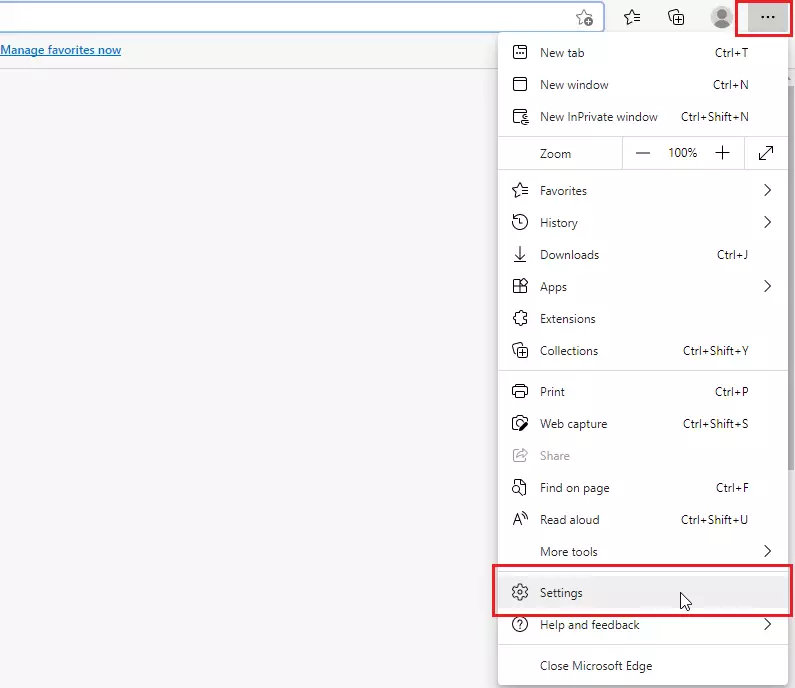
- Open Microsoft Edge on your PC.
- Click the three-dot menu in the top right corner of the window.
- Select Settings from the list.
A Settings page opens in a new tab with a list of categories down the left side.
Step 2Go to Your Profile Passwords
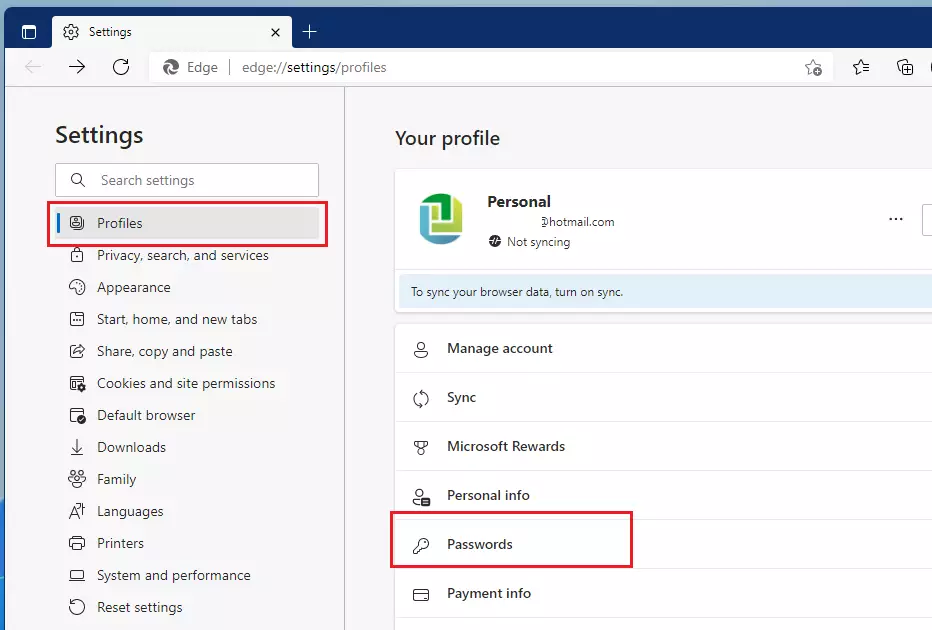
- Click Profiles on the left sidebar.
- Click the Passwords tile.
You should now see the password manager page, with a Saved passwords list showing each site, username and a masked password. If the list is empty, Edge has no saved logins for this profile, and there is nothing to export.
Step 3Click Export Passwords
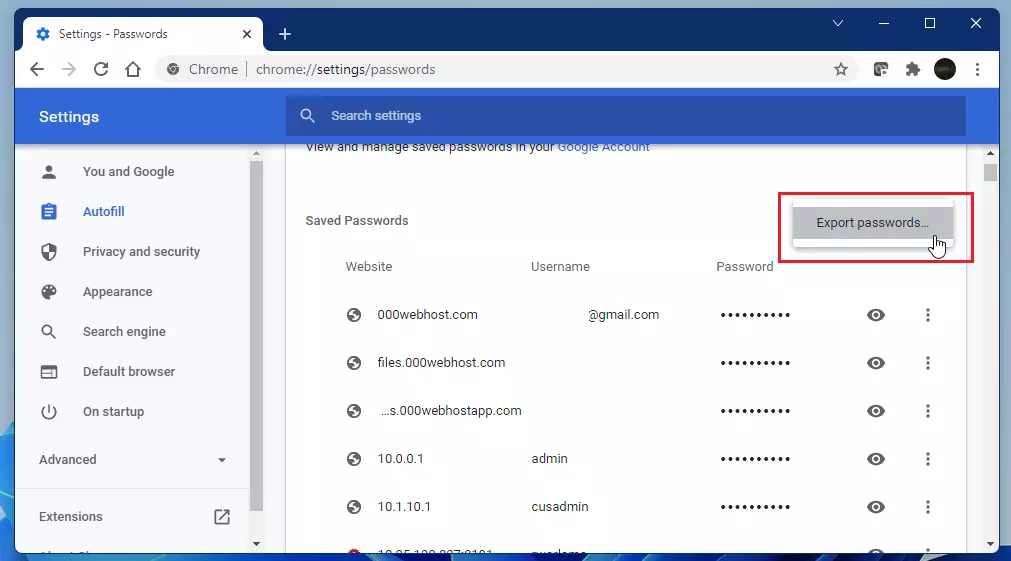
- Find the Saved passwords heading.
- Click the three vertical dots next to it.
- Choose Export passwords.
Make sure you use the dots next to the heading and not the ones on a single saved entry. The entry menu only edits or deletes that one login. If you do not see Export passwords, check that you are on a desktop version of Edge, since mobile apps do not offer it.
Step 4Confirm the Export ⚠️ Admin Privileges Required
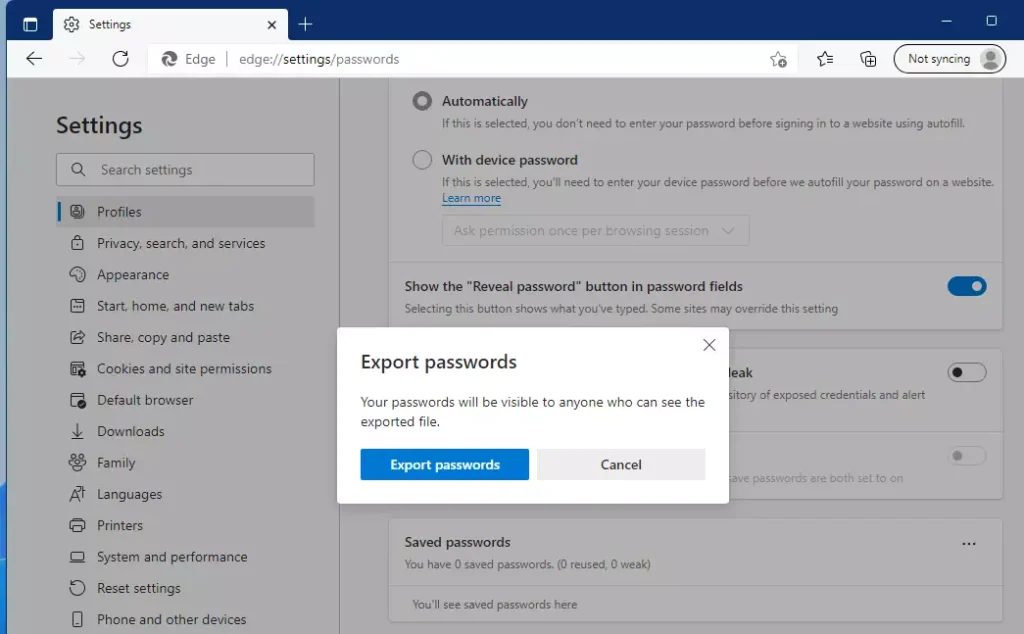
A warning appears explaining the risks of exporting. Read it, because it says the same thing this guide does: the file will not be protected.
- Click the Export passwords button to proceed.
If you change your mind, close the dialog and nothing is exported.
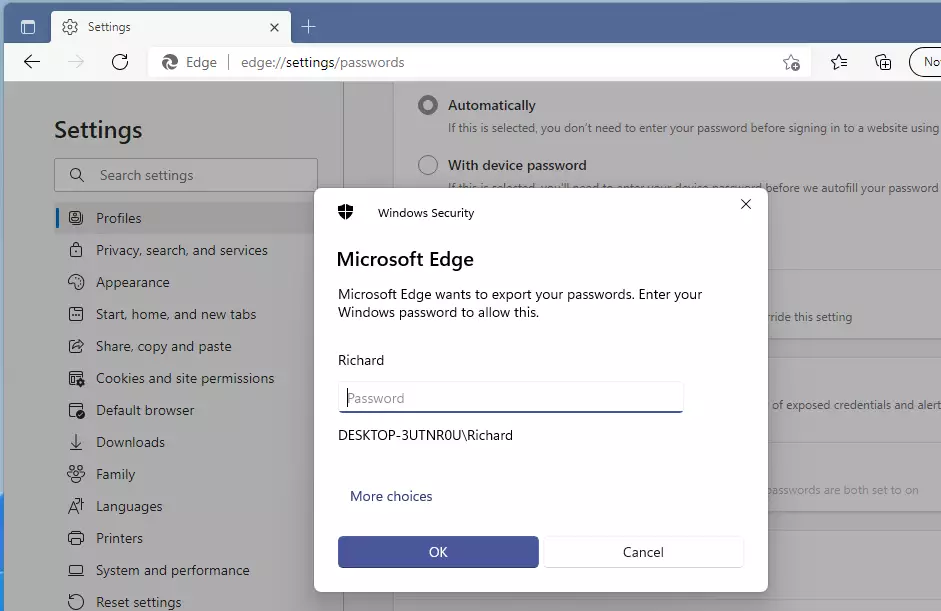
Step 5Enter Your Windows Credentials ⚠️ Admin Privileges Required
Verification protects your data, so Windows asks you to confirm your identity before it releases the passwords. Use whichever method your PC has set up: a Windows Hello PIN, a fingerprint, or your system password. Confirming identity ensures only authorized users access those credentials.
If the prompt does not appear on top of the browser, check the taskbar for a flashing Windows Security window. If you cancel or fail the check, the export stops and you can start again from the menu.
Step 6Save Your Password File
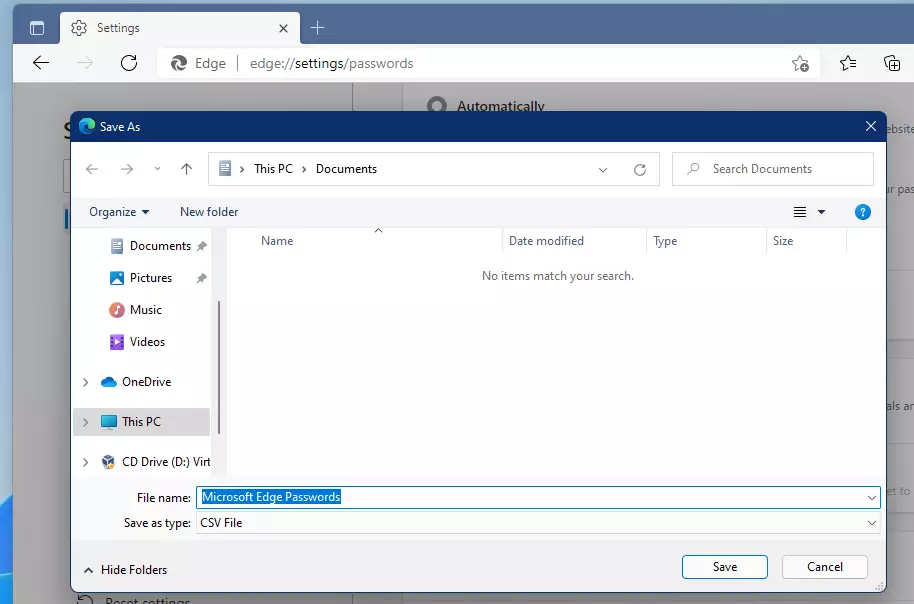
- In the save dialog, browse to a private folder on your computer.
- Click Save.
Folders synced by OneDrive and similar services copy the file to the cloud, and the file is not encrypted. The export is a standard CSV file, so you can import it into another browser or a password manager. You can also open it in a spreadsheet app to check it.
Once you have imported the file where you need it, delete it, then empty the Recycle Bin so it cannot be recovered easily.
Understanding the Security Risks of CSV Files
Anyone who opens the file can read your usernames and passwords in plain text. That includes anyone who gets hold of a copy through a shared PC, a USB drive, an email attachment or a backup.
Keep the file only as long as you need it. Move it straight to its destination, then delete it.
Sync vs. Export
Microsoft Account sync keeps passwords updated across all devices automatically. Exporting creates a static snapshot of data instead, so it will not pick up any logins you add or change later. Rely on sync for daily convenience while reserving exports for migrations or manual backups.
Summary
Exporting passwords from Microsoft Edge lets you save all your saved login details into a spreadsheet file so you can move them to another browser or app. You need to confirm your identity with Windows Hello (a security feature that checks your face, fingerprint, or PIN) before the browser lets you download this file. Make sure you delete the file as soon as you finish importing it, because anyone who opens the file can read your passwords in plain text.- Exporting passwords from Microsoft Edge creates a CSV file.
- CSV files are not encrypted; handle them with extreme caution.
- You must use Windows Hello or your system password to authorize the export.
- Mobile versions of Edge do not support this feature.
- Always delete the CSV file after importing your data into a secure password manager.
- For more details, visit the official Microsoft support page.
Have a question about this guide?
Answered by AI from this guide. Good questions may be added to this page — please don't include personal details.
Did this guide fix your problem?

About the Author
Richard
Tech Writer, IT Professional
Richard is a writer at Geek Rewind who turns complex IT tasks into clear, step-by-step guides. He draws on years of hands-on experience in system administration and enterprise IT operations, focusing on Windows, Linux and WordPress: the problems people actually run into, and the fixes that work. His server and WordPress guides come from systems he runs himself. Richard builds and maintains the platform behind Geek Rewind, from its Ubuntu servers and Nginx configuration to its custom WordPress plugins. Many new tutorials start with readers' questions, and he's always glad to answer them in the comments.
No comments yet — be the first to share your thoughts!