How to Enable Secure DNS in Google Chrome

Secure DNS in Google Chrome encrypts your internet requests, making your online activity much more private.
This feature, also known as DNS-over-HTTPS (DoH), works by sending your requests to websites through a secure, hidden tunnel. Think of it like sending a letter in a sealed, unmarked envelope instead of a postcard that anyone can read.
This encryption prevents your internet provider or anyone else on your network from easily seeing which websites you visit. Google Chrome first added support for Secure DNS back in version 61.
Turning on Secure DNS in Chrome, starting from version 78 which came out in late 2019, is a straightforward way to protect your browsing from being tracked.
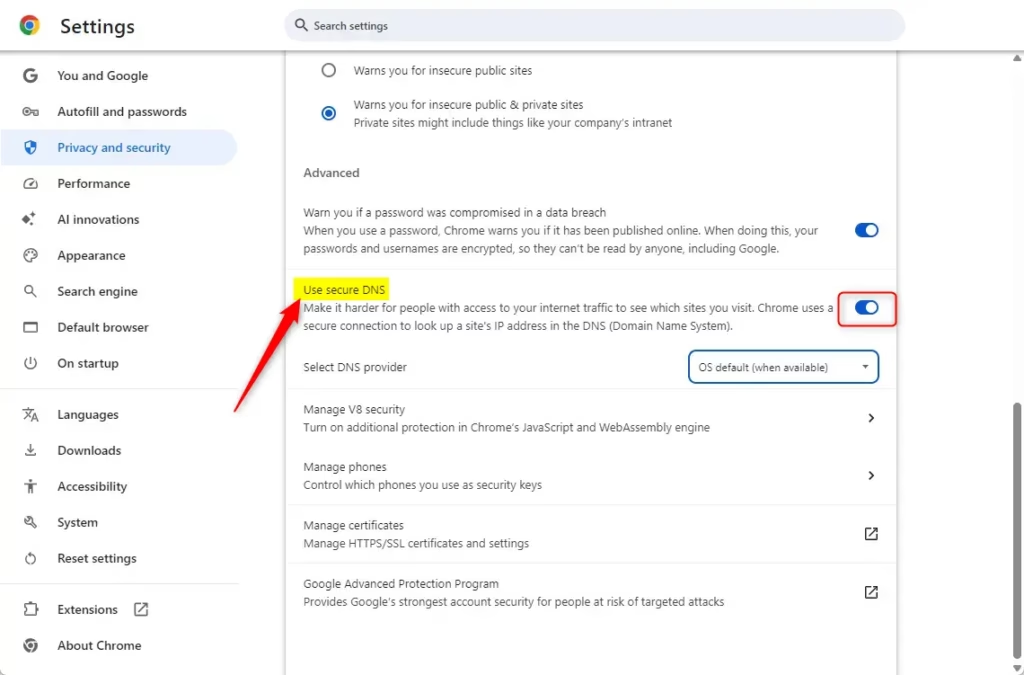
Open Chrome settings, navigate to Privacy and security, then Security. Under Advanced, find “Use secure DNS” and toggle it on. You can then choose a provider from the list or enter a custom one.
Enable/Disable DNS Over HTTPS in Chrome
You can enable secure DNS in Chrome’s settings to help keep your internet activity more private. This setting, called DNS-over-HTTPS, encrypts your DNS lookups, making it harder for others to see which websites you visit. Turning it on protects your online privacy.
- Open the Google Chrome browser.
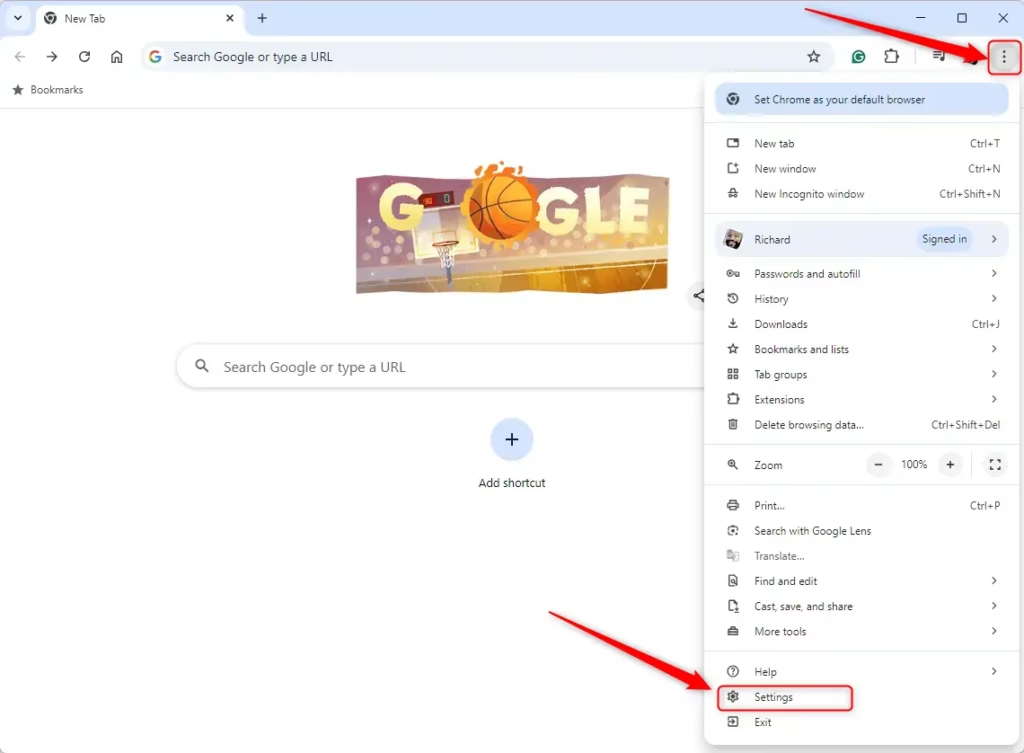
- Click the three vertical dots in the top right corner.
- Select Settings.
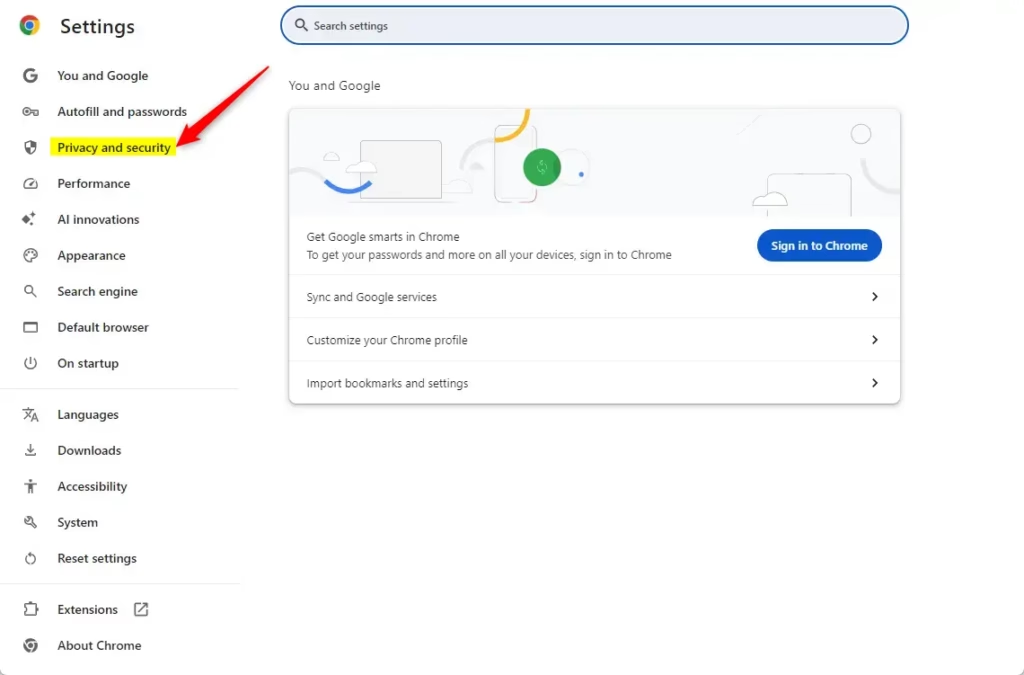
- Click Privacy and security on the left sidebar.
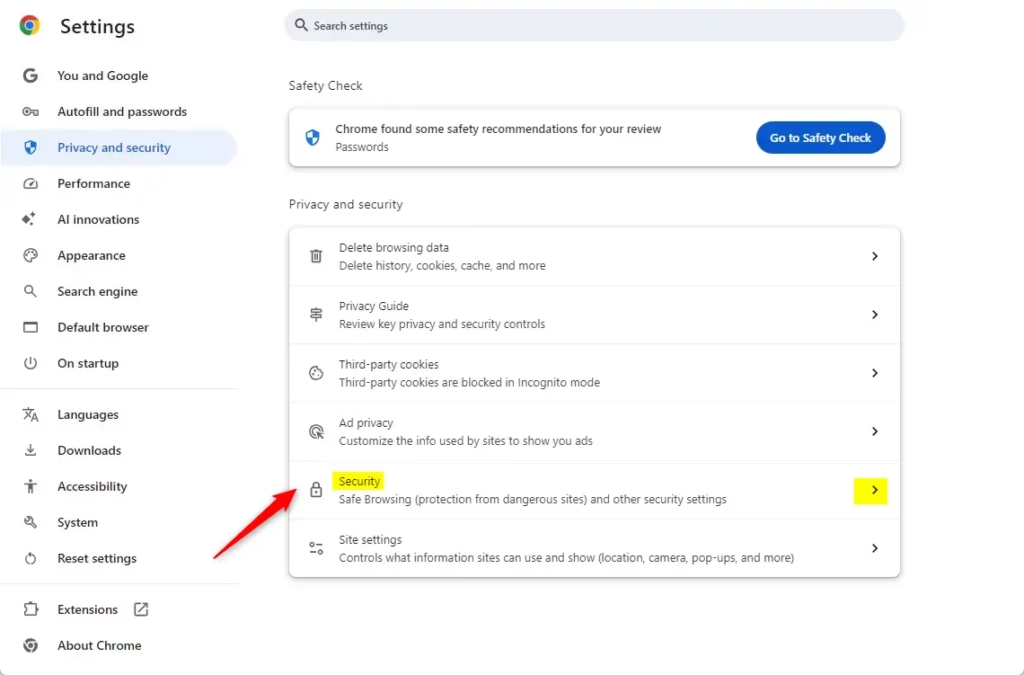
- Click the Security tile.
- Find Use secure DNS under the Advanced section.
- Toggle the switch to On or Off.
- To choose a specific provider, click Choose another provider. You can pick from a list or type in a custom address.
Enable / Disable Secure DNS in Chrome using Group Policy
Group Policy provides an efficient way to enable or disable secure DNS for Chrome across multiple computers simultaneously. This method lets you control the DNS-over-HTTPS setting for all users on a network. You just need to open the Group Policy Editor and find the right setting for Google Chrome.
- Press Win + R, type gpedit.msc, and press Enter to open the Local Group Policy Editor.
- Navigate to: Computer Configuration > Administrative Templates > Google > Google Chrome.
- Find the policy named Configure the DNS-over-HTTPS mode.
- Double-click it and select Enabled.
- In the Options box, choose off, automatic, or secure from the dropdown menu.
- Click Apply and OK.
Enable / Disable Secure DNS in Chrome using the Registry
For those unable to use Group Policy, editing the Windows Registry offers another way to enable or disable secure DNS in Chrome. This method is intended for advanced users and requires careful execution, as registry errors can lead to system issues. It's always wise to back up your registry or create a System Restore point before proceeding.
Navigate to this path:
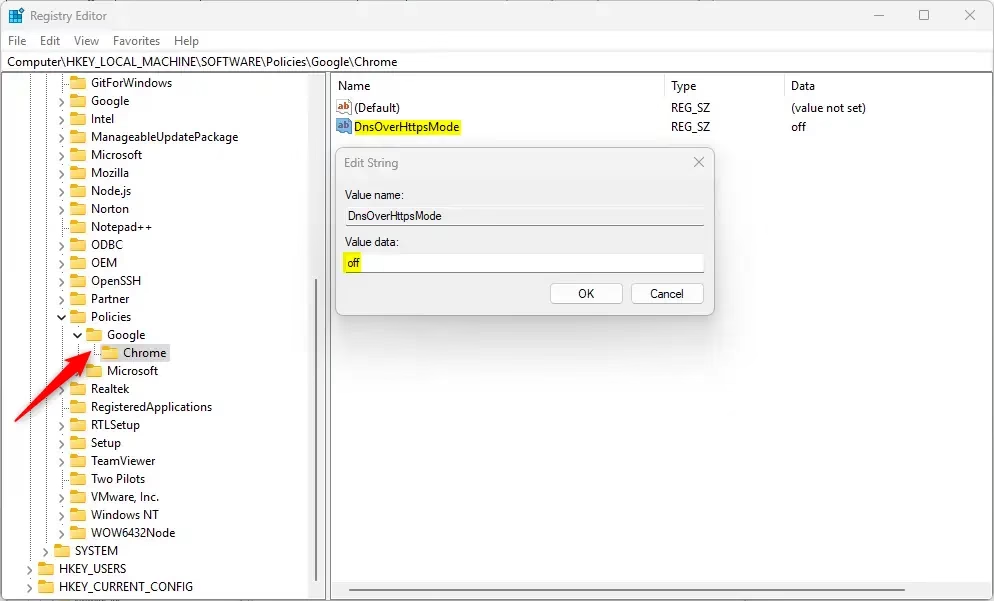
Computer\HKEY_LOCAL_MACHINE\SOFTWARE\Policies\Google\Chrome
- Right-click in the right pane.
- Select New > String Value.
- Name it DnsOverHttpsMode.
- Double-click it and set the value to:
- off: Disables secure DNS.
- automatic: Uses secure DNS if available.
- secure: Always uses secure DNS.
Your computer may need to be restarted for these changes to take effect. This post helps you manage a DnsOverHttpsTemplates for your network.
Reference: Chrome Enterprise Policy
Conclusion
Managing secure DNS settings in Chrome helps keep your internet activity private. You can choose 'automatic' for a good balance or 'secure' for maximum privacy. To revert to default settings, you can delete the registry entry or set the policy to 'Not Configured'. Be aware of potential conflicts with other settings.
- Options: Choose "automatic" for the best balance or "secure" for maximum privacy.
- Restoring: Delete the registry entry or set the policy to "Not Configured" to go back to default settings.
- Conflicts: Be aware that local registry edits may be overridden by domain-level group policies set by your IT administrator. If your settings are grayed out, a company policy is likely in charge.
- Reboot: Always restart Chrome or your computer if settings do not take effect immediately.
How to fix enable secure DNS in Chrome?
Open Google Chrome. Select the three-dotted menu icon in the top right corner. Then, go to settings. On the left side, select
Was this guide helpful?

About the Author
Richard
Tech Writer, IT Professional
Richard, a writer for Geek Rewind, is a tech enthusiast who loves breaking down complex IT topics into simple, easy-to-understand ideas. With years of hands-on experience in system administration and enterprise IT operations, he’s developed a knack for offering practical tips and solutions. Richard aims to make technology more accessible and actionable. He's deeply committed to the Geek Rewind community, always ready to answer questions and engage in discussions.


[…] article explains how to select the URI template (DNS provider) for the desired DNS-over-HTTPS resolver in Google […]