How to Enable or Disable Passkey Managers on Windows 11
Learn how to manage Passkey Managers on Windows 11 by enabling or disabling them.
Open Settings, navigate to Accounts > Passkey settings > Advanced options, and toggle the “Save passkeys to this device” option. This allows you to enable or disable third-party passkey manager integration.
What Are Passkeys?
Passkeys on Windows 11 act like digital keys for your online accounts, letting you log into websites and apps without needing to type a password. Windows Hello, a feature that lets you sign in with your fingerprint or PIN, can store these passkeys on your device for secure access.
By default, Windows offers to save the passkey locally if you’re using Windows Hello. After you create and save a passkey with Windows Hello, you can sign in using your device’s biometrics or PIN.
Windows 11 now integrates smoothly with passkey managers. This means you can use your favorite credential manager – like 1Password or Bitwarden – to handle passkeys without any fuss.
Why Enable a Passkey Manager?
By default, Windows automatically saves passkeys, and there isn’t a direct option to disable this behavior initially. Installing a third-party passkey manager, such as 1Password or Bitwarden, allows you to control whether passkeys save to your Windows device. This control becomes accessible after a third-party manager is installed.
How to Enable or Disable Passkeys Manager on Windows
As mentioned, the latest Windows build lets you enable or disable saving passkeys to Windows when third-party modules are installed.
Here’s how to do it:
Step 1Open the Settings App
First, open the Windows Settings app.
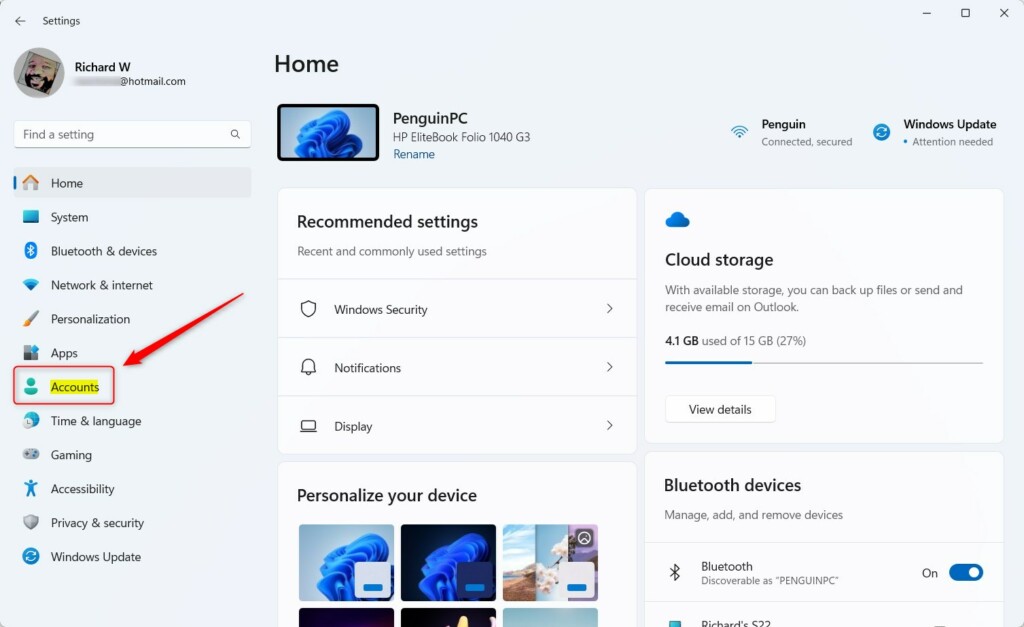
Step 2Go to Accounts
When the Settings app opens, click the Accounts button on the left.
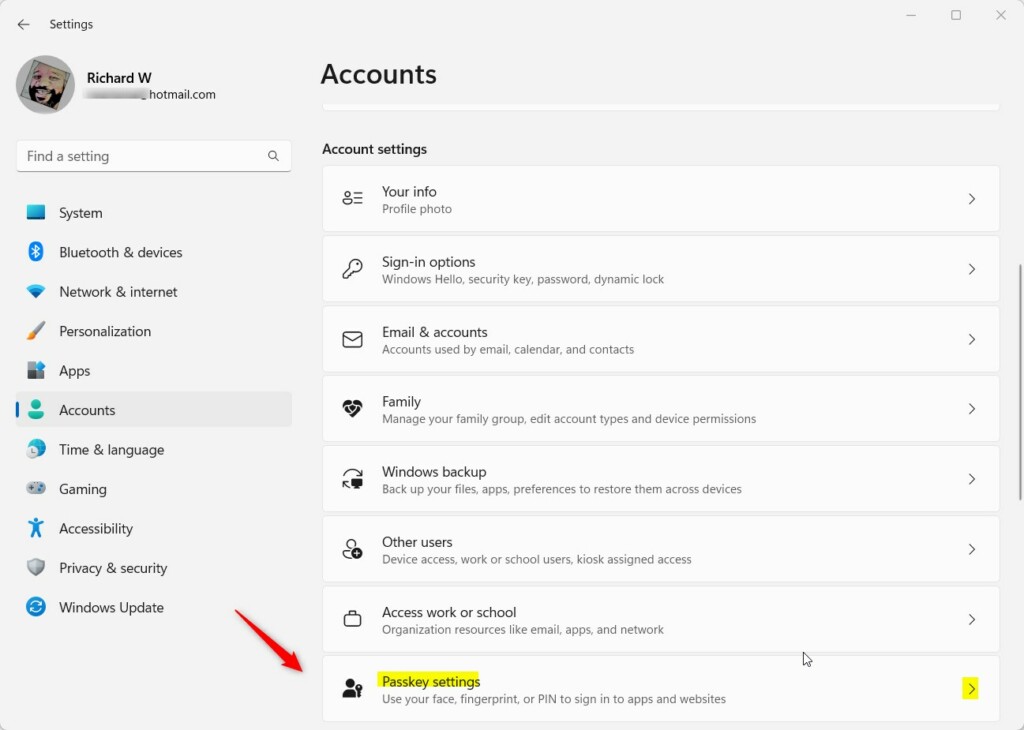
Step 3Select Passkey Settings
On the right side of the window, select the Passkey settings tile. This will expand the options.
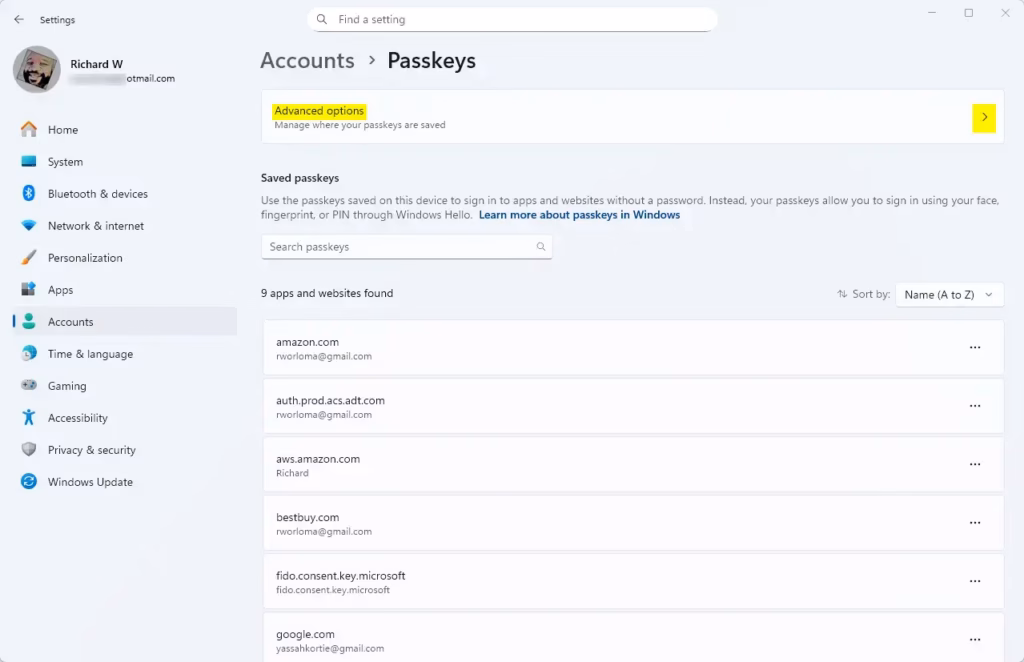
Step 4Open Advanced Options
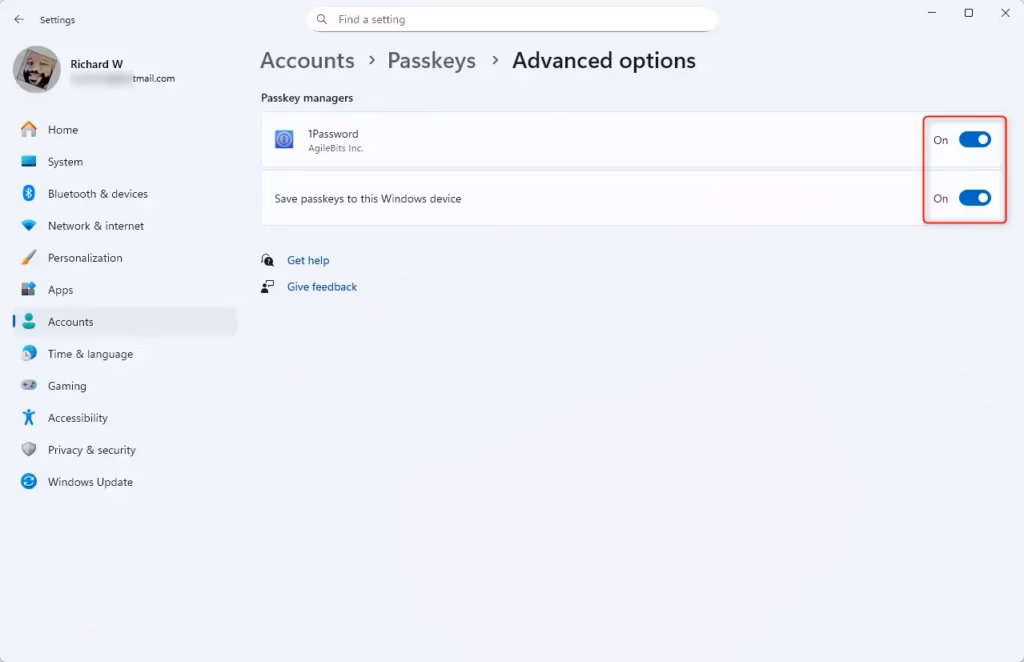
On the Windows 11 Accounts settings page, select the “Advanced options” tile. This expands the menu to reveal more passkey management settings.
Step 5Toggle Passkey Manager On or Off
Then, toggle the button to enable or disable saving passkeys to your Windows device.
That’s all there is to it!
Summary
A Windows 11 passkey manager offers a safer and simpler way to log into your accounts, using your fingerprint or PIN instead of traditional passwords. Windows 11 integrates smoothly with these managers for a convenient and protected sign-in experience.
- Passkeys provide a secure alternative to traditional passwords, utilizing biometrics or PINs for authentication.
- Windows 11 supports integration with third-party passkey managers, improving workflow and user experience.
- You can enable or disable the saving of passkeys to your Windows device through the Settings app.
- Following the outlined steps allows for easy management of passkeys according to your preferences.
- Always ensure you are using updated software and security measures for the best experience.
How do I manage passkeys in 🪟 Windows 11?
Manage where your Windows passkeys are saved In the Settings app on your Windows device, select Accounts > Passkeys > Advanced options. You can enable or disable the passkey services available on your Windows device by toggling them on or off.
Does 🪟 Windows 11 have passkeys?
Passkey privacy consent on Windows 11 Users can manage passkey access at any time in Settings > Privacy & security > Passkey access.
Does 🪟 Windows 11 expand passkey manager support?
Today, we're excited to announce a major step forward in passwordless authentication: native support for passkey managers in Windows 11. This new capability empowers users to choose their favorite passkey manager — whether it's Microsoft Password Manager or trusted third-party providers.
Was this guide helpful?

About the Author
Richard
Tech Writer, IT Professional
Richard, a writer for Geek Rewind, is a tech enthusiast who loves breaking down complex IT topics into simple, easy-to-understand ideas. With years of hands-on experience in system administration and enterprise IT operations, he’s developed a knack for offering practical tips and solutions. Richard aims to make technology more accessible and actionable. He's deeply committed to the Geek Rewind community, always ready to answer questions and engage in discussions.


No comments yet — be the first to share your thoughts!