How to Enable Tablet-Optimized Taskbar in Windows 11


The tablet-optimized taskbar in Windows 11 is a display setting that makes your taskbar icons and spacing larger when you use a touchscreen. It helps you tap buttons with your finger or a stylus instead of a mouse.
Windows 11 switches to this larger layout on its own when it senses you have detached or folded back the keyboard on a convertible laptop. When you reconnect the keyboard, it goes back to the standard, smaller taskbar.
This guide covers two ways to turn the feature on or off: the Settings app , and the Registry Editor for when the option is missing. The setting is aimed at touch devices such as 2-in-1 laptops and tablets. On a desktop PC with no touchscreen, you may not see it in Settings at all.
Go to Settings Personalization Taskbar Taskbar behaviors and check “Optimize taskbar for touch interactions when this device is used as a tablet.” This setting automatically expands the taskbar when you detach or fold your keyboard to improve touch usability.
Enable via Windows Settings
The Settings app is the easiest way to turn on the tablet-optimized taskbar, and it works the same on Windows 11 Home and Pro. When the feature is active and you use the device as a tablet, the taskbar tucks out of the way. You bring it back by swiping up from the bottom of the screen. The steps below take you from Settings to the taskbar behaviors section, where the option lives.
- Open the Windows Settings app. Press the Win+I on your keyboard. The Settings window opens with a list of categories on the left.
- Click Personalization in the left menu. The right side now shows personalization options such as Background, Colors and Themes.
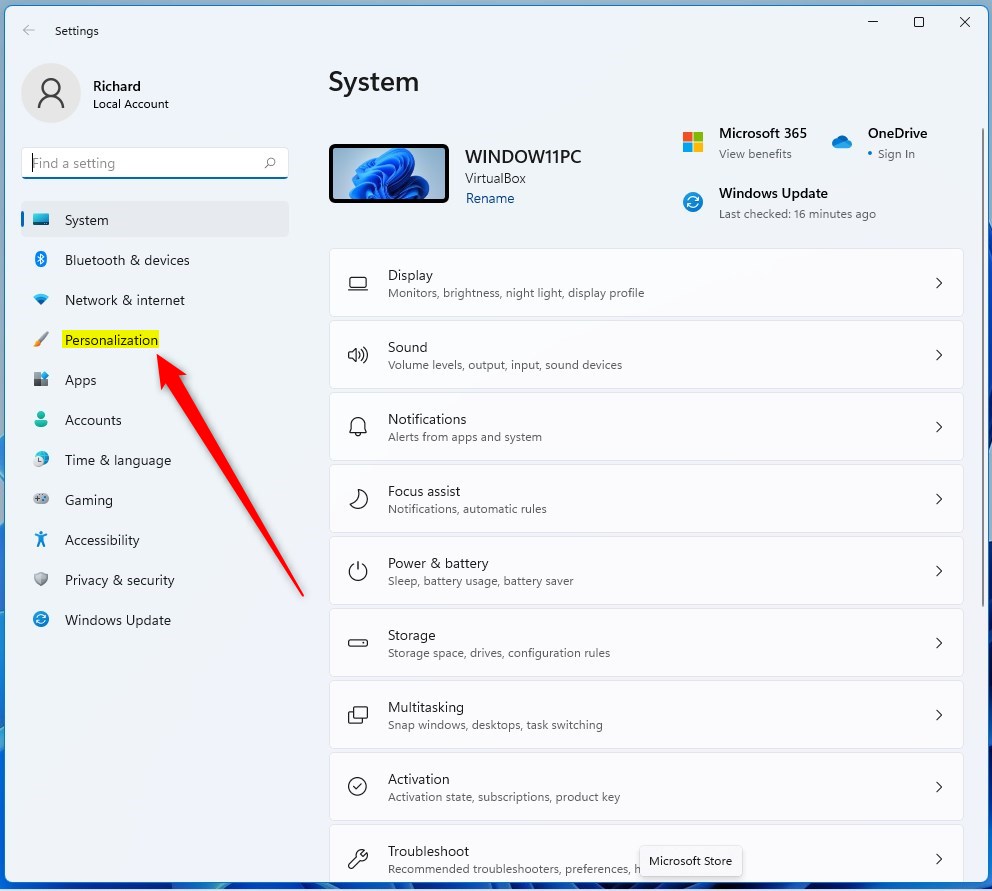
windows 11 personalization tile setting - Click the Taskbar tile on the right side. The taskbar settings page opens, with sections you can expand.
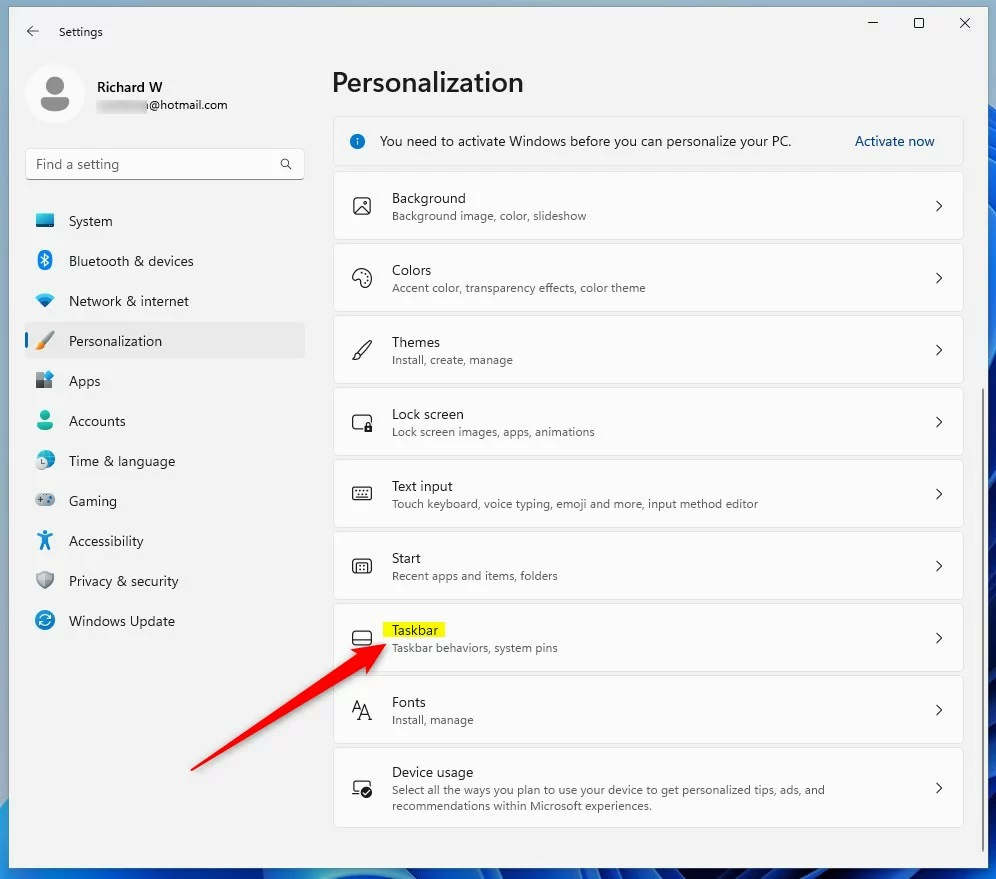
windows 11 personalization taskbar tile - Click Taskbar behaviors to show more options. The section expands and lists settings such as taskbar alignment and auto-hide.
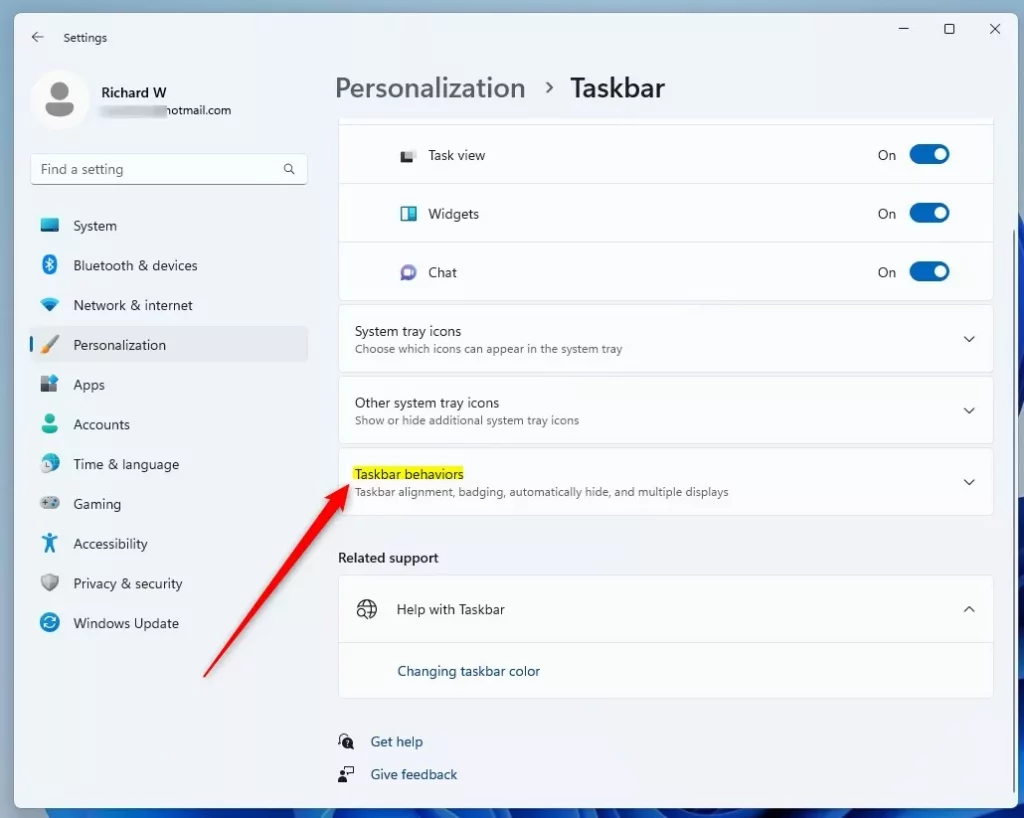
windows taskbar behaviors tile - Find the box labeled Optimize taskbar for touch interactions when this device is used as a tablet and tick it to turn the feature on. To turn it off later, come back to this page and clear the box. A restart is not normally needed. If the box is missing, your device may not report itself as a touch or convertible device, so use the Registry Editor method below.
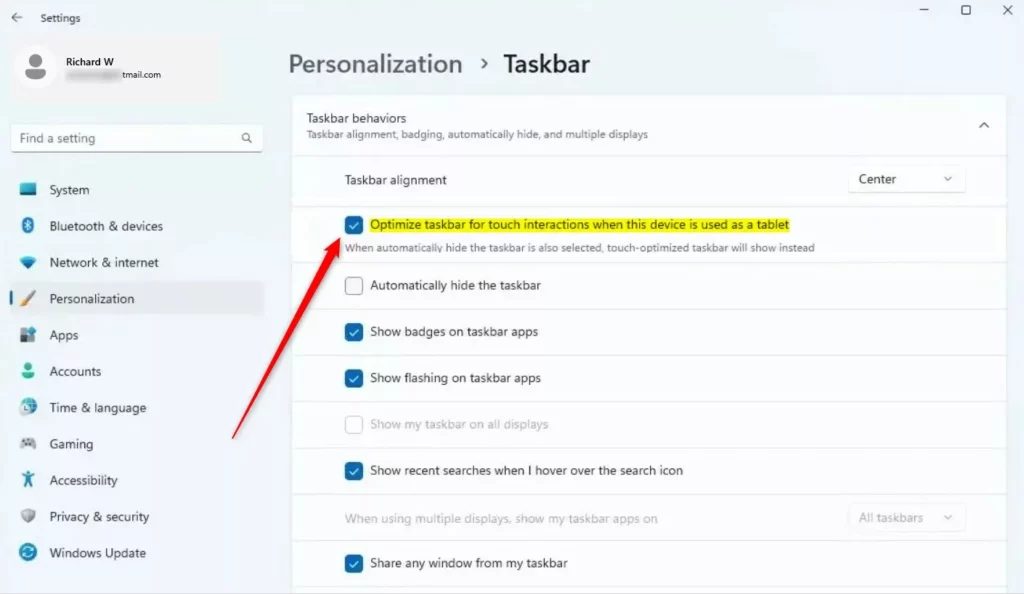
optimize taskbar for touch interactions when this device is used as a tablet updated
Understanding Automatic Mode Switching
Once the setting is on, Windows 11 switches to the tablet-optimized taskbar by itself. It reads how you are using the device, for example when you fold a convertible laptop’s keyboard back or detach it. You don’t have to do anything. If the layout doesn’t change, check that the box above is ticked and that your device really is in tablet use.
Enable via Registry Editor
If the option is missing from Settings, you can set it with the Registry Editor, a tool for advanced system settings. This method needs administrator access. It involves creating one DWORD value in the Windows registry. The Registry Editor is included in Home and Pro, so this works on both. Be careful, because a wrong change in the registry can cause system problems. Before you start, consider backing up the registry. In the Registry Editor, choose File Export and save a copy you can import again if something goes wrong.
- Open the Windows Registry by searching for “regedit” in the Start menu . Click Yes if User Account Control asks for permission. The Registry Editor window opens.
- Go to this path:
HKEY_CURRENT_USER\Software\Microsoft\Windows\CurrentVersion\Explorer\AdvancedUse the folder tree on the left, or paste the path into the address bar at the top of the window. The key’s current values appear in the right pane.
windows registry advanced key - Right-click in the empty space on the right side. Select New, then DWORD (32-bit) Value. A new entry appears in the list with its name ready to edit.
- Name this new item
TabletPostureTaskbar. Press Enter to confirm the name. If the value already exists, skip the previous step and edit the existing one. - Double-click
TabletPostureTaskbar. In the “Value data” box, enter1to turn the feature on, or0to turn it off. Then click OK. If the change doesn’t show right away, sign out and back in, or restart the PC.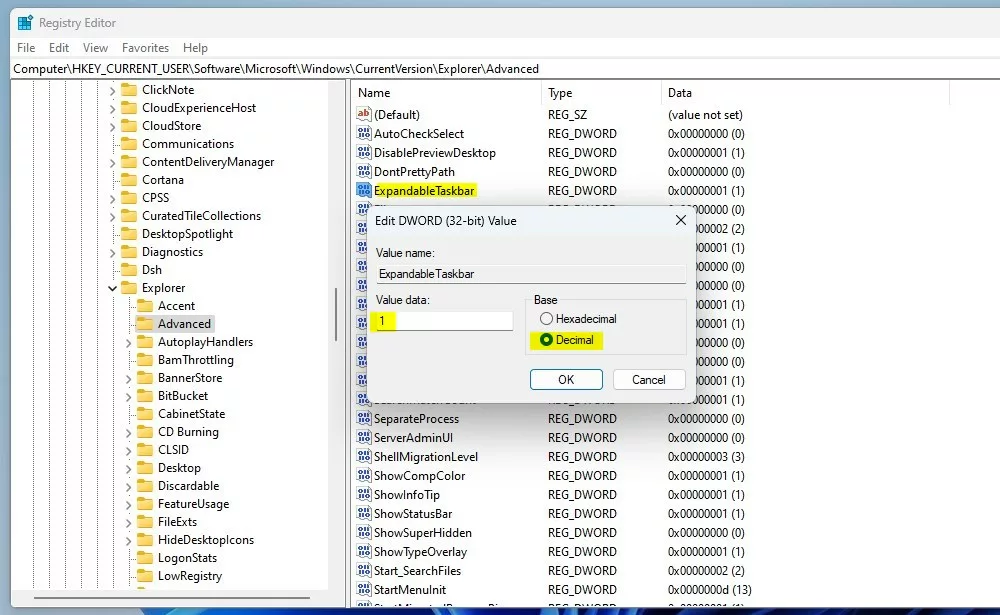
windows registry ExpandableTaskbar value data
Summary
The tablet-optimized taskbar is a helpful tool for touch users. It improves the Windows 11 touch experience by adding spacing to the taskbar icons. You can control it through the Settings app or the Registry Editor. To undo it, clear the box in Settings or set the registry value to its off setting. For more technical details, visit the official Microsoft Learn documentation.
Have a question about this guide?
Answered by AI from this guide. Good questions may be added to this page — please don't include personal details.
Did this guide fix your problem?

About the Author
Richard
Tech Writer, IT Professional
Richard is a writer at Geek Rewind who turns complex IT tasks into clear, step-by-step guides. He draws on years of hands-on experience in system administration and enterprise IT operations, focusing on Windows, Linux and WordPress: the problems people actually run into, and the fixes that work. His server and WordPress guides come from systems he runs himself. Richard builds and maintains the platform behind Geek Rewind, from its Ubuntu servers and Nginx configuration to its custom WordPress plugins. Many new tutorials start with readers' questions, and he's always glad to answer them in the comments.
No comments yet — be the first to share your thoughts!