How to Change Taskbar Size in Windows 11

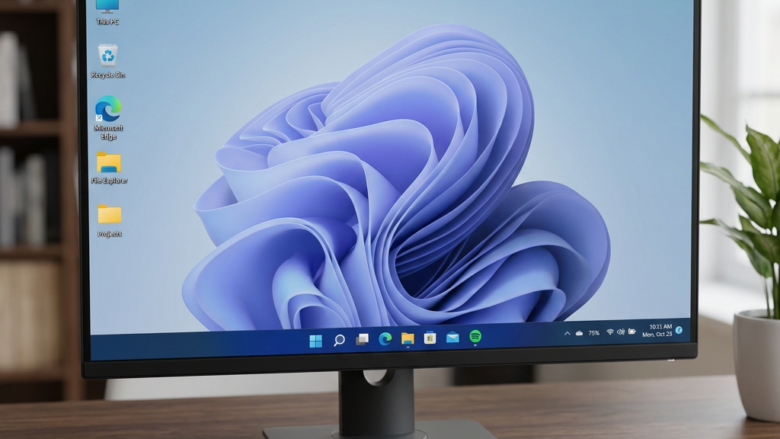
Adjust your taskbar size in Windows 11 to reclaim screen space. There are two ways to do it: the Settings app , and the Registry Editor for builds where the Settings option is missing.
Open Settings Personalization Taskbar Taskbar behaviors and select Small from the Taskbar size dropdown. The taskbar resizes immediately without requiring a restart.
Why Change Your Taskbar Size?
A smaller taskbar frees up workspace on smaller laptop screens or lets you see more apps at once. The gain is a few pixels of height, which is most noticeable on a 13 or 14 inch display, or when you work with two windows stacked vertically.
What Happens When You Make the Taskbar Smaller?
Choosing a smaller Windows 11 taskbar size makes taskbar icons smaller and reduces the overall taskbar height. This change frees up screen space for applications. The Start button , search bar , and clock on the taskbar still appear clear and work correctly.
The change is cosmetic and easy to reverse. It does not touch your pinned apps, your settings, or any files. Both methods below work on Windows 11 Home and Pro.
How to Change Your Taskbar Size in 🪟 Windows 11
Option 1Using the Settings App
You can change the Windows 11 taskbar size using the Settings app by adjusting a specific option. This method works well for most users who want a different taskbar size without complicated steps. Open Settings, go to Personalization, and look for Taskbar behavior to find the setting.
One caution before you start. The Taskbar size option has not appeared on every Windows 11 build. Microsoft has been adding it gradually, so you may not see it on your PC yet. If it is missing, installing the latest Windows updates may bring it. Otherwise, use the Registry Editor method further down.
- Open Settings. You can do this by pressing the Windows key + I on your keyboard. The Settings window opens with a list of categories on the left.
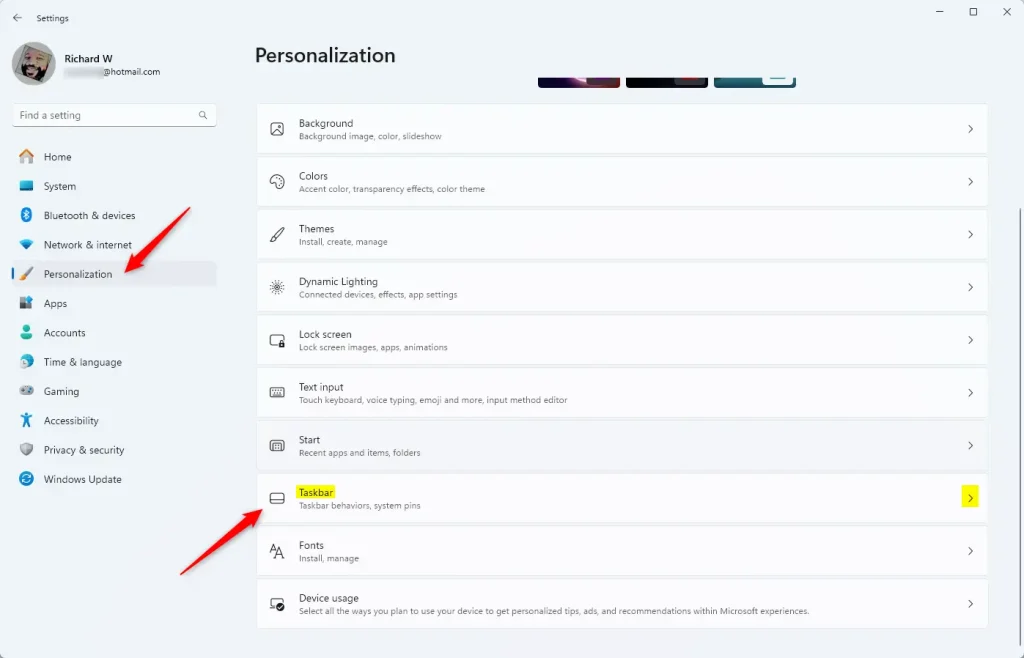
- On the left side, click on Personalization. Then, on the right side, click on Taskbar. You should now see the taskbar options: items to show, system tray icons, and a few collapsed sections below them.
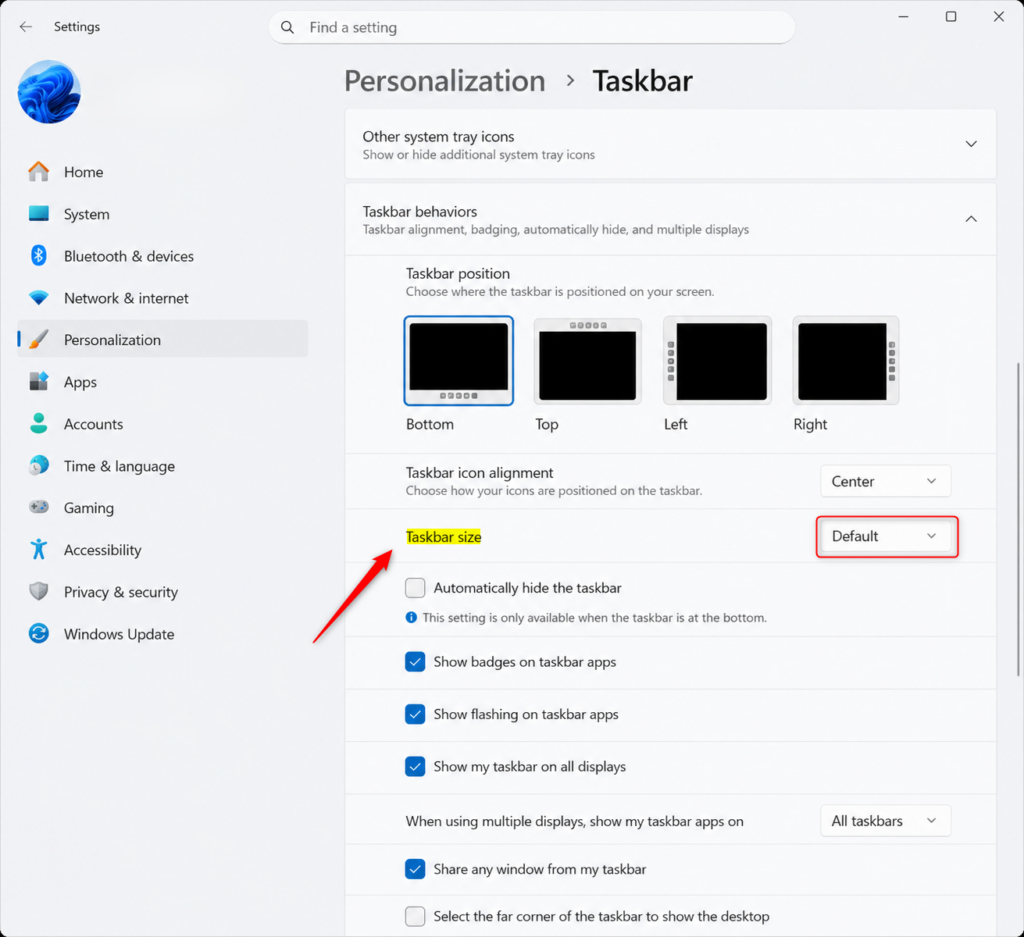
- Scroll down and click on Taskbar behaviors to open it up. The section expands to show options such as taskbar alignment and automatically hiding the taskbar.
- Look for the Taskbar size option. You can choose between Default (which is medium) or Small from the dropdown menu. The taskbar resizes right away, so you can see the result as soon as you pick one.
- Once you've made your choice, you can close the Settings window. No restart is needed.
To undo the change, return to the same dropdown and select Default.

For those comfortable with more advanced system tweaks, you can also adjust the taskbar size using the Registry Editor.
This method involves editing system settings, so you should understand the risks and know how to navigate the registry safely. You might need administrator privileges to make these changes.
Before you edit anything, create a restore point or export the key you are about to change. In Registry Editor, right-click the key and choose Export. If something goes wrong, double-click the saved file to put the old values back.
- First, you need to open the Registry Editor. Search for
regeditin the Start menu and open it. You might be asked for administrator permission. Click Yes if the prompt appears, and the Registry Editor window opens. - Navigate to the following key:
HKEY_CURRENT_USER\Software\Microsoft\Windows\CurrentVersion\Explorer\AdvancedYou can paste the path into the address bar at the top of the window. The right-hand pane then shows the values stored in that key. - In the right-hand pane, right-click on an empty space and select New DWORD (32-bit) Value. A new value appears in the list with its name highlighted, ready to type. If a value with the name below already exists, skip this step and the next one, and edit the existing value instead.
- Name the new value
TaskbarSi. Press Enter to confirm the name. - Double-click on the new
TaskbarSivalue. An Edit DWORD (32-bit) Value window opens with a Value data box. - To use the Default taskbar size, set the Value data to
0. - To use the Small taskbar size, set the Value data to
0. - Click OK and then close the Registry Editor.
- You may need to restart your computer or restart Windows Explorer for the changes to take effect. To restart Windows Explorer, press Ctrl + Shift + Esc to open Task Manager, find Windows Explorer under Processes, right-click it, and select Restart. The taskbar disappears for a moment and comes back at the new size.
To undo this, open the same value again and set the Value data back to the default number, then restart Windows Explorer. If the taskbar does not change after a restart, your Windows 11 build may ignore this value. In that case, the Settings method above, or a Windows update, is the better route.
Summary
Adjusting your Windows 11 taskbar size, whether to make it smaller or return to default, is achievable. For most people, the Settings app offers the most direct path. A smaller taskbar frees up valuable screen real estate by shrinking icons and the bar itself. If your build does not show the option in Settings, the registry method does the same job, as long as you back up the key first and restart Windows Explorer afterward.
Have a question about this guide?
Answered by AI from this guide. Good questions may be added to this page — please don't include personal details.
Did this guide fix your problem?

About the Author
Richard
Tech Writer, IT Professional
Richard is a writer at Geek Rewind who turns complex IT tasks into clear, step-by-step guides. He draws on years of hands-on experience in system administration and enterprise IT operations, focusing on Windows, Linux and WordPress: the problems people actually run into, and the fixes that work. His server and WordPress guides come from systems he runs himself. Richard builds and maintains the platform behind Geek Rewind, from its Ubuntu servers and Nginx configuration to its custom WordPress plugins. Many new tutorials start with readers' questions, and he's always glad to answer them in the comments.
No comments yet — be the first to share your thoughts!