How to Restore a Windows Backup on Windows 11

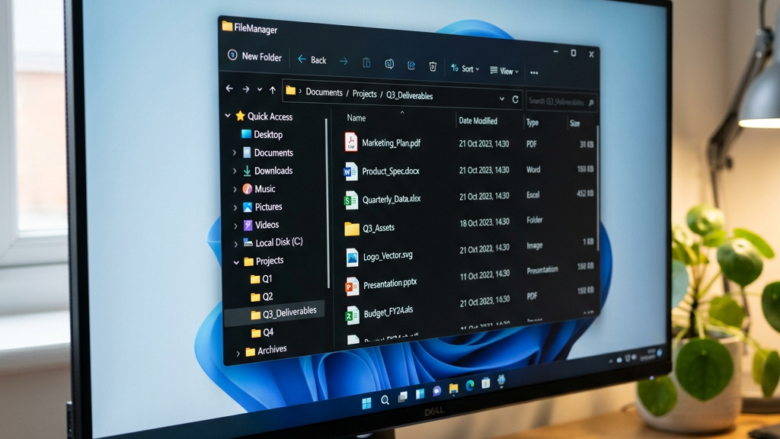
Restoring a Windows backup on Windows 11 brings your personal files, app settings, and saved passwords back to your computer after a system reset or hard drive crash. The built-in Windows Backup tool stores your desktop folders, installed apps, and Wi-Fi networks in the cloud using your Microsoft account.
You need an active internet connection and the same Microsoft account you used to create the original backup. Sign into Windows 11 with this account during a fresh setup. Windows then lets you pick which previous device backup to restore onto your current machine in a few clicks.
Before you start, check three things:
- You know the Microsoft account email and password, and you can reach any verification method on it (phone or authenticator app).
- The PC is plugged in and connected to Wi-Fi or Ethernet. A restore can take a while and uses a fair amount of data.
- The backup actually exists. If Windows Backup was never turned on for the old PC, there is nothing to restore, and Windows will offer a clean setup instead.
Sign into your Windows 11 PC with the same Microsoft account used for the backup; files and settings typically restore automatically. Check File Explorer and the Windows Backup app to confirm everything has been restored correctly.
Restoring Your Files and Settings on a New or Reset PC
People often restore a Windows backup after a fresh start to get a familiar computer setup back quickly. The process retrieves settings, files, and applications from a previous backup, which saves hours of manual reinstallation.
Windows Backup covers four areas: folders (such as Desktop, Documents, Pictures), apps, settings (including Wi-Fi networks and preferences), and credentials. It does not copy your whole drive. If you keep large files outside those folders, or on another drive, they are not part of this backup. Treat it as a convenience for getting set up again, not as a full system image.
Sign in with Your Microsoft Account
To restore a Windows backup, sign in with the exact same Microsoft account you used when you created the backup. Setting up a new computer or reinstalling Windows requires this account so Windows can find your files and settings and offer to put them back on your machine.
- Start the new setup (the first-run screens after a reset or a clean install) and work through the region and keyboard questions.
- Connect to the internet when asked. Without a connection, Windows cannot look up your backup.
- Sign in with your Microsoft account email and password at the account screen. Complete any verification prompt.
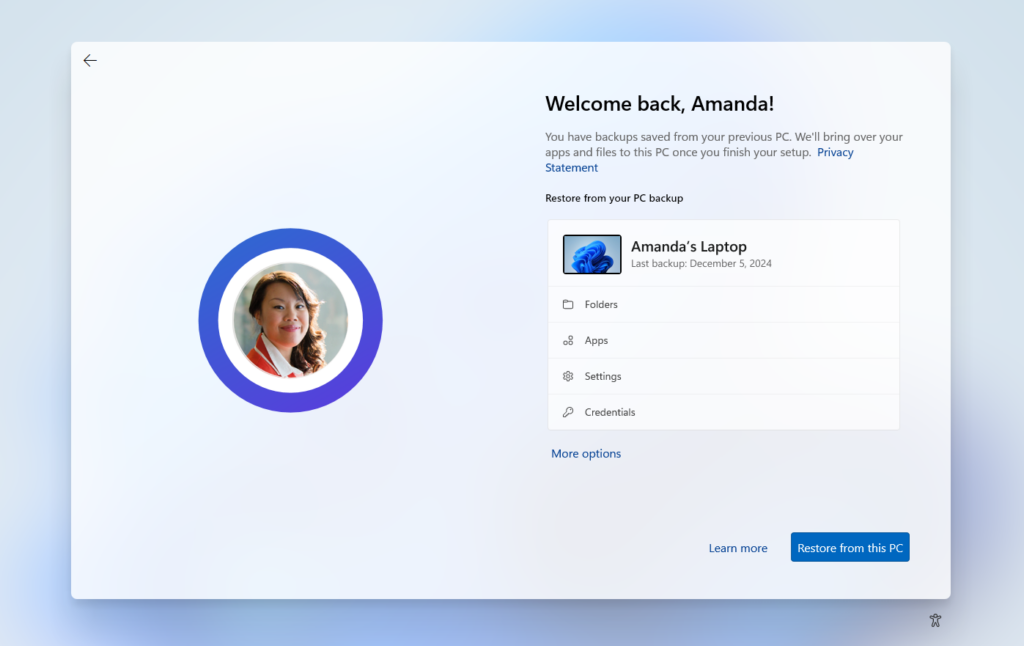
- Look for a screen that offers to restore from a previous backup. It lists your earlier devices by name. Select the device whose backup you want, then continue. If you would rather start clean, choose the option to set up as a new device instead.
The exact wording of these screens changes between Windows 11 builds, so yours may differ slightly. If you have several earlier backups, pick the one with the most recent date.
If you skip this step or sign in with a different account, the system will not find the backup automatically. On a PC that is already set up, you would need to reset it to see this screen again, so do not rush past it.
Windows Backup Starts (Usually Automatically)
Once that account is linked and you have chosen a backup, Windows Backup usually gets to work on its own. You do not need to start the restore by hand. Finish any remaining setup questions, such as a PIN, and let the desktop load.
Messages like "Windows is setting things up" or "Restoring your environment" will appear on screen. Leave the machine alone while it sorts out your files and settings. Do not turn it off or close the lid. If the screen stays on one message for a long time, give it several minutes before you worry, especially on slow connections.
Check Your Restored Items
Once you reach the desktop, check that your data came back. Windows may restart during or after the restore, so wait until it finishes.
- Open File Explorer and check your Desktop and Documents folders. You should see your files there. Some may take a little while to appear while they download.
- Open the Start menu and look at your apps. The system tries to reinstall your previous apps automatically.
- Open the apps you use most and sign in again where needed. Some programs ask for your login details once the process finishes.
Expect a bit of a wait here. The system works through your list of previously installed programs one at a time, so apps may show up over the next hour or so rather than all at once. Some apps, especially ones that did not come from the Microsoft Store, may need to be installed manually.
Check the Windows Backup App for Details
You can check the Windows Backup app for more detail on your restore progress.
- Click the Start menu and type Windows Backup.
- Select the app from the results. The Windows Backup window opens.
- Look at the restore or sync information in the app. Depending on your build, it shows what has been restored, what is still running, and any unresolved issues.
Items listed as finished are already back on the PC. Active tasks are still running, so wait for them. Anything listed as an issue is worth a second look, and often a restart or signing in again fixes it.
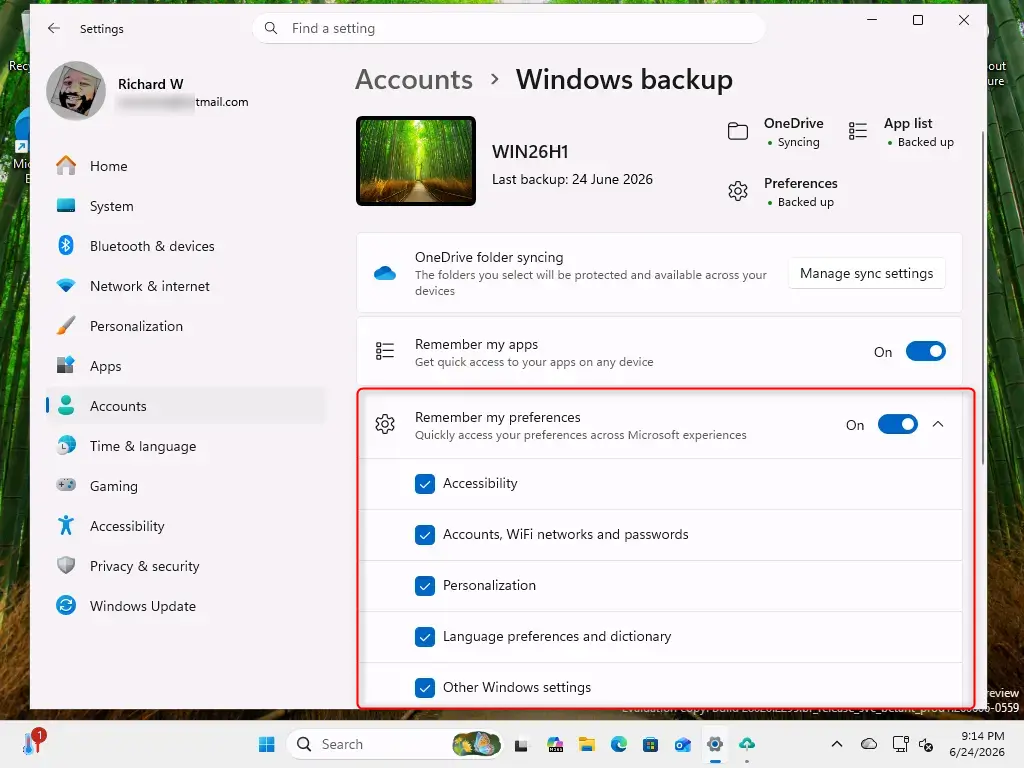
Practical Tip: If a folder is missing or a setting behaves oddly, go to Settings Accounts Windows backup on the restored PC. Turn the relevant backup options back on, such as folders, apps, or preferences. That keeps everything syncing from now on, so your next restore has current data.
Reference:
Summary
Restoring a Windows 11 backup comes down to signing in with the correct Microsoft account during setup, which typically triggers an automatic restore of files and settings. After that, wait for it to finish, check your folders and apps, and confirm your backup options are still on under Settings Accounts Windows backup
Have a question about this guide?
Answered by AI from this guide. Good questions may be added to this page — please don't include personal details.
Did this guide fix your problem?

About the Author
Richard
Tech Writer, IT Professional
Richard is a writer at Geek Rewind who turns complex IT tasks into clear, step-by-step guides. He draws on years of hands-on experience in system administration and enterprise IT operations, focusing on Windows, Linux and WordPress: the problems people actually run into, and the fixes that work. His server and WordPress guides come from systems he runs himself. Richard builds and maintains the platform behind Geek Rewind, from its Ubuntu servers and Nginx configuration to its custom WordPress plugins. Many new tutorials start with readers' questions, and he's always glad to answer them in the comments.
No comments yet — be the first to share your thoughts!