How to Disable OneDrive Personal Vault

OneDrive Personal Vault is a protected folder inside your Microsoft cloud storage. It asks for a fingerprint, face scan, PIN or a verification code each time you open it, and it is available on Windows 10 and 11. Disabling Personal Vault permanently deletes every file inside it. Before you start, unlock the vault and move anything you want to keep to a regular folder on your PC, such as Documents. Choose a folder outside the vault. Then check that the files open from their new location.
Sign in to your OneDrive account online, click Settings Options, select Personal Vault from the left menu, verify your identity with a security code, then click Disable twice to confirm. All files in the vault are permanently deleted, so move anything you want to keep to another folder first.
How to Disable Your OneDrive Personal Vault
You can’t turn off the vault from the OneDrive app on the Windows desktop. The option only exists in your online Microsoft account settings. The process has two parts. First, empty the vault. Then open the OneDrive website, sign in, go to the settings, and disable the vault there. Nothing needs to be installed, and you don’t need to restart Windows afterward.
- Open your OneDrive account page online in a web browser. Sign in with your Microsoft account if you are not already logged in. Use the same account that holds the vault. If you have both a work and a personal account, the work account has no Personal Vault. You should now see your OneDrive files in the browser.
- Click the Settings (gear) icon in the top right corner of the page and choose Options. The OneDrive options page opens, with a list of categories on the left.
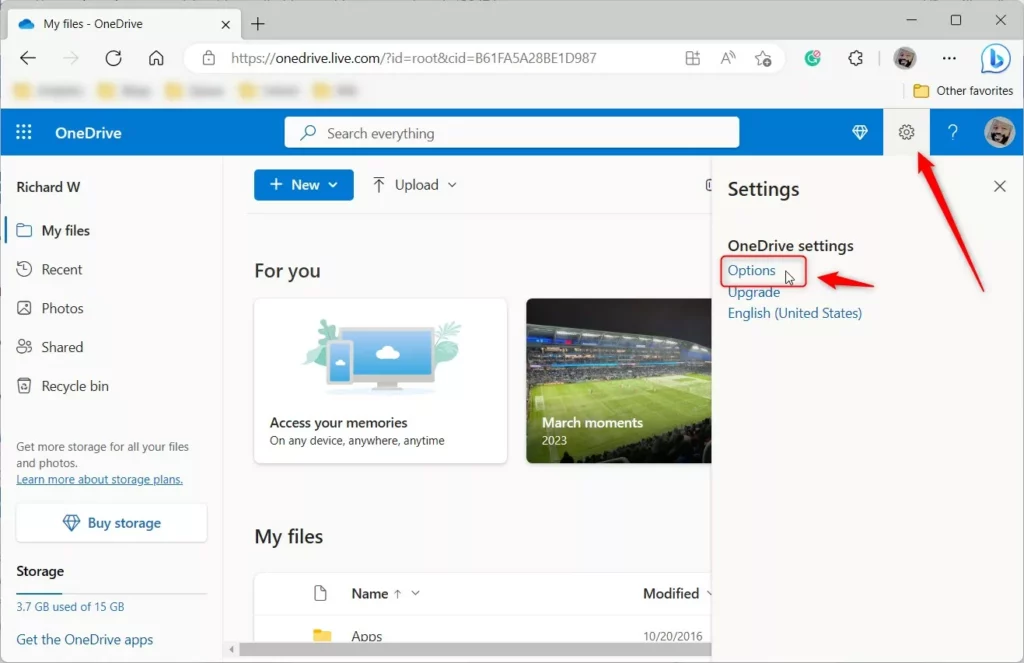
If you can’t find the gear icon, make sure you are on the OneDrive page and not another Microsoft site. In a narrow browser window the toolbar can look different, so try maximizing the window.
- Select Personal Vault from the menu on the left side of the screen. The page shows the current state of your vault and the options for it. If you don’t see this entry, the vault probably isn’t set up on this account, so there is nothing to disable.
- Click Verify your identity to prove it is really you. Microsoft will ask you to confirm with a security code sent to your email or phone, or with the method you have set up on the account. Complete the prompt that appears.
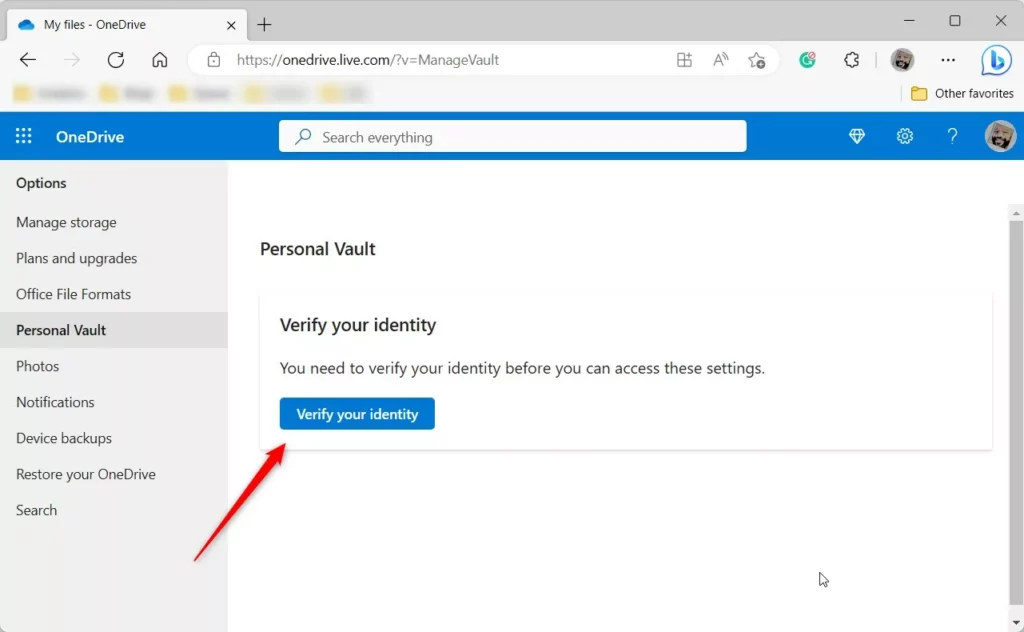
The verification step protects the vault from someone who happens to be using your signed-in browser. If the code doesn’t arrive, check your spam folder or choose another verification method on the prompt.
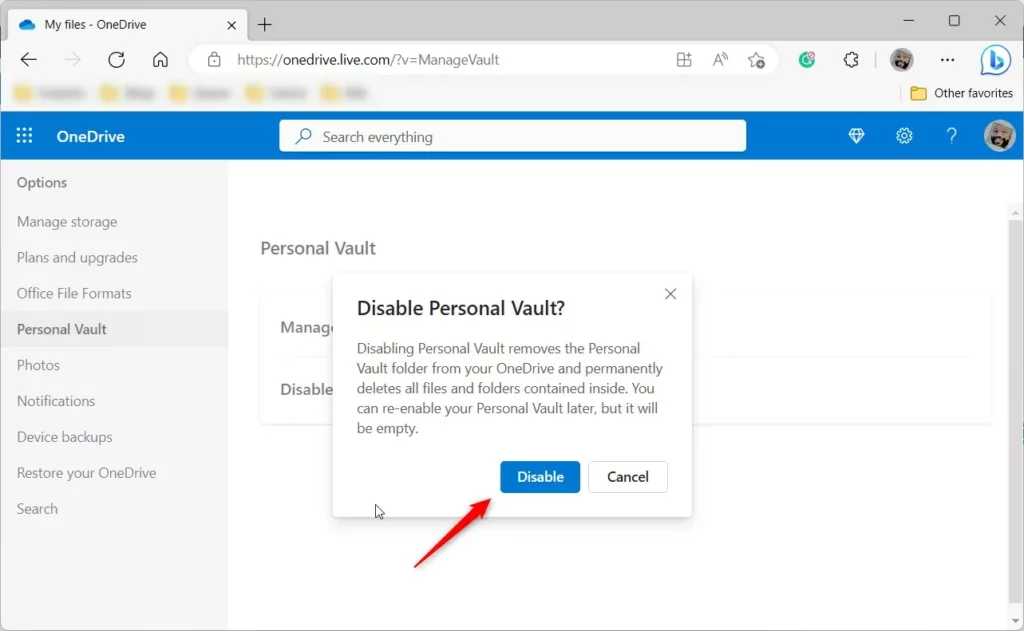
- Once your identity is confirmed, click the Disable link. The Personal Vault page now offers this option. A confirmation box should appear next.
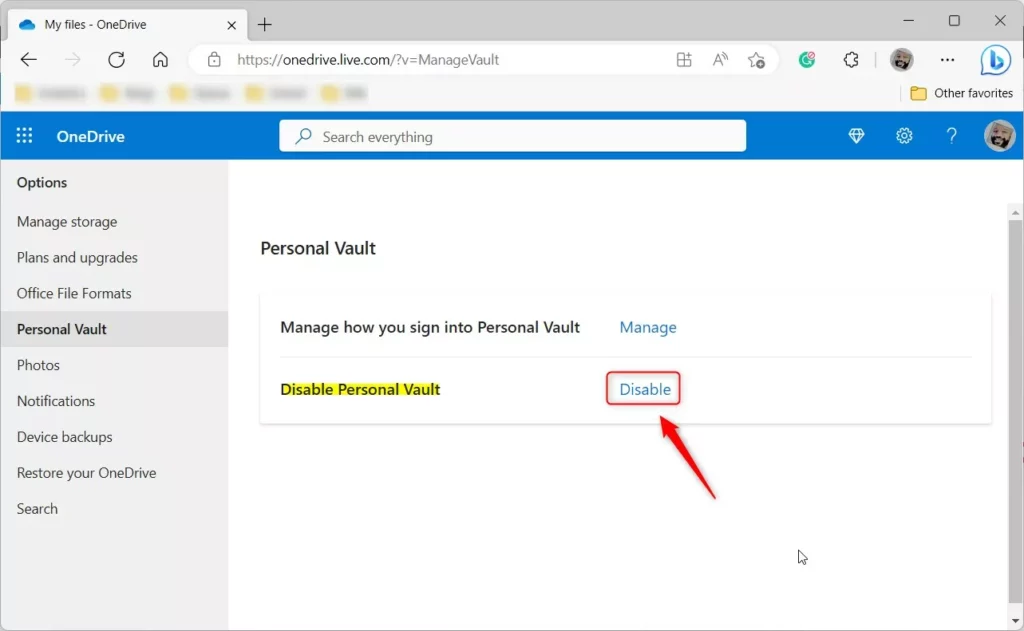
This is your last chance to cancel. If you aren't sure the vault is empty, close the box, move your files out, and come back.
- A final confirmation box will appear. Click Disable again to finish. The vault and anything still inside it are removed from your OneDrive.
The Personal Vault folder should disappear from your OneDrive folder list, both on the website and in File Explorer. The desktop app may take a short while to sync the change.
You're all done! If you want a vault again later, you can set up a new one from OneDrive. It starts empty, and the files deleted from the old vault do not come back.
Summary
Make sure to move anything you want to keep out first.
Have a question about this guide?
Answered by AI from this guide. Good questions may be added to this page — please don't include personal details.
Did this guide fix your problem?

About the Author
Richard
Tech Writer, IT Professional
Richard is a writer at Geek Rewind who turns complex IT tasks into clear, step-by-step guides. He draws on years of hands-on experience in system administration and enterprise IT operations, focusing on Windows, Linux and WordPress: the problems people actually run into, and the fixes that work. His server and WordPress guides come from systems he runs himself. Richard builds and maintains the platform behind Geek Rewind, from its Ubuntu servers and Nginx configuration to its custom WordPress plugins. Many new tutorials start with readers' questions, and he's always glad to answer them in the comments.
I have no disable button.
I tried to disable Personal Vault but don’t get the same screens you show in your instructions – I get a Manage button, click on that and
I don’t get anywhere to Disable or delete the Vault – I get a Manage button, but it takes me to a page for Security settings- no option for Disable or delete
How do I do this as I have multiple issues with files that will not upload. Also – is there a way to empty all the files waiting to upload but cannot?