How to Clear Personal Inking and Typing Dictionary Data in Windows 11 Privacy Settings

Personal inking and typing dictionary data in Windows 11 is a custom word list your PC builds to help suggestions appear faster as you write. Windows saves your common words, slang, and names from your keyboard and stylus pen so it can guess what you want to type next.
Clearing this data deletes the history your computer stores about your writing habits. You can wipe the list at any time from the privacy settings. Doing so protects your personal info and stops Windows from keeping a record of your vocabulary. Suggestions may feel less accurate for a while afterward, because Windows starts learning your words again from scratch.
Open Settings , go to Privacy & security, select Inking & typing personalization, click Custom dictionary, then click Clear personal dictionary. Your typing and handwriting history deletes immediately and Windows starts learning your words again from scratch.
How to Clear Your Personal Inking and Typing Dictionary in 🪟 Windows 11
Windows 11 saves the words you type and write by hand to help with auto-complete suggestions. The overall path is short:
- Open the Settings app.
- Go to Privacy & security.
- Choose Inking & typing personalization.
- Use the button on that page to clear your personal dictionary.
The steps are the same on Windows 11 Home and Pro. You don’t need an administrator account, because this setting applies to your own user profile. The exact wording on the page can change slightly between Windows 11 builds, so look for the option that clears or resets your custom dictionary if the label differs from what you expect.
The next section covers the first step in detail, using Windows 11 version 23H2.
To begin clearing your personal inking and typing dictionary data in Windows 11 version 23H2, open Settings first:
- Click the Start button on your taskbar. You should see the Start menu open.
- Select the Settings app icon, which looks like a small gear. If you don't see it in the pinned apps, click All apps and find Settings in the list, or type "Settings" into the search box at the top of the Start menu.
- Wait for the window to open. You should see the Settings home page, with a category list down the left side.
As a shortcut, you can also press the Windows key and I together to open it directly.
No restart is needed after clearing the data. Clearing cannot be undone, but Windows will simply begin building a new word list as you keep typing, unless you turn the feature off.

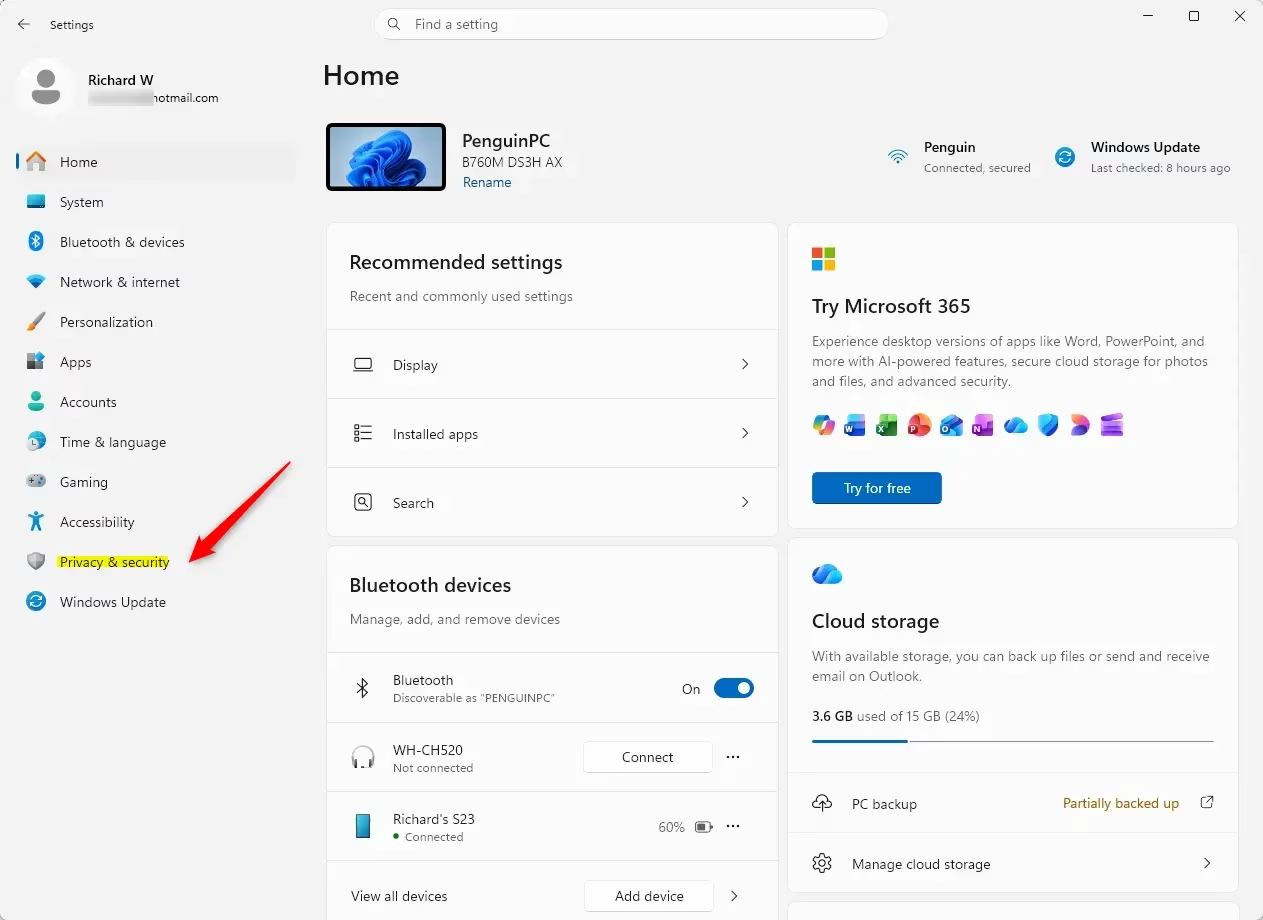
In the Settings window, click on Privacy & security in the left-hand menu.
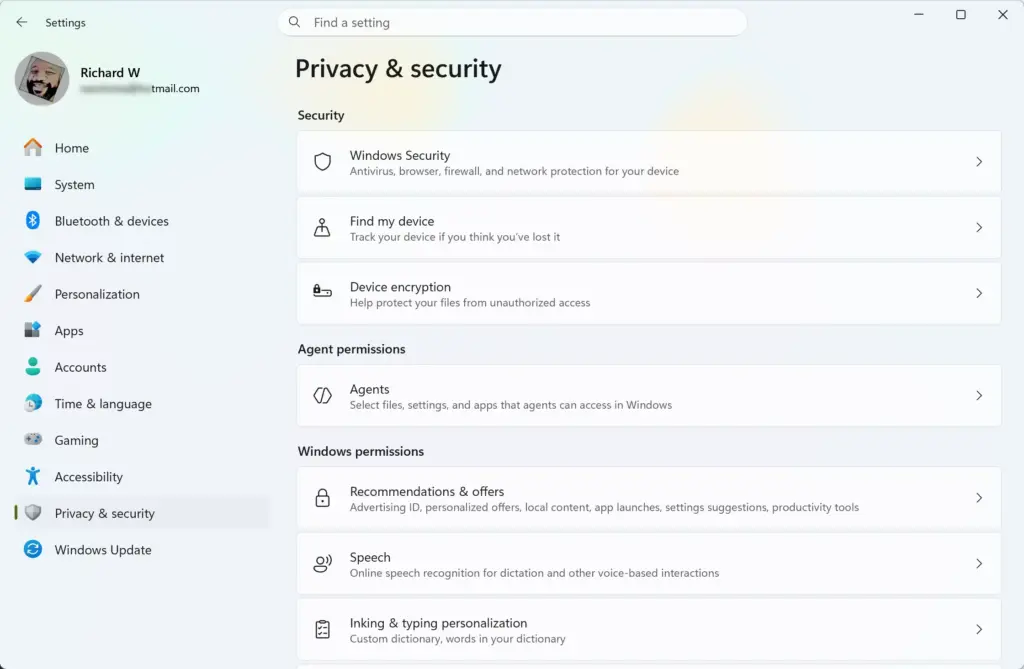
Scroll down the right side of the screen and click on Inking & typing personalization.
In your Windows 11 privacy settings, you should look for the option labeled Custom dictionary and click on that button to open your personal word list. Opening your personal word list lets you review and delete the specific words that Windows 11 has saved from your typing and handwriting over time, which protects your privacy by erasing stored personal habits.
Click the button that says Clear personal dictionary to erase all the words and phrases your computer has saved over time.
Once you finish these steps, your computer instantly deletes your saved typing and handwriting history. The suggestion tool will start over, learning only from the words you type from now on.
Turning Off Inking and Typing Data Collection Completely
Turning off inking and typing data collection in Windows 11 stops your computer from learning new words as you type or write. You can disable this feature by opening Settings, going to Privacy & security, selecting Inking and typing personalization, and switching the main toggle to the Off position.
Open the Settings app from your Start menu.

Click on Privacy & security on the left side.
Select Inking & typing personalization again.
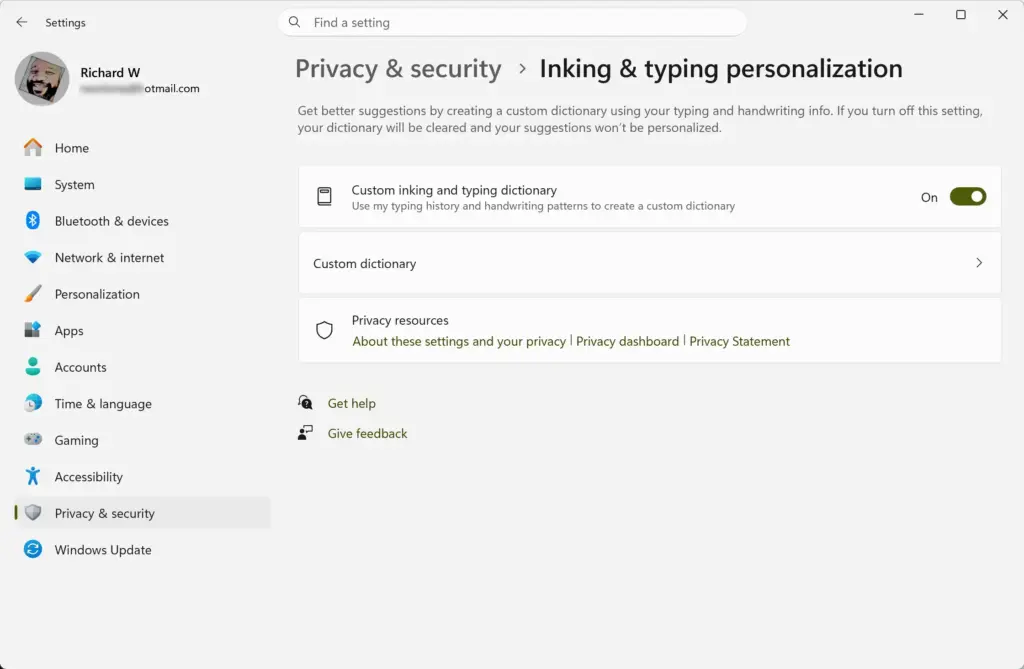
At the top of the page, find the main toggle switch under the heading Custom dictionary or Inking & typing personalization.
Click the switch to turn it from On to Off.
By turning this setting off, you stop Windows from sending your typing samples to the cloud and stop the system from building a personal dictionary on your device. Your computer will use only its built-in standard dictionary instead.
Unique Expert Tips: Managing Hidden Diagnostic Data in 🪟 Windows 11
Managing hidden diagnostic data in Windows 11 ensures your typing habits are fully removed from the operating system beyond the standard privacy menu. You can view and delete this extra information by opening Settings, going to Privacy & security, selecting Diagnostics & feedback, and viewing your diagnostic data.
To make sure your typing habits are truly gone, you should also check your diagnostic data settings in Windows 11. The Windows operating system collects optional diagnostic data that can include small parts of what you type to help Microsoft improve products. While this diagnostic data is completely anonymous, privacy-focused people often prefer to turn off optional diagnostic data completely.
Open your Windows Settings app.
Click on Privacy & security.
Select Diagnostics & feedback from the list.
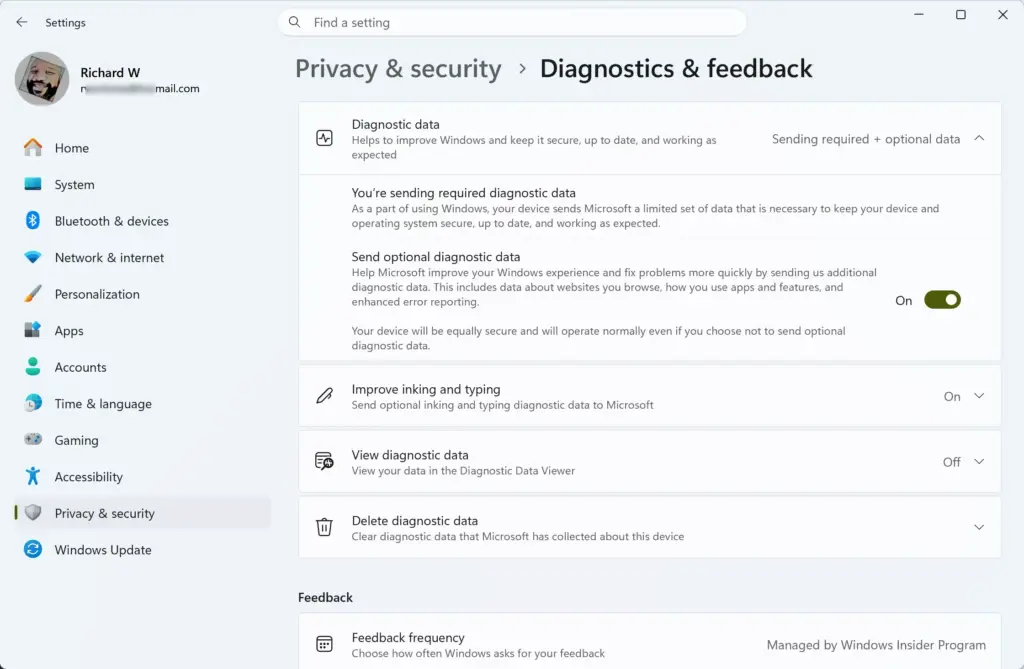
Under the diagnostic data section, choose Required diagnostic data instead of optional data. This limits the information your computer shares with Microsoft to only what is needed for the system to run safely.
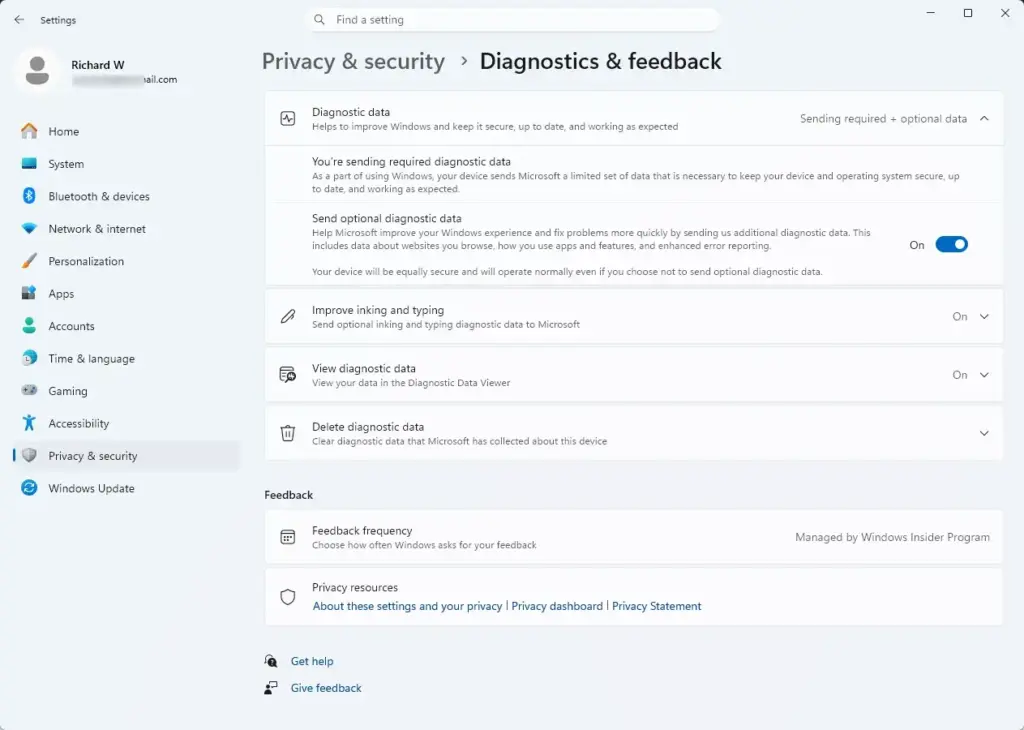
Scroll down to the section labeled View diagnostic data and check if there are options to delete your stored diagnostic logs. Click the delete button if you see it.
Taking this extra step makes sure that no leftover typing samples or text snippets stay in Microsoft's diagnostic logs, giving you total peace of mind.
Summary
Clearing personal inking and typing dictionary data protects your privacy by erasing the custom words and handwriting habits your computer has saved over time. You can keep your private writing habits off your device by regularly checking your Windows 11 privacy options and turning off data collection when you do not need it.
Have a question about this guide?
Answered by AI from this guide. Good questions may be added to this page — please don't include personal details.
Did this guide fix your problem?

About the Author
Richard
Tech Writer, IT Professional
Richard is a writer at Geek Rewind who turns complex IT tasks into clear, step-by-step guides. He draws on years of hands-on experience in system administration and enterprise IT operations, focusing on Windows, Linux and WordPress: the problems people actually run into, and the fixes that work. His server and WordPress guides come from systems he runs himself. Richard builds and maintains the platform behind Geek Rewind, from its Ubuntu servers and Nginx configuration to its custom WordPress plugins. Many new tutorials start with readers' questions, and he's always glad to answer them in the comments.
No comments yet — be the first to share your thoughts!