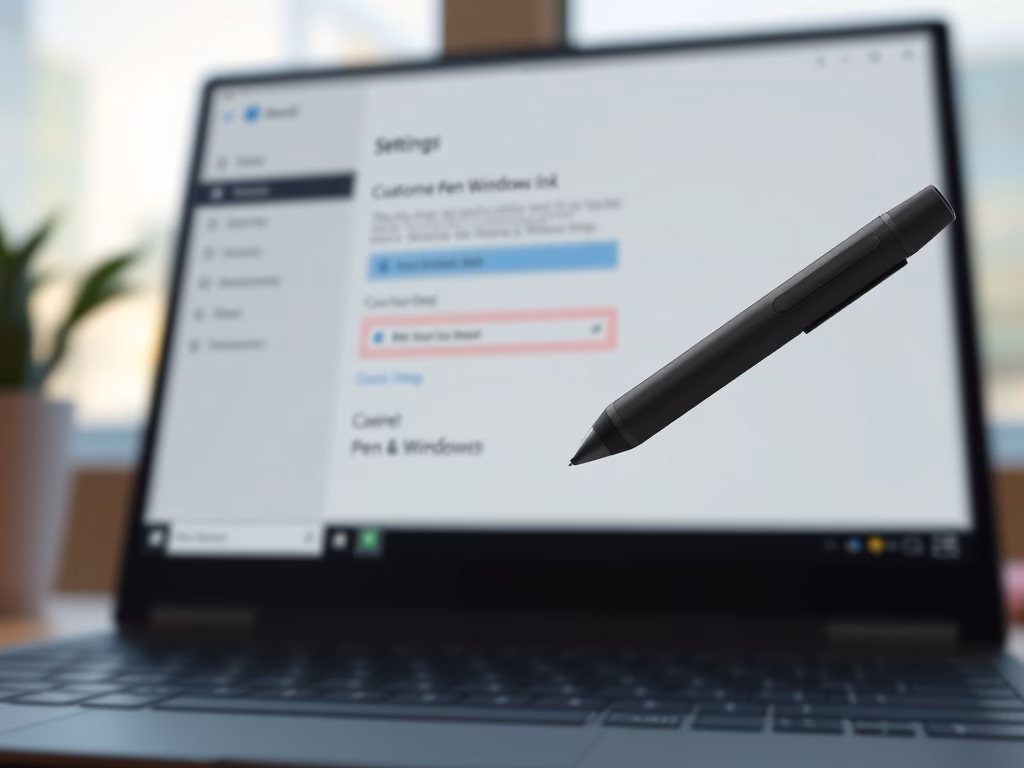
How to Change what Pen Shortcut Button Does in Windows 11
You can customize your Windows 11 pen’s shortcut button to do all sorts of useful things, like launching your favorite apps or taking screenshots with one click.
This option works for digital pens that let you change what the buttons do, like many Surface Pen models. It’s a great way to make your pen work perfectly with how you get things done.
For example, you might set your pen button to instantly open OneNote or activate Windows Ink Workspace.
To do this, you typically access pen settings through the Windows 11 Settings app. You’ll usually find these settings under ‘Bluetooth & devices,’ then ‘Pen & Windows Ink.’
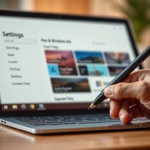
Go to Settings > Bluetooth & devices > Pen & Windows Ink. Scroll down and click “Choose what your shortcut button does” to assign actions for single-click, double-click, and press-and-hold. Your pen button functionality will update immediately.
Step 1Make Sure Your Pen is Connected via Bluetooth
How to Turn Bluetooth On or Off in Windows 11
How to Link Your Android Mobile Device to Your Microsoft Account on Windows 11
Step 2Open Windows Settings
Opening the Windows Settings app is the first step to changing your pen button functions in Windows 11.
- Click the Start menu (the Windows icon in the bottom-left corner) and select Settings.
- Or press
Windows key + Ion your keyboard to open Settings right away.
More on resetting or opening settings here: How to Reset the Settings App in Windows 11
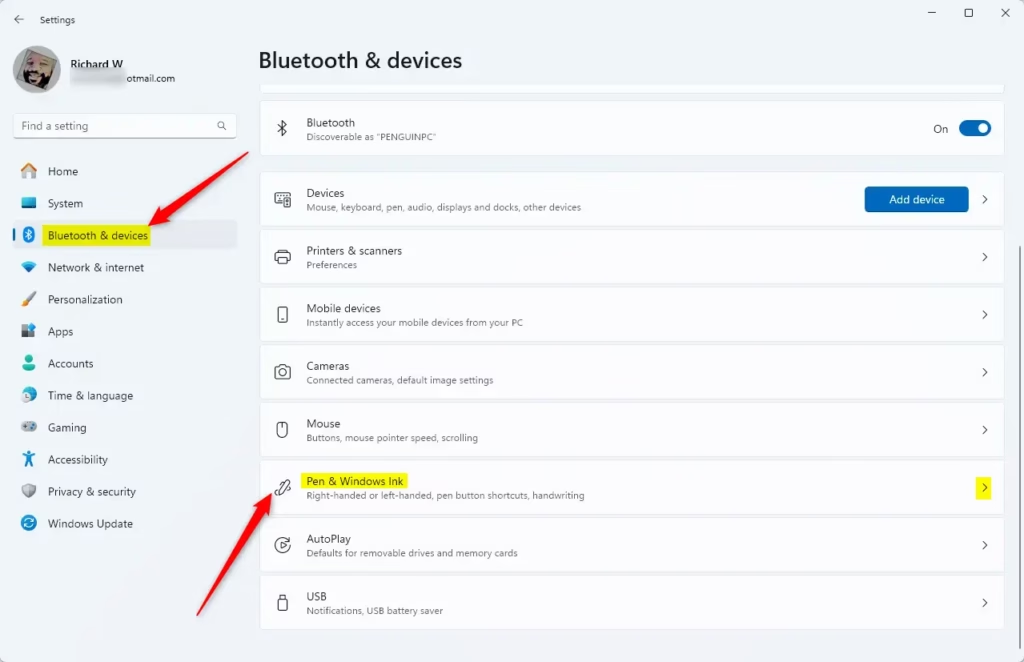
Step 3Find the Pen Settings
In the Settings window, do this:
- From the menu on the left, click Bluetooth & devices.
- On the right side, find and click on Pen & Windows Ink.
Step 4Change What the Pen Shortcut Button Does
You can easily change what your pen shortcut button does in Windows 11 by choosing actions for single-clicks, double-clicks, or press-and-hold.
You can set different actions for:
- Single-click – What happens when you press the button once.
- Double-click – What happens when you press the button twice quickly.
- Press and hold – What happens when you press and hold the button.
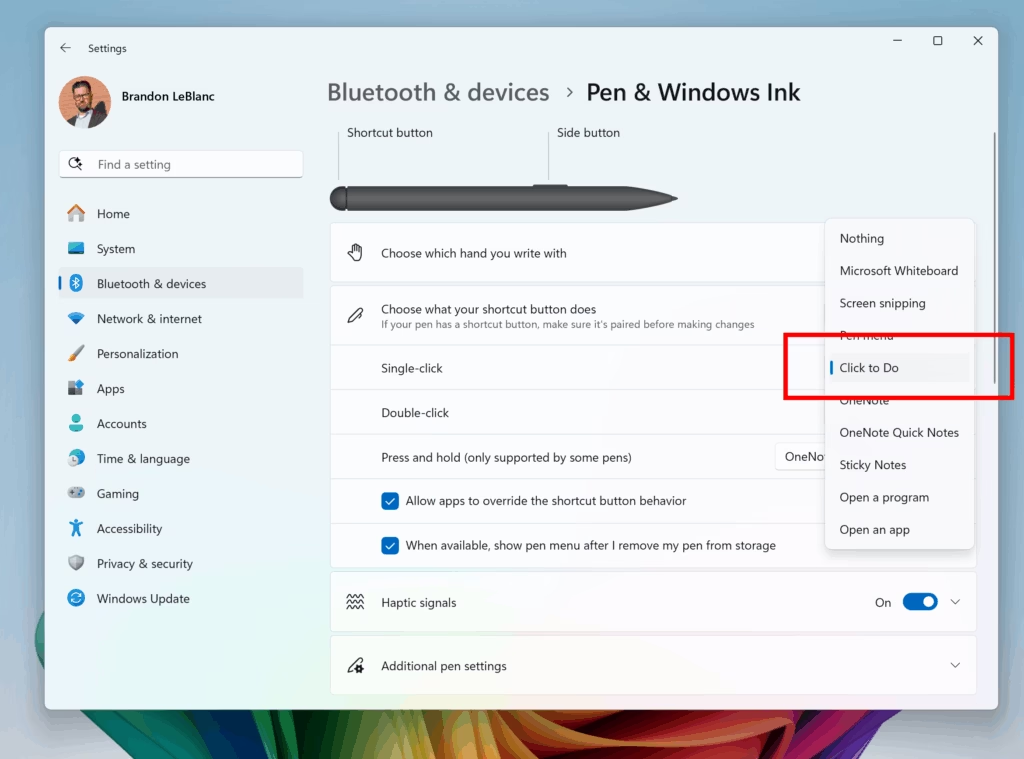
Pick your favorite actions from the list for each type of press.
Step 5Close Settings
Once you’re done choosing your settings, close the Settings app. Your pen button will now work exactly how you’ve set it up!
Summary
Changing your pen button functions in Windows 11 is easy and makes your pen more useful, requiring Bluetooth connection and using the Settings app for custom actions.
- Bluetooth: Make sure your pen is connected to your PC through Bluetooth.
- Settings: Use the Windows Settings app to customize your pen button.
- Options: Choose different actions for single-click, double-click, and press-and-hold.
- Quick Access: Find these settings under Bluetooth & devices > Pen & Windows Ink.
- Better Workflow: Customizing helps you get more done with less effort.
Enjoy using your pen your way!
How to use pen tool in 🪟 Windows 11?
The Pen Menu in Windows 11 is a handy tool that helps you quickly open your favorite apps, like OneNote or the Snipping Tool. You can also turn it on to appear on your taskbar by looking for ‘Pen Menu’ under ‘ System tray icons’ and enabling it.
What does the button on the Microsoft Pen do?
The button on your Microsoft Pen has different functions depending on how you press it. Typically, a single press of the top button opens Microsoft Whiteboard, while a double-press takes a screenshot, and holding the side button acts like a right-click.
How to customize Surface Pen buttons?
App double click to open sticky notes. And then press and hold to take a screen snap. I chose these because they’re some of my most commonly used apps.
Was this guide helpful?

About the Author
Richard
Tech Writer, IT Professional
Richard, a writer for Geek Rewind, is a tech enthusiast who loves breaking down complex IT topics into simple, easy-to-understand ideas. With years of hands-on experience in system administration and enterprise IT operations, he’s developed a knack for offering practical tips and solutions. Richard aims to make technology more accessible and actionable. He's deeply committed to the Geek Rewind community, always ready to answer questions and engage in discussions.


No comments yet — be the first to share your thoughts!