How to Change Primary Mouse Button in Windows 11

You can change your primary mouse button in Windows 11 by adjusting a single setting in the mouse configuration panel.
Your primary mouse button is the one Windows uses for most actions – usually the left click, which you use to select and interact with things.
In Windows 11, you can switch this primary function from the left button to the right button in less than a minute.
Windows 11 allows users to change the primary mouse button. This primary mouse button controls the main clicking action. Changing the primary mouse button makes computers easier for left-handed people to use, aligning the main clicking action with the user's dominant hand.
You can change your primary mouse button in Windows 11 through Settings or Control Panel. In Settings, navigate to Bluetooth & devices, then Mouse, and select your preferred button. Alternatively, open Control Panel, click Mouse, go to the Buttons tab, and check the “Switch primary and secondary buttons” box.
Option One
Change Primary Mouse Button in Settings
- Open Settings by pressing ⊞ Win+I on your keyboard.
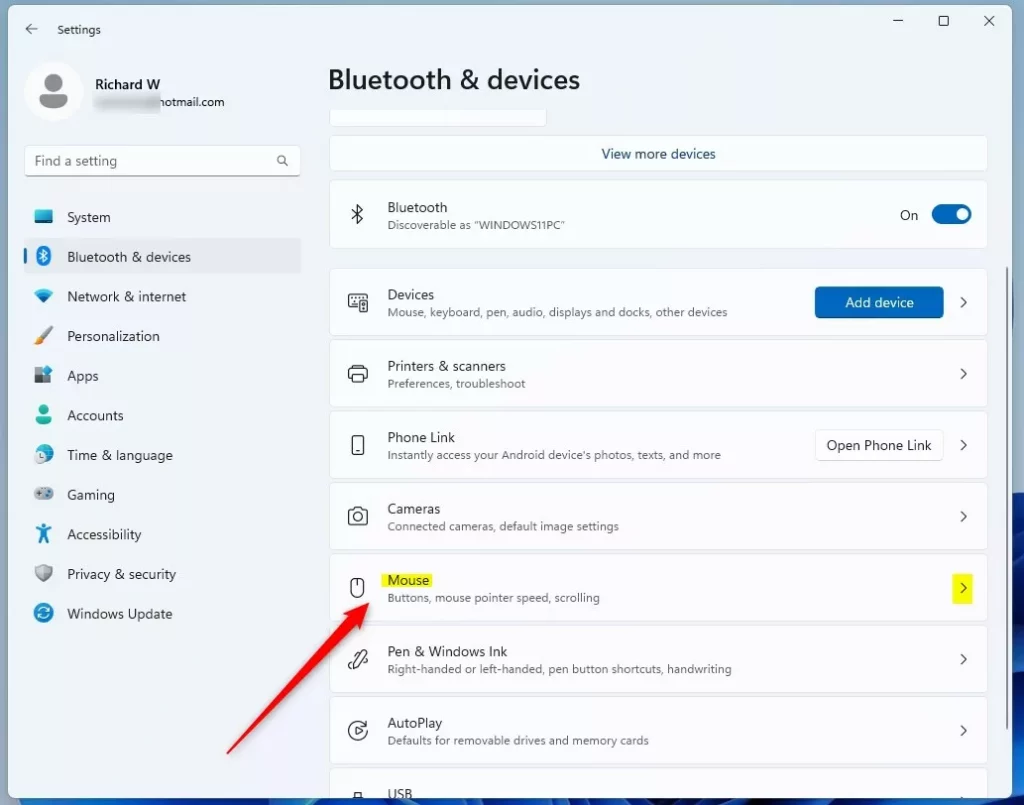
- Click on Bluetooth & devices on the left side. Then click on Mouse on the right side. (see screenshot below)
You can easily change your primary mouse button in Windows 11 using the Settings app, which is the simplest method for most users.
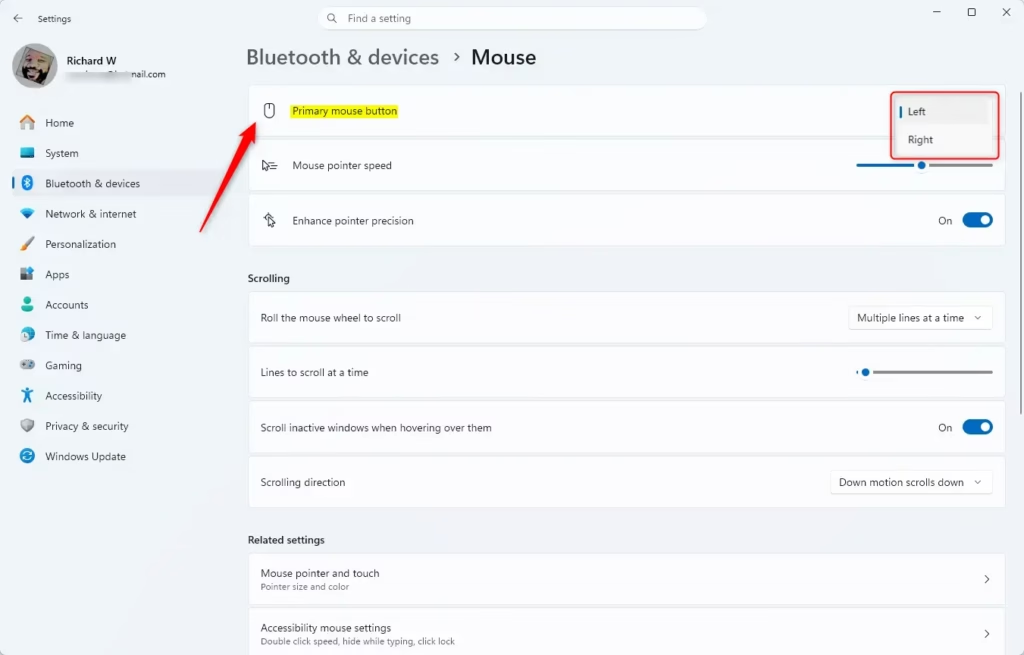
- Find the Primary mouse button drop-down menu. Choose either Left (this is the default) or Right. (see screenshot below)
- You can now close the Settings window.
Option Two
Change Primary Mouse Button in Control Panel
If you’re used to the older Control Panel, you can also change your primary mouse button there by checking or unchecking a simple box.- Open Control Panel and switch to icon view. Click on the Mouse icon.
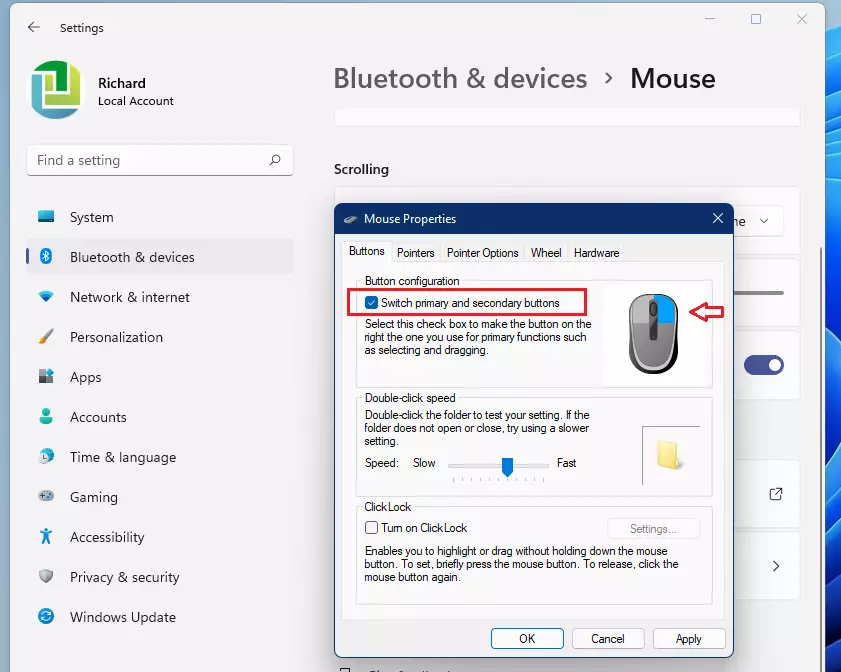
- Go to the Buttons tab. You will see a checkbox for Switch primary and secondary buttons. Check this box to use your right button as primary. Leave it unchecked to use your left button as primary (the default). (see screenshot below)
- Click OK to save your changes.
Option Three
Change Primary Mouse Button Using Registry
⚠️ Admin privileges required
Change Primary Mouse Button to Left
This is the default setting.
reg add "HKEY_CURRENT_USERControl PanelMouse" /v SwapMouseButtons /t REG_SZ /d 0 /f
Change Primary Mouse Button to Right
reg add "HKEY_CURRENT_USERControl PanelMouse" /v SwapMouseButtons /t REG_SZ /d 1 /f
Summary
Changing your primary mouse button in Windows 11 is simple, with the Settings app offering the most straightforward method for most users.
Can a mouse button be changed from left to right?
Open the Control Panel. Click Hardware and Sound. Click Mouse. In the Mouse Properties window, click the Buttons tab and then check the box next to ‘Switch primary and secondary buttons’.
Was this guide helpful?
0% of readers found this helpful (1 votes)

About the Author
Richard
Tech Writer, IT Professional
Richard, a writer for Geek Rewind, is a tech enthusiast who loves breaking down complex IT topics into simple, easy-to-understand ideas. With years of hands-on experience in system administration and enterprise IT operations, he’s developed a knack for offering practical tips and solutions. Richard aims to make technology more accessible and actionable. He's deeply committed to the Geek Rewind community, always ready to answer questions and engage in discussions.


No comments yet — be the first to share your thoughts!