How to Change Display Language in Windows 11
You change your Windows 11 display language through the Settings app, selecting your preferred language from the installed options.
This process updates all Windows menus, dialog boxes, and system messages to your chosen language, making your PC easier to use and understand.
For example, switching from English to French involves adding the French language pack and then designating it as your primary display language. This modification usually requires you to sign out and back in, or restart your computer, for it to take full effect.
Go to Settings, then Time & language, and finally Language & region. Add your desired language and select “Set as my Windows display language” before installing it. You will need to sign out and back in for the change to take effect.
Steps to Change the Display Language in 🪟 Windows 11
Step 1 Open Settings
Click the Start button (the Windows icon at the bottom left). Then click Settings.
Or use this quick shortcut: Press the Windows key + I on your keyboard to open Settings immediately.
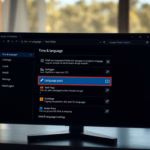
Step 2Go to Language Settings
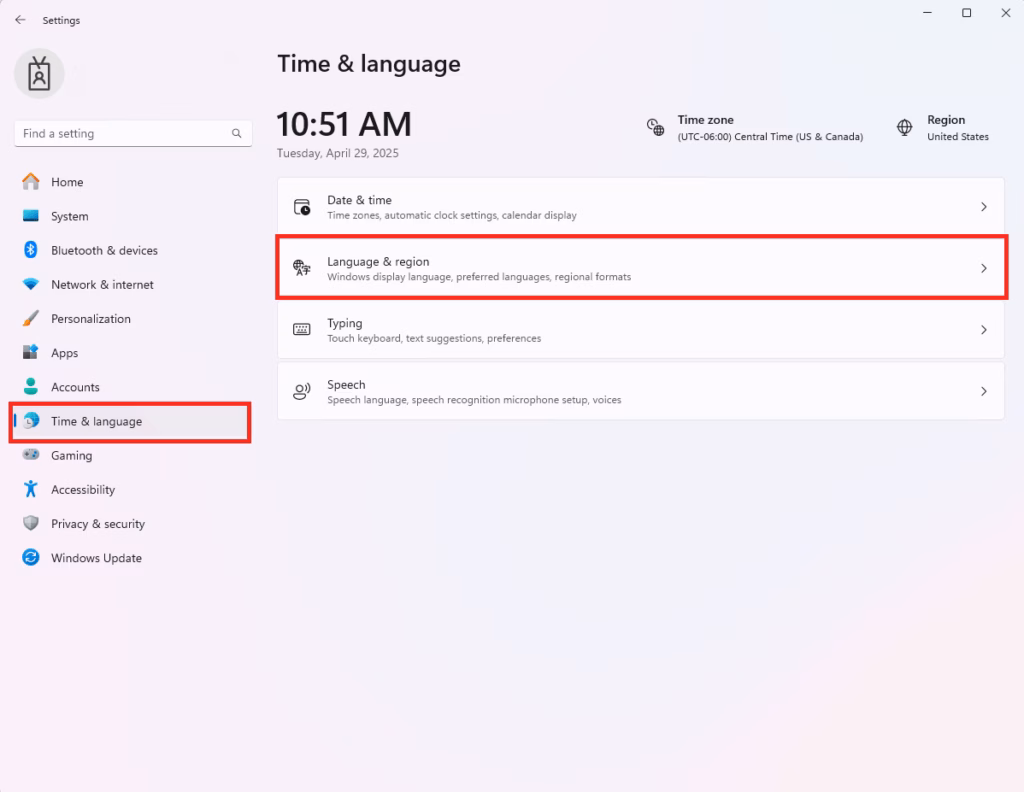
In the Settings window, click Time & language on the left side.
Then click Language & region on the right side.
Step 3Add a New Language
Click the Add a language button.
Step 4Pick Your Language
Find the language you want in the list. You can type in the search box to find it faster.
Then click Next.

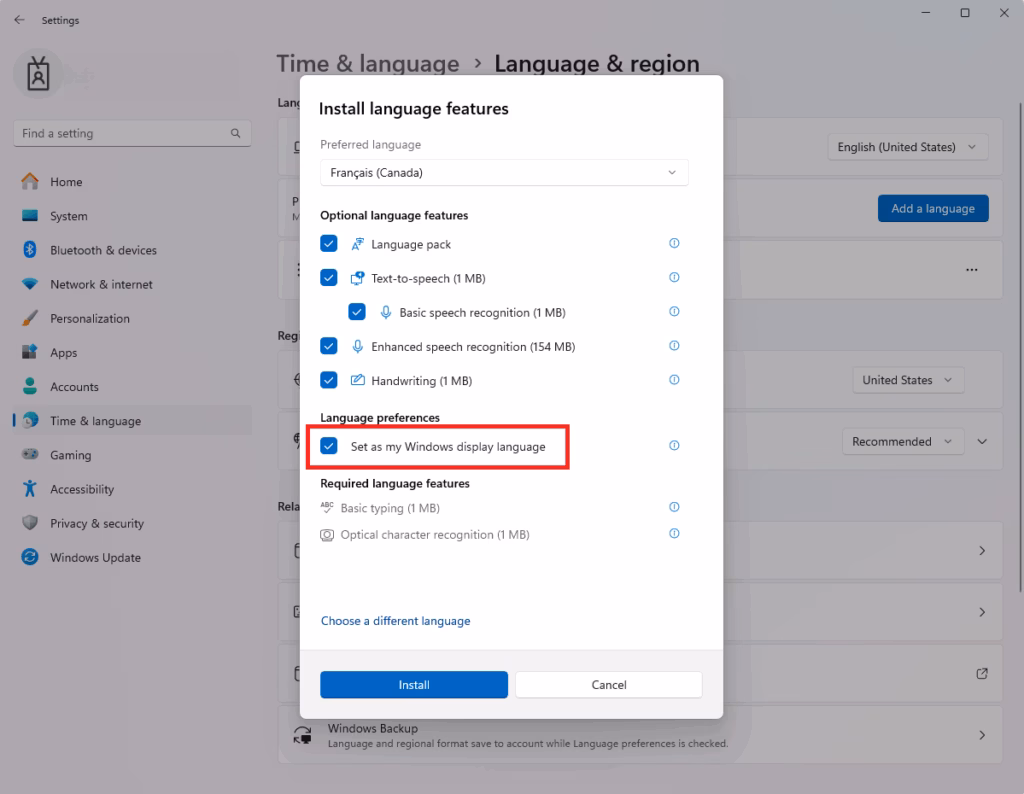
Step 5Set as Display Language
Look for the box labeled “Set as my Windows display language” and check it.
Then click Install.
Step 6Wait for Installation
Windows will download and install the language pack. This might take a few minutes.
After it’s done, you will need to sign out and then sign back in for the new language to start working.
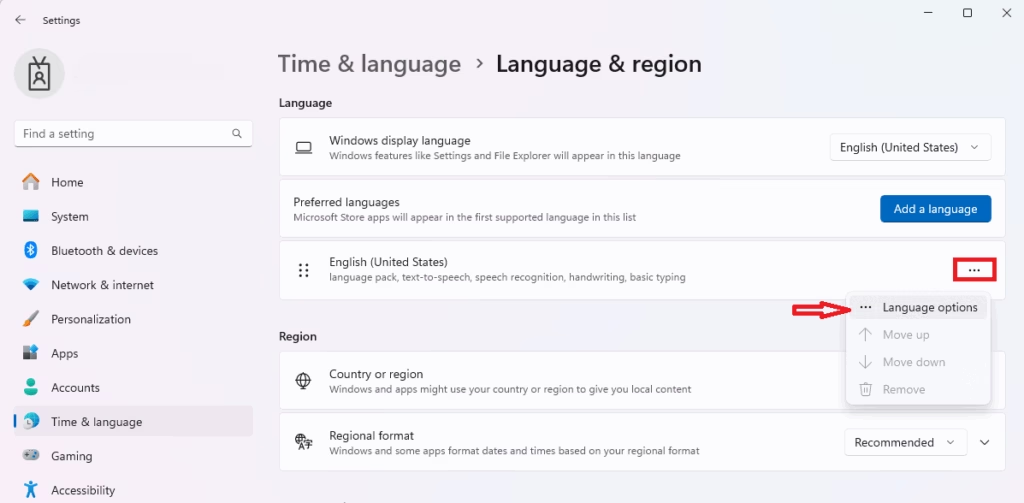
Step 7 (Optional): Add Keyboard Layout
If you want to type in your new language, you can add a matching keyboard.
Go back to the Language & region settings. Click your new language. Then click Language options. Click Add a keyboard and choose the keyboard layout for your language.
Extra Tips
- If Windows doesn’t install the language automatically, you might need to download the language pack manually.
- Some folder names like “Music,” “Pictures,” and “Documents” will change to the new language after you log back in.
Summary
Changing your Windows 11 display language is straightforward using the Settings app. You’ll add the language you want, set it as your primary display language, install its language pack, and then sign out and back in to see the changes.
Here’s how:
- Open Settings
- Go to Time & language → Language & region
- Add your new language
- Set it as your display language
- Install the language pack
- Sign out and sign back in
You can also add a keyboard for easy typing in that language.
Enjoy using Windows 11 in the language that feels best for you!
How to change 🪟 Windows 11 language without reinstalling?
Type and search [Language settings] in the Windows search bar①, and then click [Open]②. In preferred languages, click [Add a language]③. Choose a language you want to install from the list④, and then select [Next]⑤.
How do I force windows to be in English?
Go into “Settings” and click on “Time & language”. Select “Language & region”. The currently-supported languages should be shown under “Preferred languages”. To add a new language, click on “Add a language” and a list of available languages will appear.
Why is my 🪟 Windows 11 in Chinese?
Change the Windows 11 Default Language. Click the Clock Icon for Time and Language settings. Click Language & Region. Click the world Icon with language symbols to open Language and Region settings. In the Language section, click the Add a language button for the Preferred languages setting.
Was this guide helpful?

About the Author
Richard
Tech Writer, IT Professional
Richard, a writer for Geek Rewind, is a tech enthusiast who loves breaking down complex IT topics into simple, easy-to-understand ideas. With years of hands-on experience in system administration and enterprise IT operations, he’s developed a knack for offering practical tips and solutions. Richard aims to make technology more accessible and actionable. He's deeply committed to the Geek Rewind community, always ready to answer questions and engage in discussions.

No comments yet — be the first to share your thoughts!