How to Add or Remove Network Locations in Windows 11

Add network locations in Windows 11 to access shared folders or web servers directly from File Explorer without using up a drive letter.
Add a network location by opening File Explorer , right-clicking This PC, selecting “Add a network location,” and following the wizard to enter the network address and name. Remove one by right-clicking the location in File Explorer and selecting Delete.
What Is a Network Location?
A network location is a shortcut to files stored on another computer or a server. It lets you access shared folders or websites directly from File Explorer without using up a drive letter, making your File Explorer look cleaner than with mapped network drives.
A network location offers a cleaner File Explorer experience compared to a mapped network drive. A mapped network drive occupies a drive letter, such as Z: or Y:, while a network location does not. Managing files on a remote server becomes efficient, appearing as if those files reside on your personal computer.
Prerequisites: Preparing Your Network
Before adding network locations, confirm Network Discovery is active so your PC can spot other devices nearby. You will need administrator permissions to change this setting. Go to Settings, then Network & internet, followed by Advanced network settings, and finally Advanced sharing settings, where you’ll switch on Network discovery and File and printer sharing.
[ADMIN PRIVILEGES REQUIRED] Open Settings Network & internet > Advanced network settings Advanced sharing settings. Turn on Network discovery and File and printer sharing.
Mapped Drives vs. Network Locations
Mapped drives and network locations both connect you to network resources, but they work differently in Windows 11; a mapped drive gets its own drive letter like Z:, while a network location is a shortcut for quick access.
How to Add a Network Location in 🪟 Windows 11
Step 1Open File Explorer
Click the folder icon on your taskbar.
Step 2Access the Network Location Menu
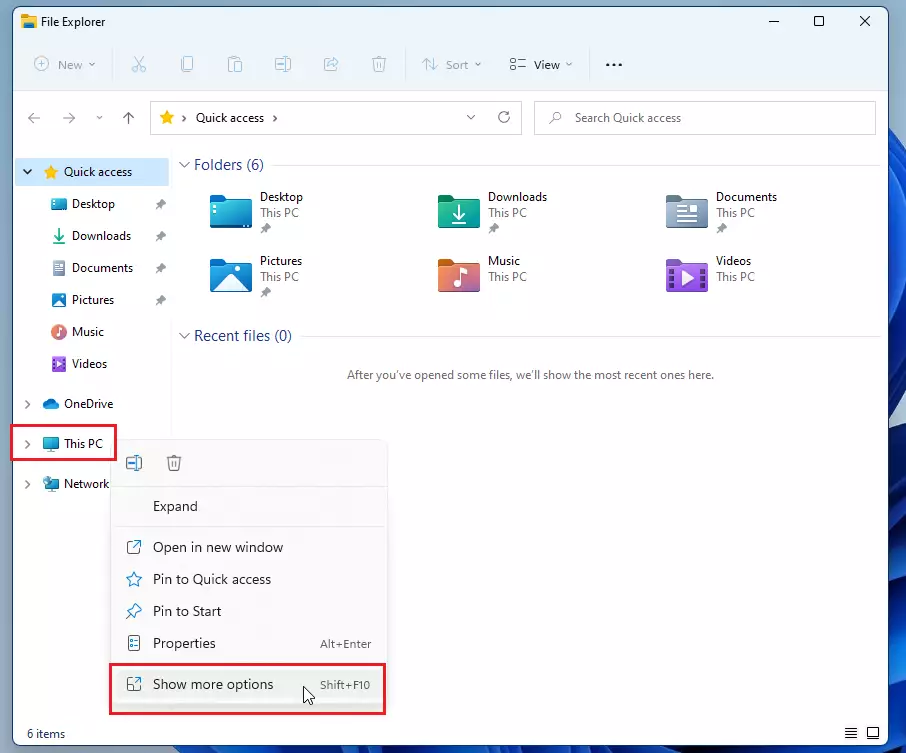
Right-click This PC in the left sidebar. Click 'Show more options'.
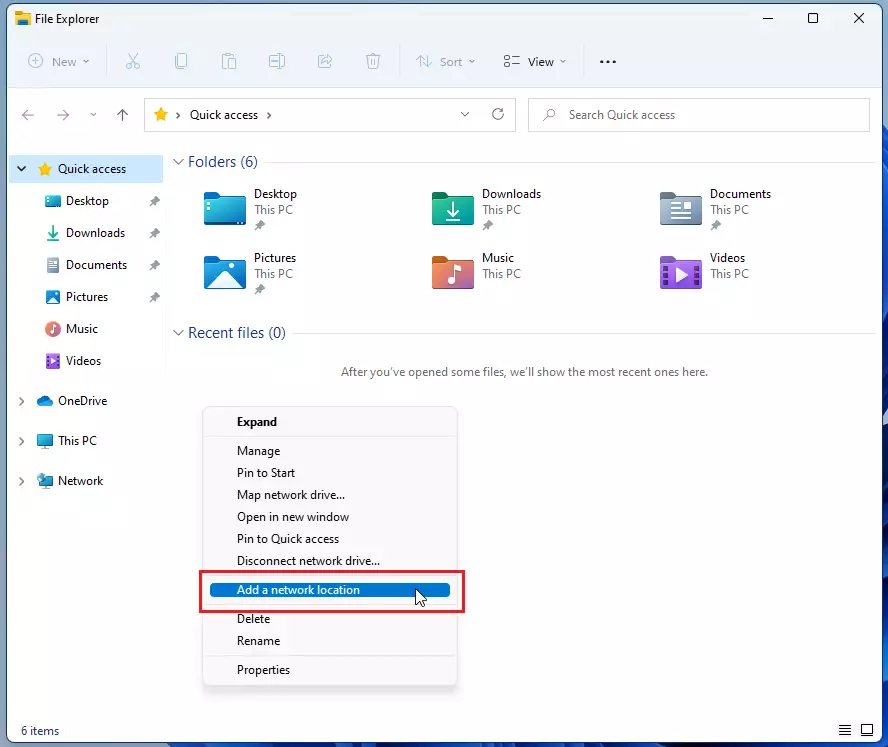
Select Add a network location.
Step 3Start the Setup Wizard
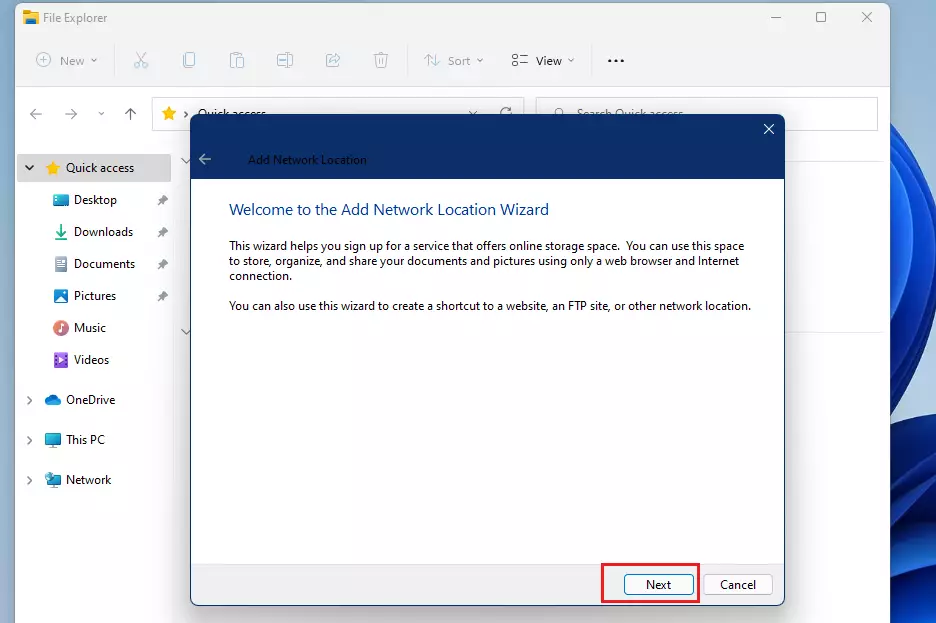
Click Next on the welcome screen.
Step 4Choose a Custom Network Location
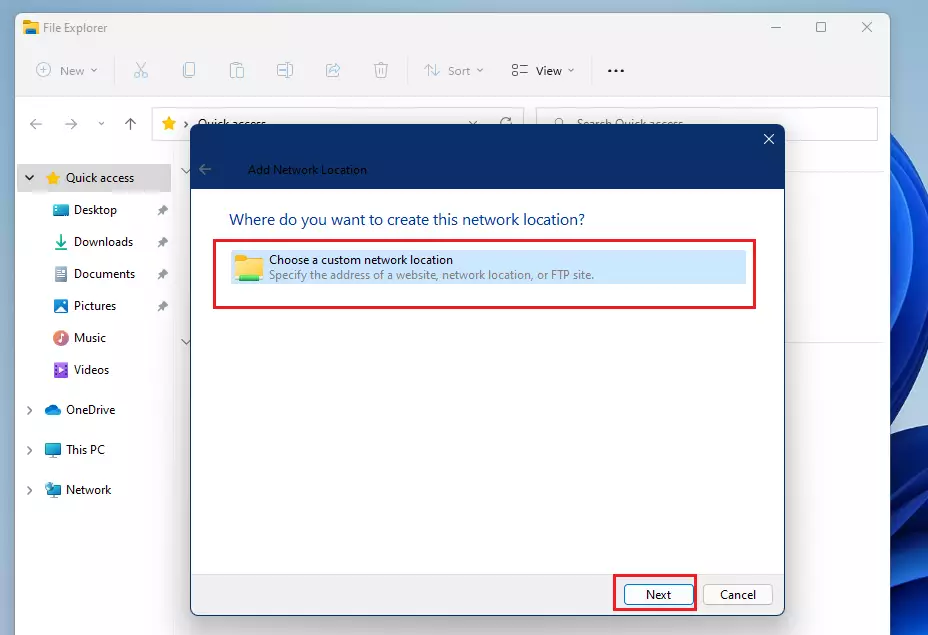
Select Choose a custom network location and click Next.
Step 5Type the Network Address
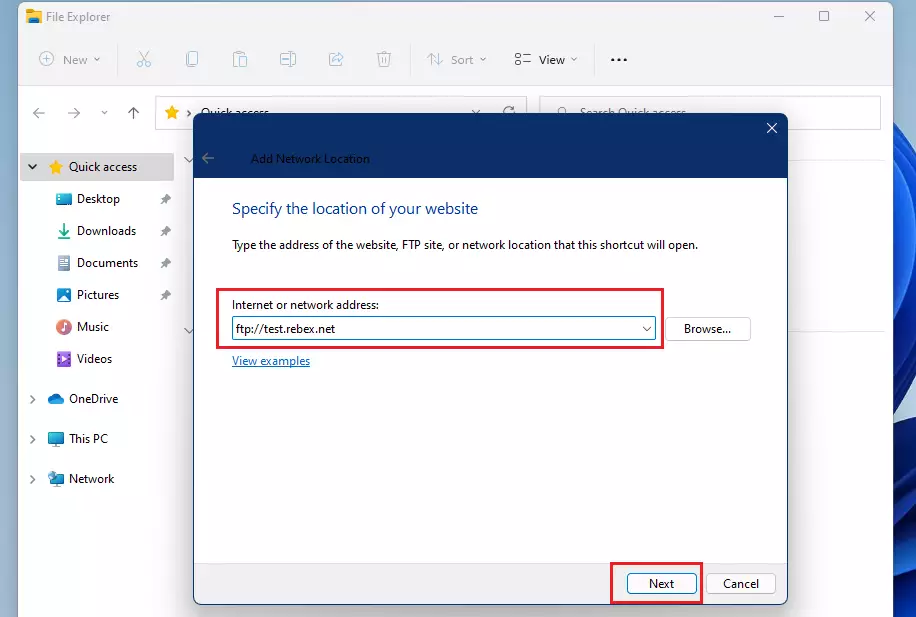
Enter the network address here. Windows uses this path to connect to FTP sites, websites, or local file shares. For example, use ftp://example.com for FTP, http://example.com for websites, or \\server\share for Windows file shares.
Step 6Log In Information
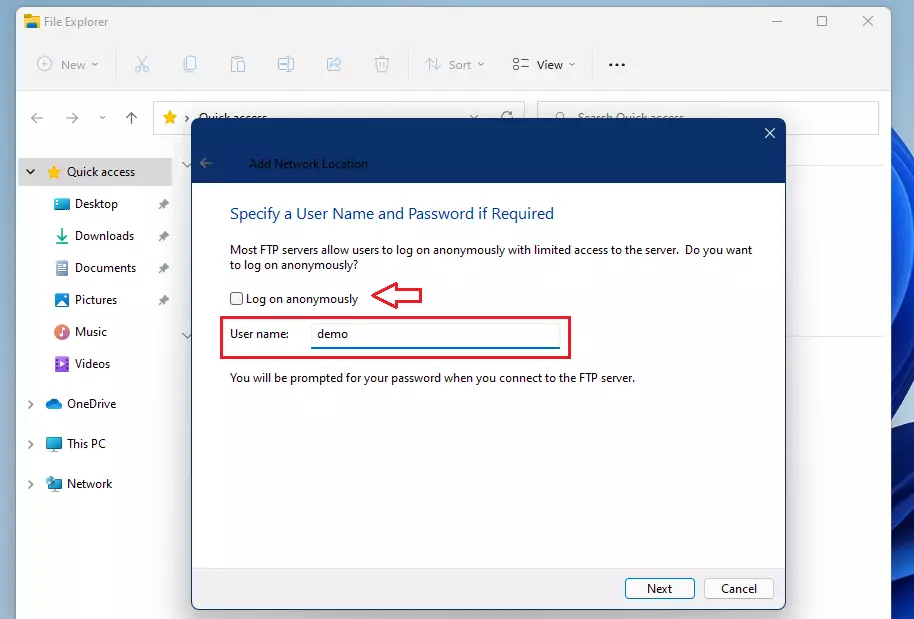
If a network server requires authentication, enter your user name. If the network server allows public access without a password, choose the "Log on anonymously" option, which grants access without requiring any login details.
Step 7Name Your Location
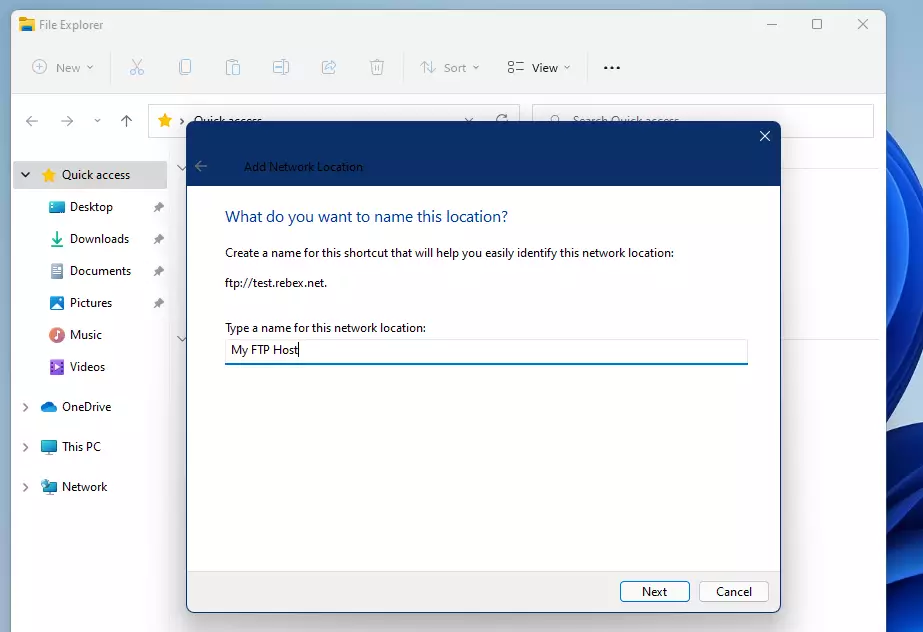
Give it a name you will recognize later.
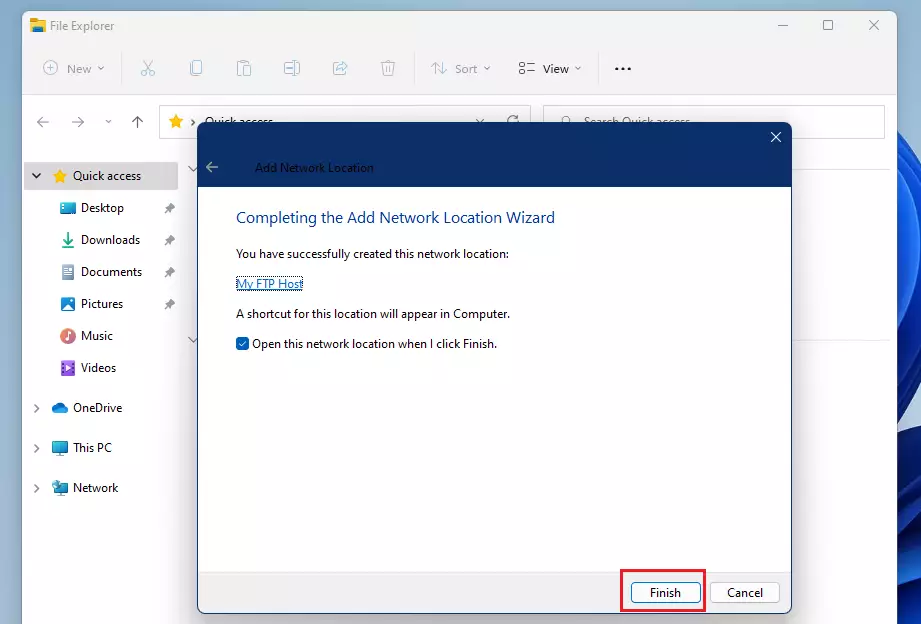
Step 8Finish Setup
Click Finish.
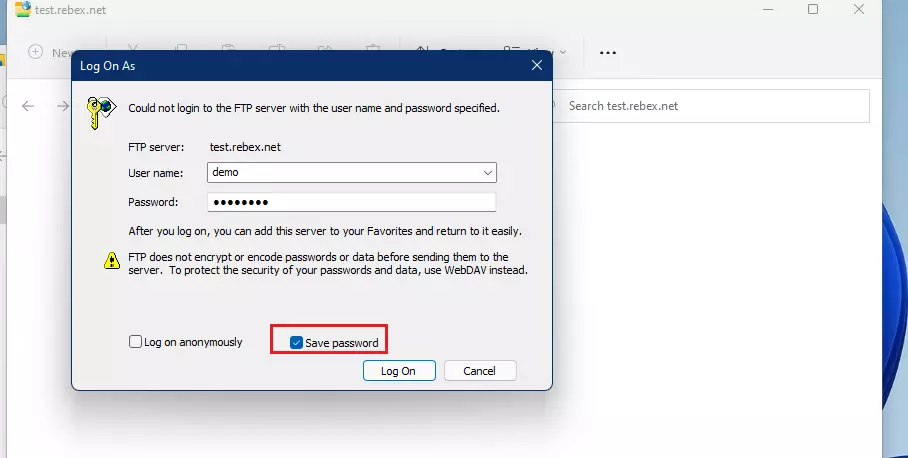
Step 9Log In to the Server
Enter your username and password when the computer asks. Saving these login details in the Windows Credentials Manager makes logging in more efficient for future network access.
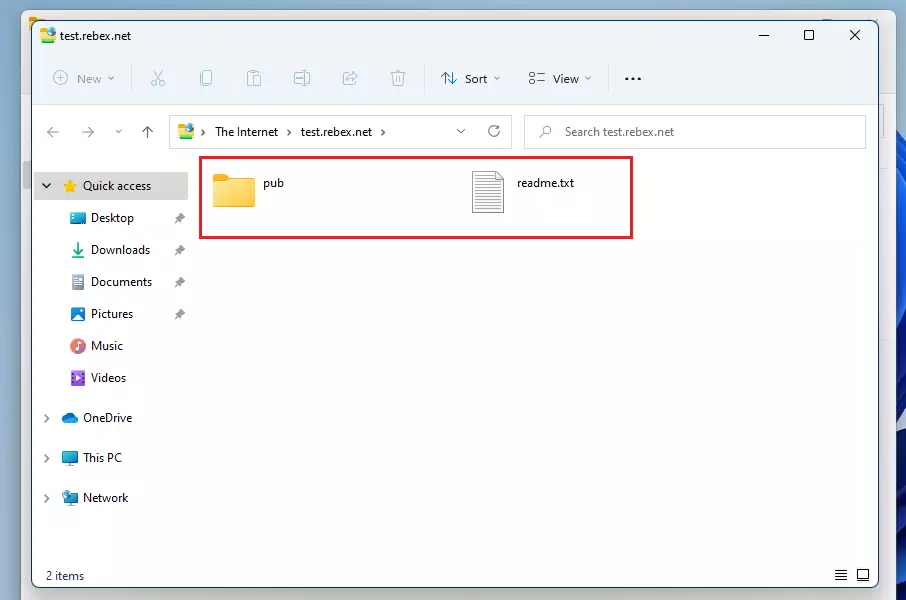
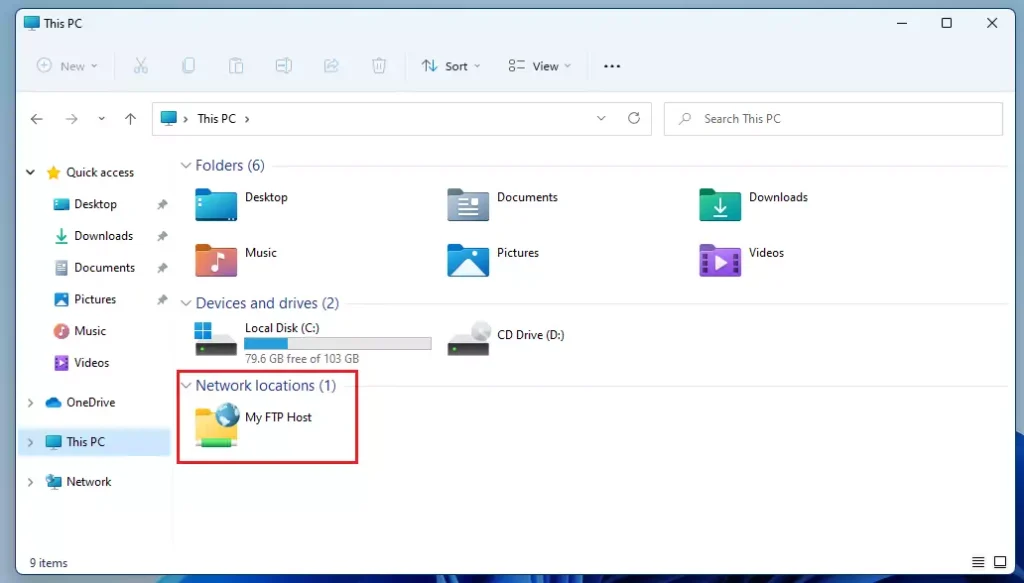
Your new folder will appear under Network Location in File Explorer.
How to Remove a Network Location
Deleting a network location shortcut in Windows 11 removes only the link to the shared folder, not the actual files stored on the remote server. This action safeguards your data because the original files remain accessible from other devices connected to the network.
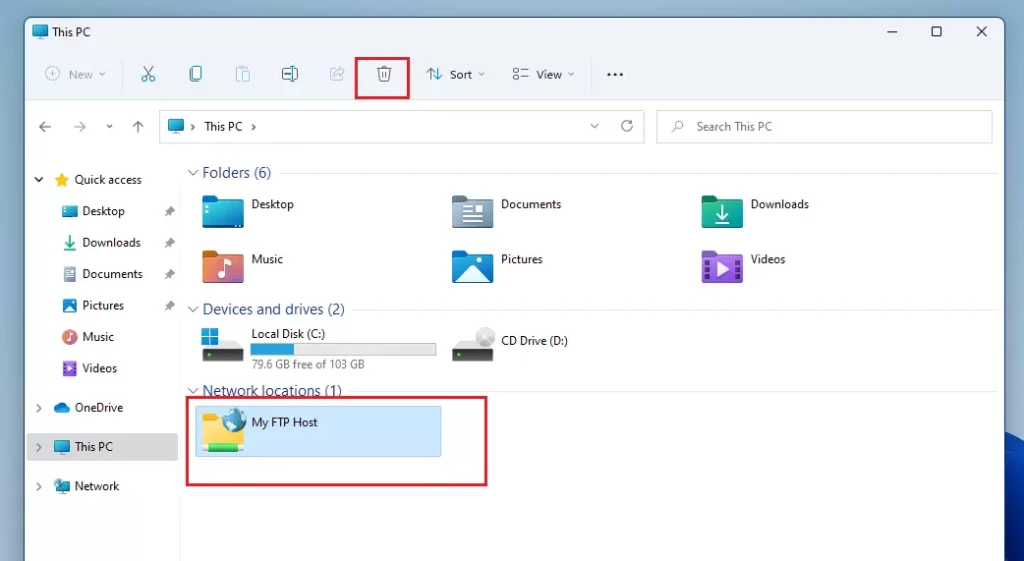
Summary
Network locations are a great way to access remote files. Always ensure Network Discovery is on. Use them for FTP or web shares to keep your computer organized. For more help with sharing, visit the official Microsoft file sharing guide.
Was this guide helpful?

About the Author
Richard
Tech Writer, IT Professional
Richard is a writer at Geek Rewind who turns complex IT tasks into clear, step-by-step guides. He draws on years of hands-on experience in system administration and enterprise IT operations, focusing on Windows, Linux and WordPress: the problems people actually run into, and the fixes that work. His server and WordPress guides come from systems he runs himself. Richard builds and maintains the platform behind Geek Rewind, from its Ubuntu servers and Nginx configuration to its custom WordPress plugins. Many new tutorials start with readers' questions, and he's always glad to answer them in the comments.

Hi Richard,
Thanks for your article. Very useful with W11 dialogues..
It is not clear in your article how to differentially access FTP and SFTP. I believe this is achieved by using port 21 for FTP and 22 SFTP but windows doesn’t seen to provide you with a port choice. There is a warning on the LogOnAs dialogue box about entering using FTP but I cant see how you can be sure you’re using SFTP. Also what is sFTP?
TQ Paul.
This page claims to show how to connect to SFTP, but does not actually demonstrate an SFTP connection. FTP is not SFTP, it seems the author got those two confused.
[…] The Network icon is included in the File Explorer navigation pane by default. This makes it easier for users to browse their local network locations. […]