Enable Handwriting: Use Your Fingertip in Windows 11

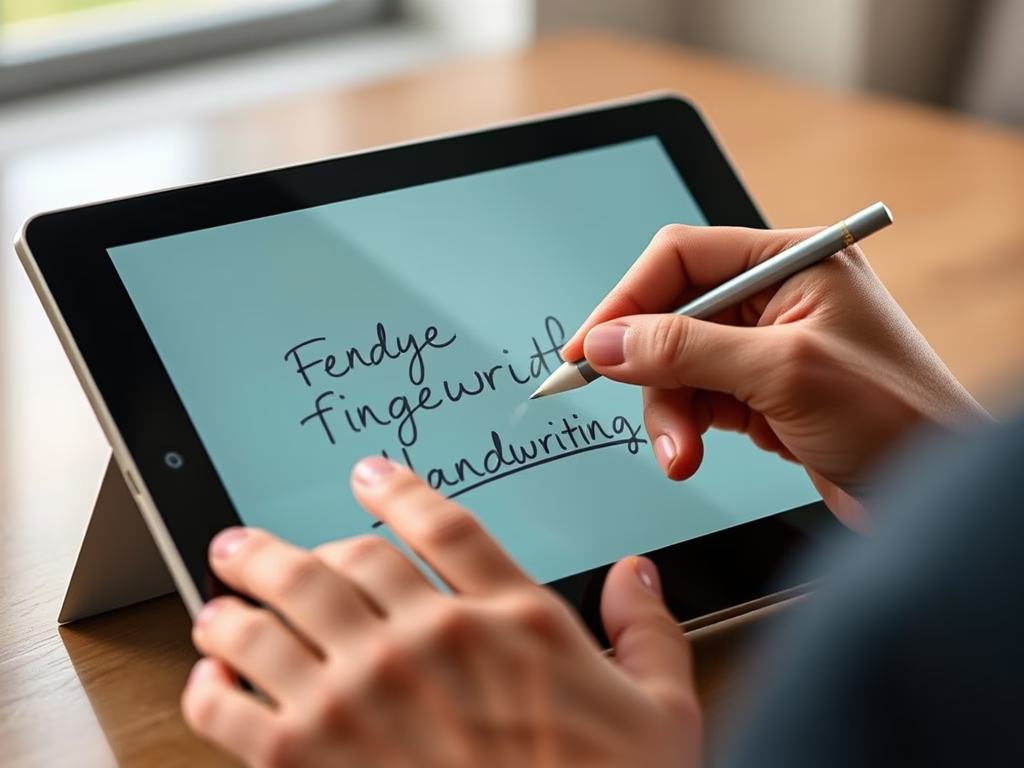
Handwriting recognition in Windows 11 lets you write on a touchscreen with your fingertip instead of a stylus. Windows turns your finger movements into typed text in apps and text boxes. It only makes sense on a device with a touchscreen. On a non-touch PC there is nothing to write on, so the option has no use.
You can turn fingertip handwriting on or off in two ways. The first is the Settings app . The second is the Registry Editor, a database where Windows and apps store their settings. Use Settings first, because it is safer and easier to undo.
To enable handwriting with your fingertip in Windows 11, open Settings , go to Bluetooth & devices Pen & Windows Ink, scroll to the Handwriting section, and check the box next to Write with your fingertip. The change applies immediately without restarting.
How to Turn On or Off Writing with Your Fingertip in the Handwriting Panel
When writing with your fingertip is on, you can enter text in the handwriting panel by writing with your finger. With it off, the panel expects a pen. The setting lives in Settings Bluetooth & devices > Pen & Windows Ink, where the handwriting options are.
The steps below walk you through it. Work through them in order and check the screen after each one before you move on.
- Open the Settings app. Click the Start menu button and choose Settings. Or press
Windows key + Ion your keyboard. - In Settings, click Bluetooth & devices from the menu on the left side.
- On the right side, find and click Pen & Windows Ink to open its settings.
- Scroll down to the Handwriting section and click on Use your handwriting to enter text to expand it.
- Check the box next to Write with your fingertip to turn it ON. Uncheck it to turn it OFF.
- When done, just close the Settings app.
The change applies right away, and you do not need to restart. To undo it, go back to the same page and switch the option the other way. If you do not see the Pen & Windows Ink page, the device probably has no touch or pen hardware that Windows recognizes. Check that the touchscreen driver is working before you troubleshoot anything else.
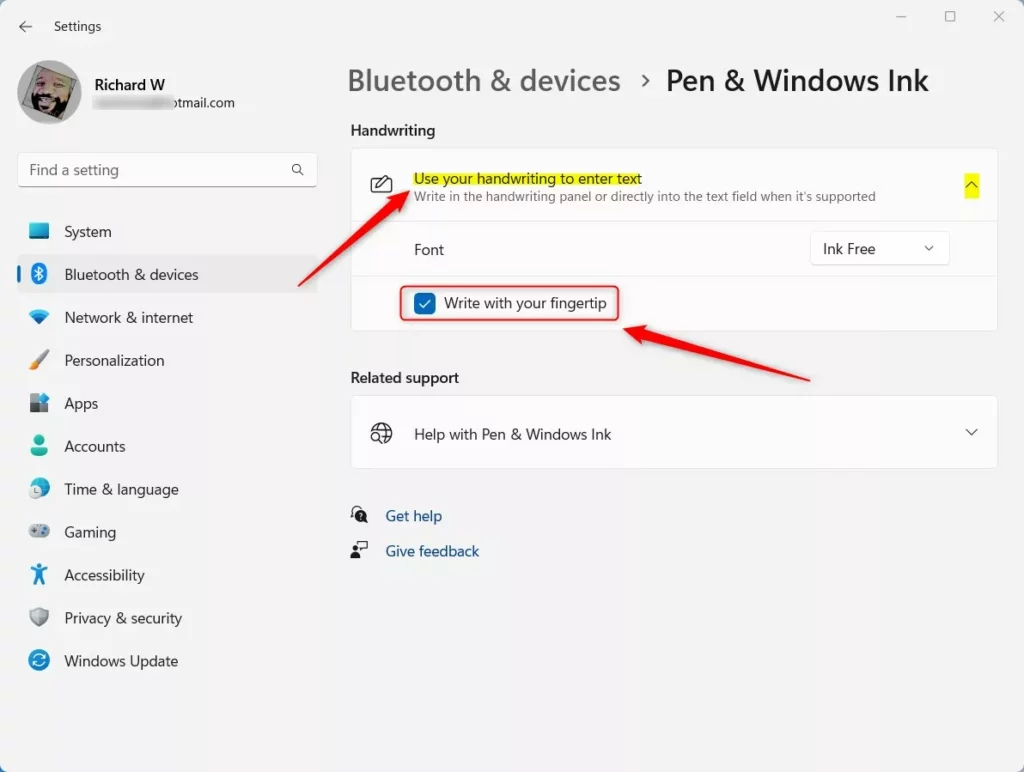
Turn on or off writing with your fingertip in Windows 11 settings
How to Enable or Disable Writing with Your Fingertip Using the Windows Registry Editor
You need an administrator account, and Windows may show a User Account Control prompt when you open the editor. You will go to the correct key, then set the value by hand.
Before you change anything, back up the registry or create a restore point. Make only the one change the steps describe. The same steps work on Windows 11 Home and Pro.
- ⚠️ Admin privileges required. Open the Windows Registry Editor by typing
regeditin the Start menu search and clicking on it. - In the Registry Editor, go to this folder:
HKEY_CURRENT_USER\Software\Microsoft\TabletTip\EmbeddedInkControl - If you don't see the EmbeddedInkControl folder, right-click on TabletTip, choose New Key, and name it EmbeddedInkControl.
- Click on the EmbeddedInkControl folder. On the right side, right-click and select New DWORD (32-bit) Value.
- Name the new value
EnableInkingWithTouch. - Double-click
EnableInkingWithTouch, set the Base to Decimal, and enter the value:1to turn writing with fingertip ON.0to turn it OFF.
- Click OK, close Registry Editor, and restart your computer for the changes to take effect.
Once the value is set, close the Registry Editor. If the handwriting panel does not pick up the change, sign out and back in, or restart the PC. To undo the change, set the value back to what it was before, or restore the backup you made.
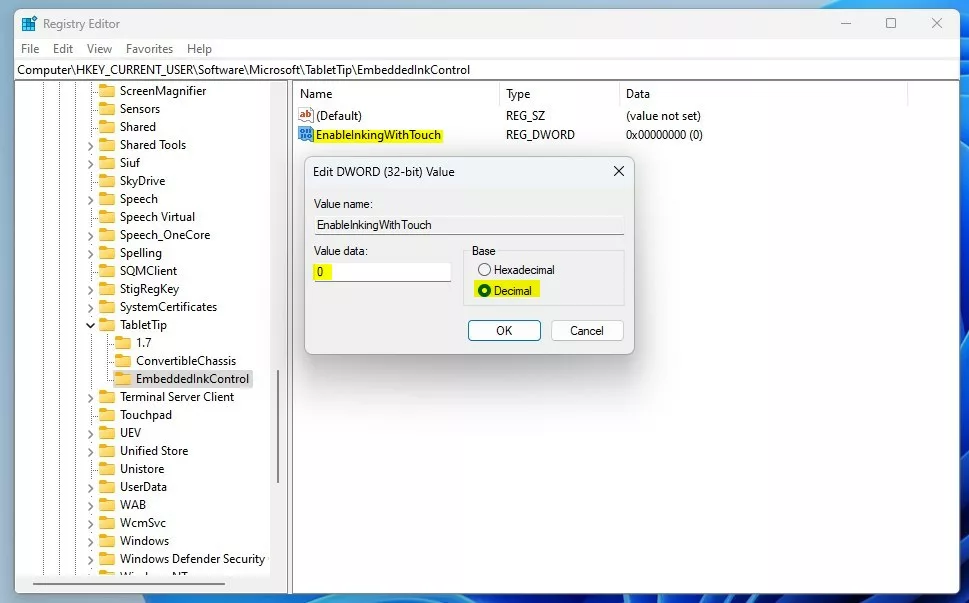
Set the fingertip writing value in the Windows Registry Editor
Summary
You can toggle fingertip writing in the Windows 11 handwriting panel from either the Settings app or the Registry Editor. Try Settings first, and use the registry only when Settings does not give you the option.
Was this guide helpful?

About the Author
Richard
Tech Writer, IT Professional
Richard is a writer at Geek Rewind who turns complex IT tasks into clear, step-by-step guides. He draws on years of hands-on experience in system administration and enterprise IT operations, focusing on Windows, Linux and WordPress: the problems people actually run into, and the fixes that work. His server and WordPress guides come from systems he runs himself. Richard builds and maintains the platform behind Geek Rewind, from its Ubuntu servers and Nginx configuration to its custom WordPress plugins. Many new tutorials start with readers' questions, and he's always glad to answer them in the comments.


No comments yet — be the first to share your thoughts!