How to configure handwriting panel auto-completion in Windows 11 Inking and typing
Handwriting panel auto-completion in Windows 11 finishes words for you as you write with a stylus or finger on the screen. It predicts the rest of the word you are writing, which saves time and cuts down on typing.
Advertisement
Windows 11 has built-in pen and touch settings that turn this word prediction on or off. You can also set it to insert the top suggested word automatically when you tap a space. Where an option lives can differ between Windows 11 builds. If a setting below is missing on your PC, check Windows Update 🔃 first, because some pen features only appear on recent versions.
⚡ Quick Answer
Open Settings ⚙️, press Win+I, go to Time & language›Typing, and turn on Show text suggestions when typing on the software keyboard and Multilingual text suggestions. Then open Bluetooth 🔷 & devices›Pen & Windows Ink, expand Handwriting panel, and configure your preferred writing behavior. Changes take effect immediately.
Advertisement
How to Access Inking and Typing Settings in 🪟 Windows 11
Every typing and prediction option starts in the Settings ⚙️ app, under the language menu. This menu controls how your device handles written words, predictive text and touch behavior.
Press Win+I to open Settings. Windows 11 Start menu with Settings gear icon highlighted. The Settings ⚙️ window opens with the list of categories on the left.
Select Time & language from the left-hand sidebar. Settings › Time & language
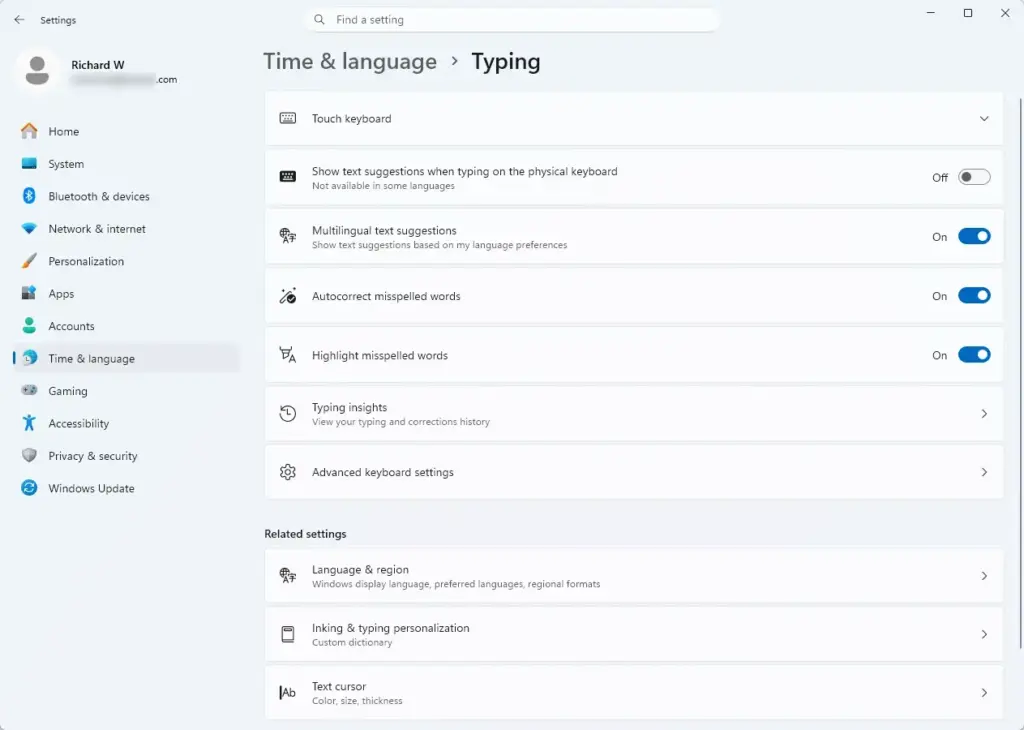
Click Typing in the main pane to open your text suggestion and correction preferences. Settings › Time & language › Typing
Review the toggles for showing text suggestions as you type and for automatically correcting misspelled words. Note which ones are currently on, so you can put them back if you change something.
Configuring Text Suggestions and Auto-Completion
Text suggestions and multilingual suggestions are what let the panel offer words as your pen moves across the screen. Turn them on to make typing and writing faster. The same page works on both Home and Pro editions.
Open Settings and go to Time & language›Typing. Settings › Time & language › Typing
Turn on the toggle for Show text suggestions when typing on the software keyboard. Some builds word this option differently, for example for the physical keyboard. Pick the text suggestions toggle that matches the input method you use.
Turn on Multilingual text suggestions if you write in more than one language. This only helps if you have more than one language or keyboard installed.
Scroll down to the hardware keyboard settings if you want text suggestions to apply across both physical and virtual input methods.
The toggles take effect immediately and do not need a restart. To undo a change, return to this page and switch the toggle back.
Managing Pen and Windows Ink Preferences
The pen settings control how your hardware interacts with text fields across Windows. This is where you adjust writing box behavior and handwriting panel options. If Pen & Windows Ink is missing from the list, Windows has not detected a pen or touch digitizer on the device. Desktop PCs without a pen or touchscreen commonly lack it.
Advertisement
Press Windows key + I to open Settings.
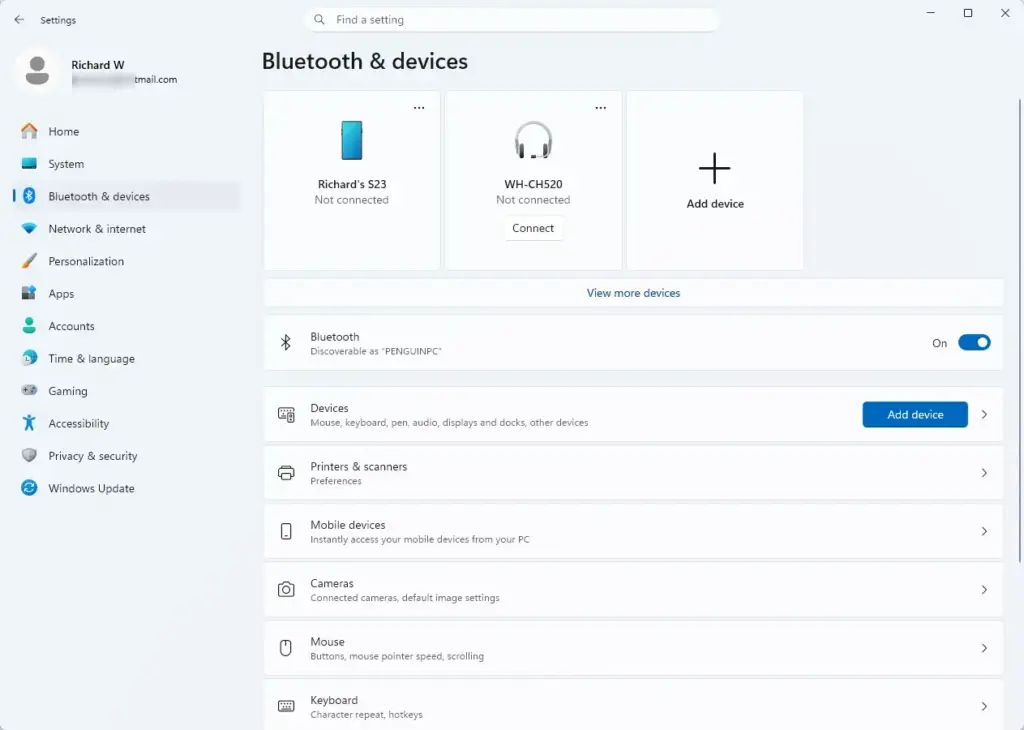
Select Bluetooth & devices from the left menu. Windows Settings menu highlighting the Bluetooth and devices option for printers
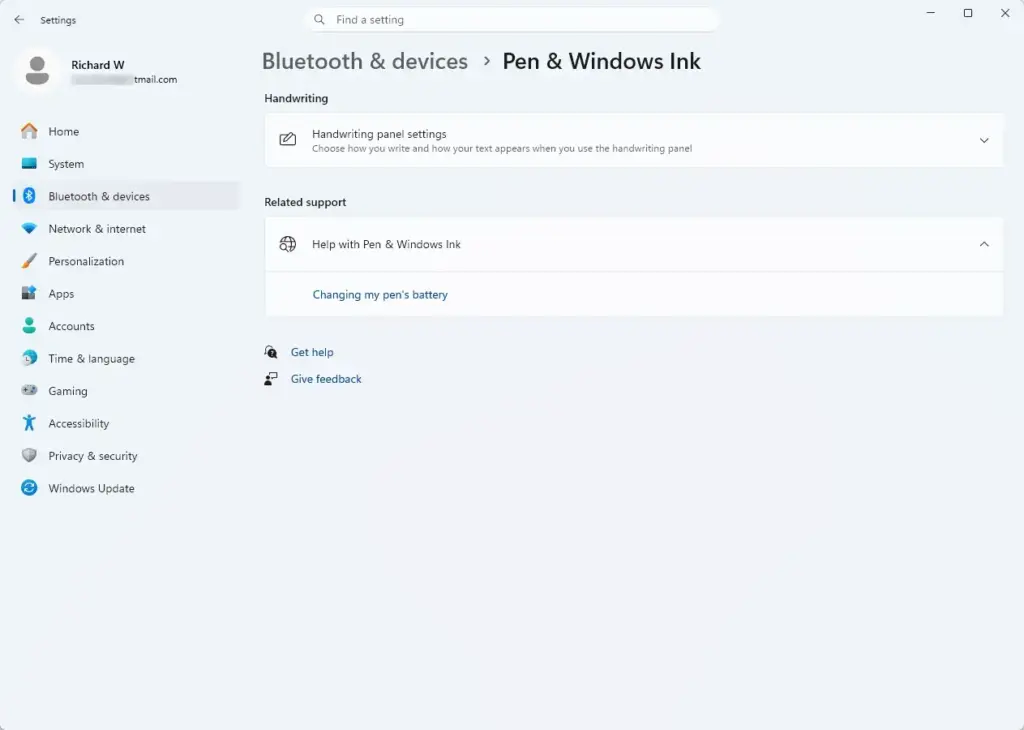
Click Pen & Windows Ink to open the hardware response options. Settings › Bluetooth & devices › Pen & Windows Ink
Expand the Handwriting panel section. Here you can choose whether text writes directly into text fields or goes through the dedicated floating panel. The exact options in this section vary by Windows 11 build.
Troubleshooting Handwriting Panel Text Disappearing Issues
If handwritten text disappears, does not reach the active text field, or the auto-completion stops responding, the background process that handles touch and pen input has usually stalled. Restarting it from Task Manager clears most of these glitches and does not affect your open documents.
Right-click the Start button and select Task Manager. You can also press Ctrl + Shift + Esc.
Open the Processes page if it is not already shown. On newer builds this is the first item in the left-hand list. On older builds it is a tab along the top.
Scroll down to find TextInputHost.exe or Microsoft Text Input Application.
Right-click the process and select End task. The service restarts on its own within a few seconds, which clears temporary glitches in your handwriting panel.
If the process does not come back or the problem returns, sign out and back in, or restart the PC.
Enabling or Disabling Shell Handwriting via Settings
Shell handwriting lets you write directly into standard desktop text boxes. Turning it on or off in Settings is the simplest way to control it. The setting only appears on builds that include this feature.
Open Settings and select Bluetooth & devices.
Click Pen & Windows Ink.
Scroll to the Shell Handwriting section.
Switch the toggle to On or Off, depending on whether you want to use handwriting in standard desktop text boxes. The change applies straight away. To undo it, flip the toggle back.
Enabling or Disabling Shell Handwriting via Registry Editor
⚠️WarningAdvanced users can also control inking capabilities directly through the registry.
Be careful here. Incorrect changes in Registry Editor can cause system problems, so only use it if the Settings method above is not available to you.
Advertisement
⚠️WarningBefore you edit anything, back up the key.
Select it in Registry Editor, then choose File›Export and save the file somewhere safe. Double-clicking that file later restores the saved values.
Press Windows key + R to open the Run dialog box.
Type regedit and press Enter to open Registry Editor, a centralized database for storing system and application configuration settings. Click Yes if User Account Control asks for permission.
Navigate to the following path in the left sidebar: HKEY_CURRENT_USER\Software\Microsoft\Windows\CurrentVersion\PenWorkspace
Double-click the EnableInkingWithTouch value on the right side. If it does not exist, right-click an empty space, select New›DWORD (32-bit) Value, and name it EnableInkingWithTouch.
Change the Value data to 1 to enable the feature or 0 to disable it, then click OK.
Because this key sits under HKEY_CURRENT_USER, it applies only to your account. If the change does not show up, sign out and back in. To undo it, set the value back or import the file you exported.
Optimizing Handwriting Recognition for Personal Writing Styles
Windows can adapt to your handwriting, including letter shapes and spacing. Training the recognizer improves recognition, and better recognition means more accurate auto-completion suggestions. The personalization option depends on your language and Windows build. If you do not see it, your language may not support it.
Press Windows key + I to open Settings.
Go to Time & language and click Language & region.
Click the three-dot menu icon next to your primary language and select Language options.
Scroll down to the Keyboards section and click Handwriting to start the personalization wizard. Follow the on-screen prompts and write the sample phrases. Write the way you normally do, since the goal is to teach Windows your natural style.
What is the Shell Handwriting feature in 🪟 Windows 11?
Shell Handwriting in Windows 11 lets you write directly into standard desktop text fields with a digital pen or stylus. Windows converts your handwriting into typed text in real time. It supports auto-completion and predictive suggestions, so text entry is faster across many apps. It works best with an active pen. If it feels unreliable, check the settings above and restart the text input process.
Was this guide helpful?
📬 Get new Windows tips in your inbox
One email when we publish something worth your time. No spam, unsubscribe anytime.
Richard is a writer at Geek Rewind who turns complex IT tasks into clear, step-by-step guides. He draws on years of hands-on experience in system administration and enterprise IT operations, focusing on Windows, Linux and WordPress: the problems people actually run into, and the fixes that work.
His server and WordPress guides come from systems he runs himself. Richard builds and maintains the platform behind Geek Rewind, from its Ubuntu servers and Nginx configuration to its custom WordPress plugins.
Many new tutorials start with readers' questions, and he's always glad to answer them in the comments.
One email when we publish a guide worth your time — new Windows features, the fixes that actually
work, and a heads-up when Microsoft breaks something. Unsubscribe in one click.
📬 Get new Windows tips in your inbox
One email when we publish something worth your time. No spam, unsubscribe anytime.






No comments yet — be the first to share your thoughts!