How to Enable or Disable the Touch Keyboard in Windows 11

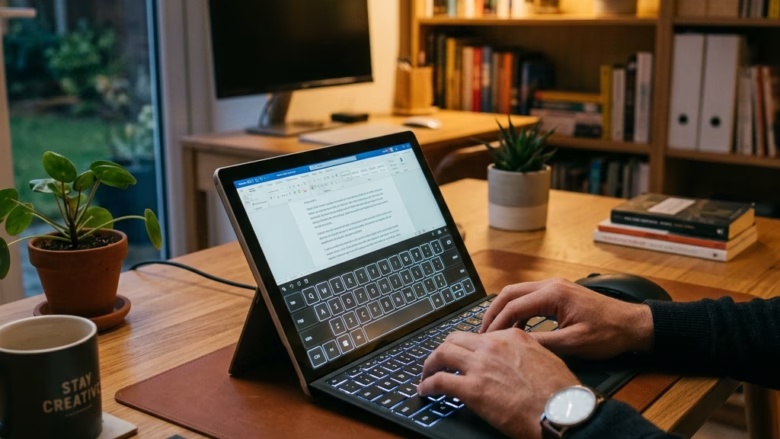
The touch keyboard in Windows 11 is a built-in on-screen panel that lets you type with your mouse or finger instead of a physical keyboard. In Windows 11 version 22H2 and later, it can appear on its own when you disconnect a hardware keyboard or tap a text field on a touchscreen device.
You can turn this behavior off so the keyboard stays hidden, keep a keyboard button on the taskbar at all times, or have the panel appear only when no hardware keyboard is attached. All three options use the same setting, and they work the same way on Windows 11 Home and Pro. You don’t need to restart the PC, because the change takes effect as soon as you pick a value.
Open Settings Personalization Taskbar, expand Taskbar corner icons, then change the Touch keyboard dropdown to Never, Always, or When no keyboard attached. The change applies without a restart.
Controlling When the Touch Keyboard Appears
The touch keyboard is controlled by a single dropdown in the taskbar settings. It has three values: Never, Always and When no keyboard attached. That dropdown decides whether the keyboard icon shows in the system tray area near the clock, and so when the panel appears.
On current Windows 11 builds, the section holding this dropdown is called Taskbar corner icons. Some guides and older builds call it “Notification area ” or “System tray icons”. It’s the same setting under a different name.
1Never Show the Touch Keyboard Icon (and Disable It)
To turn off the touch keyboard, set the Touch keyboard dropdown in the taskbar settings to Never. This removes the keyboard button from the system tray and stops the panel from popping up by accident.
- Close the touch keyboard if it’s open. Tap the X in its top-right corner. The panel should disappear from the screen.
- Open the taskbar settings. Right-click an empty part of the taskbar and click Taskbar settings. You can also open Settings Personalization Taskbar. The Taskbar page should open.
- Find the touch keyboard option. Expand the Taskbar corner icons section (called “Notification area ” or “System tray icons” on some builds). You should see Pen menu, Touch keyboard and Virtual touchpad. If you don’t see it, scroll down the page. On a PC with no touchscreen, some of these entries may not be listed.
- Set it to Never. Click the dropdown next to Touch keyboard and choose Never. The change applies right away, with no Save button and no restart.
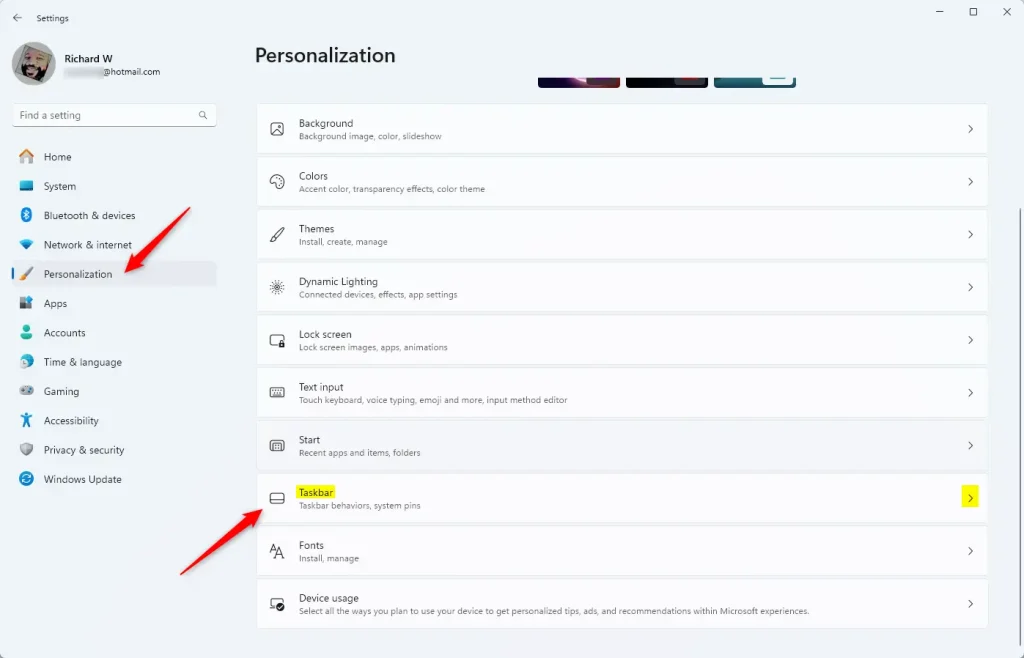
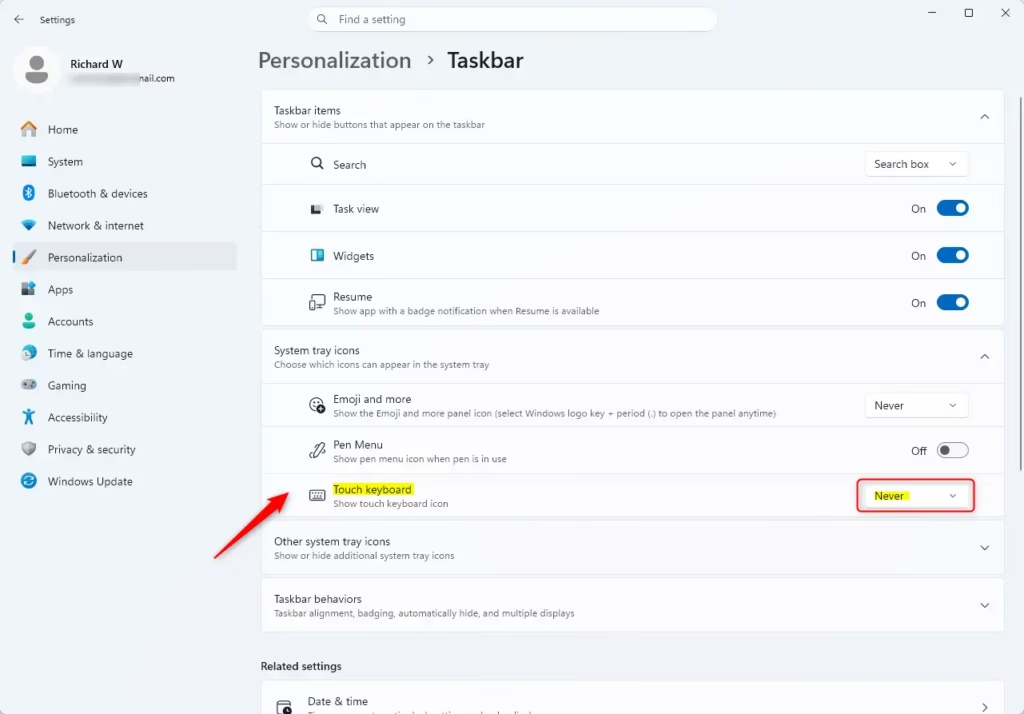
The touch keyboard icon should now be gone from the taskbar corner, and the panel no longer appears by itself. If you still need it, you’ll have to open it manually.
Recent builds have a separate touch keyboard option there that controls when the panel opens automatically.
Make sure you have a hardware keyboard or another way to get back into Settings before you do this. To undo the change, set the dropdown back to Always or When no keyboard attached.
2Always Show the Touch Keyboard Icon
To keep the touch keyboard button on the taskbar all the time, set the Touch keyboard dropdown to Always. This puts a permanent shortcut next to the clock, so you can open the keyboard whenever you want, even with a hardware keyboard attached.
- Open the taskbar settings. Right-click the taskbar and click Taskbar settings, or open Settings Personalization Taskbar.
- Locate the touch keyboard setting. Expand Taskbar corner icons (or "Notification area" / "System tray icons" on some builds) and find Touch keyboard.
- Set it to Always. Change the dropdown next to Touch keyboard to Always. A small keyboard icon should appear in the taskbar corner straight away.
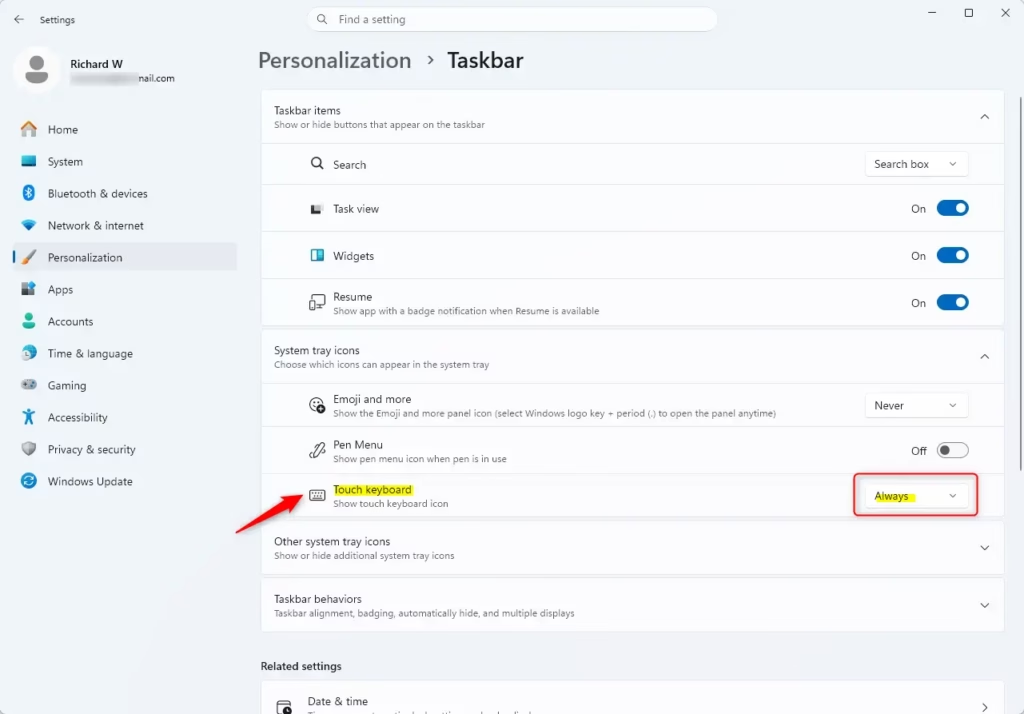
The keyboard icon stays in the system tray whether or not a hardware keyboard is connected. Click it to open the touch keyboard, and click the X on the panel to close it again. The icon stays in place until you change the setting.
This option is useful if you switch between a physical keyboard and a touchscreen. The keyboard stays one tap away, but it doesn't open until you ask for it. If you'd rather not see the icon at all, set the dropdown to Never instead.
3Show the Touch Keyboard Only When No Keyboard is Attached
To have the touch keyboard appear only when you take off the physical keyboard, set the Touch keyboard dropdown to When no keyboard attached. This fits convertible laptops and tablets with detachable keyboards.
- Open the taskbar settings. Right-click the taskbar and click Taskbar settings, or go to Settings Personalization Taskbar.
- Find the touch keyboard option. Look for Touch keyboard under Taskbar corner icons (or "Notification area" / "System tray icons" on some builds).
- Select When no keyboard attached. Pick this value from the dropdown. The change applies immediately.
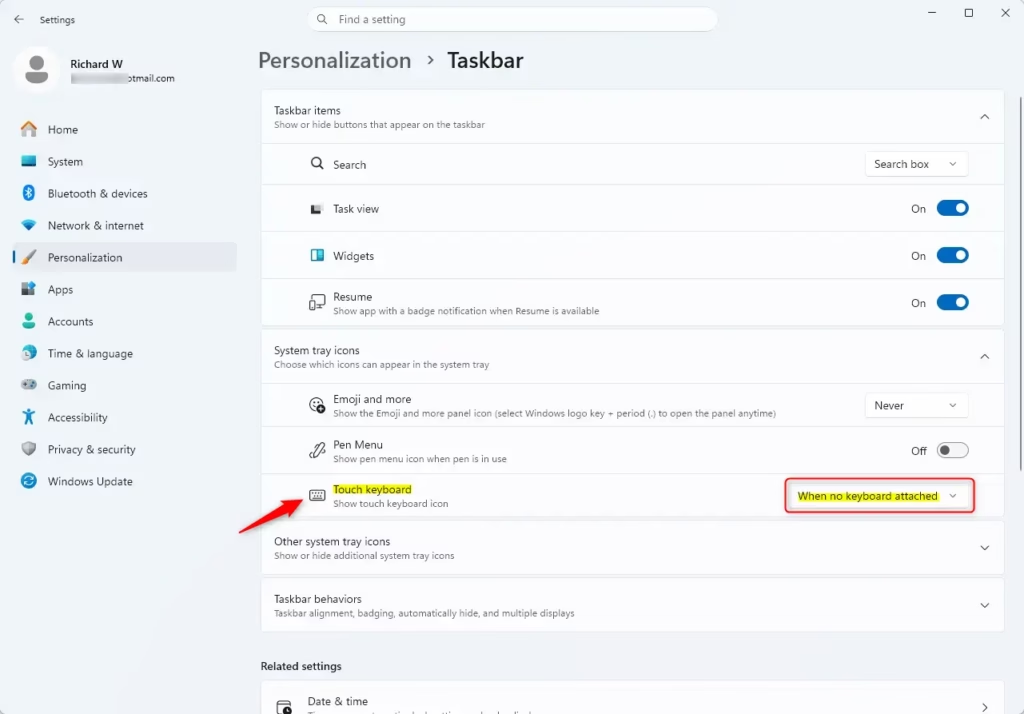
This setting suits laptops with foldable or detachable keyboards. When you use the device as a tablet, the touch keyboard can appear automatically when you tap a text field. When you reattach the physical keyboard, the panel should hide again.
On a desktop PC with a permanently connected keyboard, you'll rarely see any difference from Never, because Windows always detects a keyboard.
Summary
Changing when the touch keyboard appears takes a few clicks in the taskbar settings. Pick Never to hide it, Always to keep the shortcut visible, or When no keyboard attached to have it appear only when you need it. You can change the setting back at any time.
Was this guide helpful?

About the Author
Richard
Tech Writer, IT Professional
Richard is a writer at Geek Rewind who turns complex IT tasks into clear, step-by-step guides. He draws on years of hands-on experience in system administration and enterprise IT operations, focusing on Windows, Linux and WordPress: the problems people actually run into, and the fixes that work. His server and WordPress guides come from systems he runs himself. Richard builds and maintains the platform behind Geek Rewind, from its Ubuntu servers and Nginx configuration to its custom WordPress plugins. Many new tutorials start with readers' questions, and he's always glad to answer them in the comments.


No comments yet — be the first to share your thoughts!