How to Change the Font in the Handwriting Panel on Windows 11

The handwriting panel in Windows 11 changes what your written notes look like by converting pen or finger strokes into digital text using the default Ink Free font. You can switch this style to any other font installed on your PC to make your converted text match your personal taste.
Change the font in Windows 11 Settings under Bluetooth & devices, then Pen & Windows Ink. Expand the Handwriting section and select your desired font from the dropdown. This updates the font used for converting your handwriting to text.
Method 1Change the Font Using Windows Settings
You can change the handwriting panel font in Windows 11 using the main Settings app . This is the quickest way to customize how your written notes look on screen. Open Settings , go to Bluetooth & devices, and select Pen & Windows Ink to find the font options.
- Open the Settings app. You can click the Start menu button and choose Settings, or press Win+I on your keyboard.
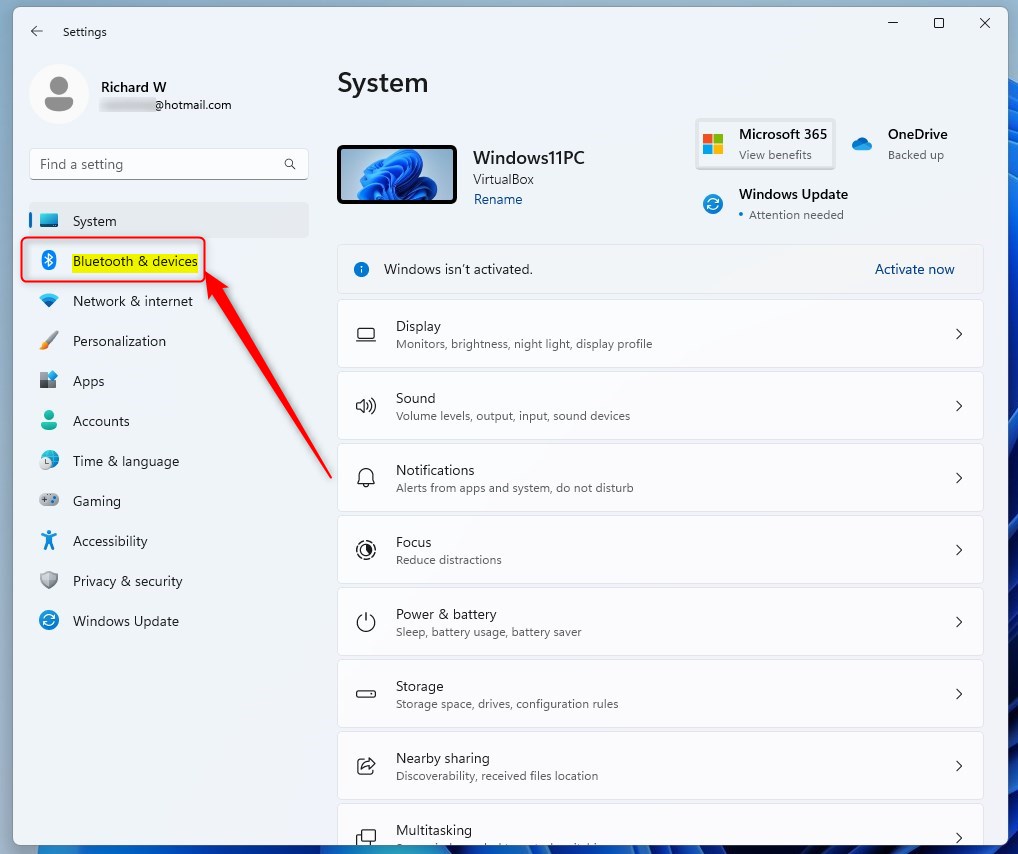
- In Settings, click Bluetooth & devices on the left side menu.
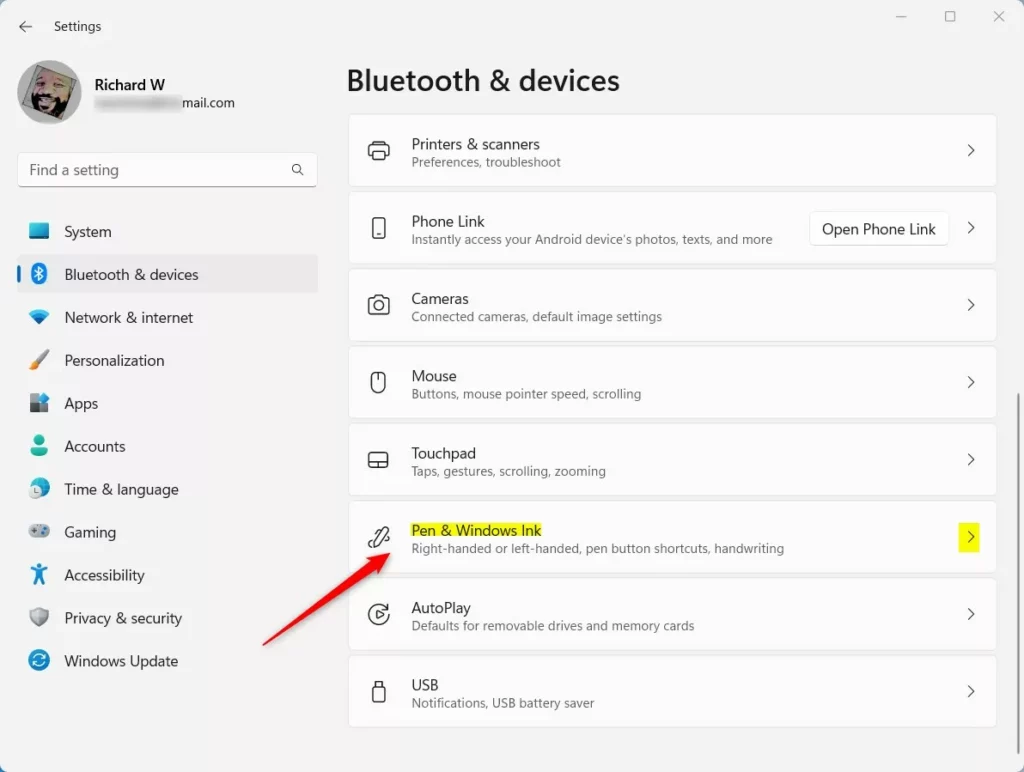
windows 11 bluetooth and devices - On the right side, find and click Pen & Windows Ink.
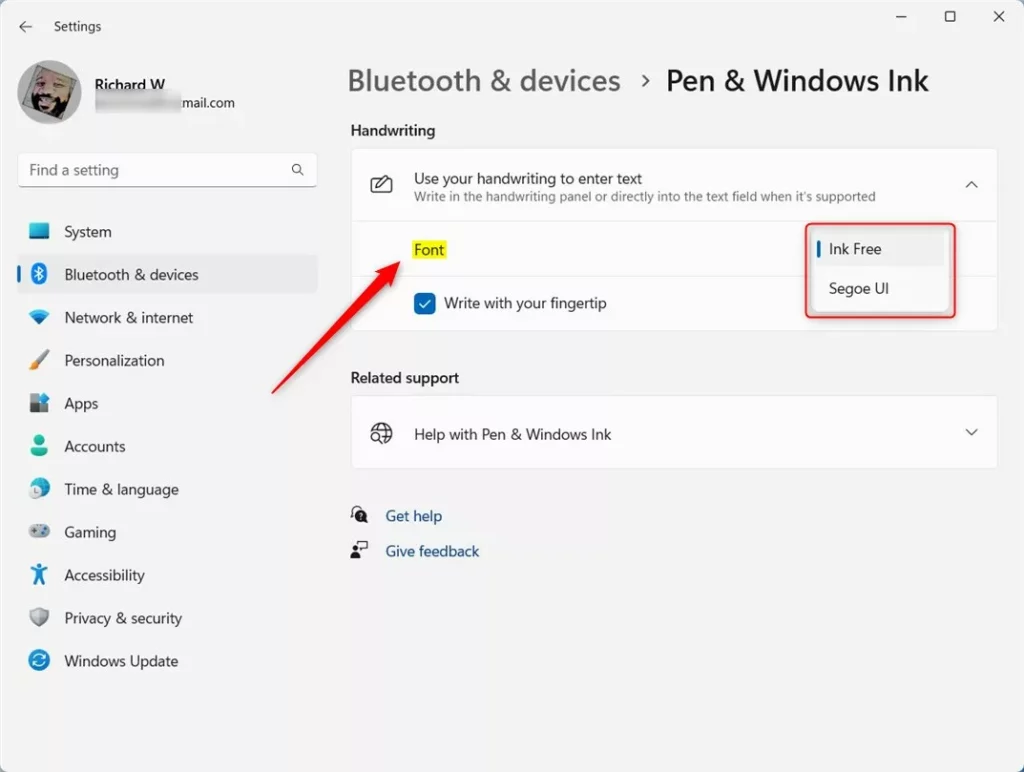
Windows pen and windows ink tile - Under the Handwriting section, click to expand the option called “Use your handwriting to enter text”.
- Now, select the font you want Windows to use when converting your handwriting to text.
Choose handwriting font in Windows 11 Settings - Close the Settings app when you’re finished.
Method 2Change the Font Using Windows Registry Editor (Advanced)
You can change the handwriting panel font in Windows 11 using Registry Editor (a tool for changing advanced system settings) if you want deeper control over your text style. This advanced method lets you apply custom fonts that do not show up in the standard settings menu.
Making wrong changes can cause problems with your computer.
- [ADMIN PRIVILEGES REQUIRED] Open the Registry Editor. Press Win+R, type
regedit, and press Enter. - If prompted by User Account Control, click Yes to allow it.
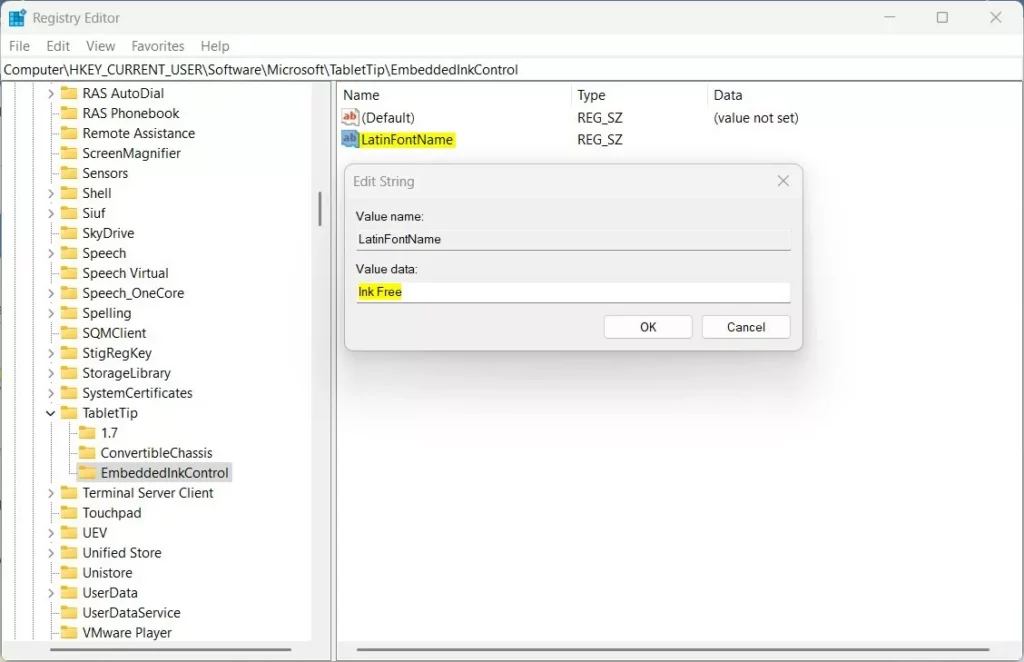
- In Registry Editor, go to this folder path:
HKEY_CURRENT_USER\Software\Microsoft\TabletTip\EmbeddedInkControl - If the EmbeddedInkControl folder (key) does not exist:
- Right-click on TabletTip, choose New Key, and name it EmbeddedInkControl.
- Click on the EmbeddedInkControl folder. In the right pane, right-click and select New String Value. Name this new string value: LatinFontName.
- Double-click LatinFontName and set the Value data to the name of the font you want to use. For example, type Arial, Calibri, or any font installed on your PC.
- Close the Registry Editor and restart your computer to apply the changes.
Where to Find Font Names
C:\Windows\Fonts.You can open this folder to see all fonts available on your computer. Use the exact font name when entering the value in the registry.
Summary
Changing the handwriting panel font in Windows 11 is easy to do through the Bluetooth & devices section in your main Settings app. If you need more font choices, you can use the Registry Editor instead, though you should follow the steps carefully to avoid system errors.
- The easiest way is through the Settings app under Bluetooth & devices Pen & Windows Ink.
- If you want more control, you can edit the font using the Windows Registry Editor (advanced users only).
- Changing fonts helps personalize your device and can make handwriting recognition more comfortable for you.
- If you have questions or want to share your experience, feel free to leave a comment below!
Was this guide helpful?

About the Author
Richard
Tech Writer, IT Professional
Richard is a writer at Geek Rewind who turns complex IT tasks into clear, step-by-step guides. He draws on years of hands-on experience in system administration and enterprise IT operations, focusing on Windows, Linux and WordPress: the problems people actually run into, and the fixes that work. His server and WordPress guides come from systems he runs himself. Richard builds and maintains the platform behind Geek Rewind, from its Ubuntu servers and Nginx configuration to its custom WordPress plugins. Many new tutorials start with readers' questions, and he's always glad to answer them in the comments.



No comments yet — be the first to share your thoughts!