How to Check Windows Feature Experience Pack Version in Windows 11
This guide will show you how to find out which version of the Windows Feature Experience Pack is installed on your Windows 11 computer.
The Windows Feature Experience Pack is a set of features that Microsoft can update more often and separately from big Windows updates. This started in Windows 10 and helps keep your computer up to date with new features faster.
Some of the features included in this pack are new emojis, better graphics settings, and improvements to Windows Search.
How to Check Your Windows Feature Experience Pack Version
Follow these simple steps to see which version is installed on your PC:
Step 1Open the Settings App
- Click the Start button (the Windows logo in the bottom-left corner), then click Settings.
- OR press
Windows key + Ion your keyboard to open Settings right away.
Step 2Go to System > About
- In the Settings window, click on System on the left side menu.
- Then scroll down and click on About at the bottom of the list.
Step 3Find the Windows Feature Experience Pack Version
- Look under the Windows specifications section on the right side.
- You will see the version number listed next to Windows Feature Experience Pack.
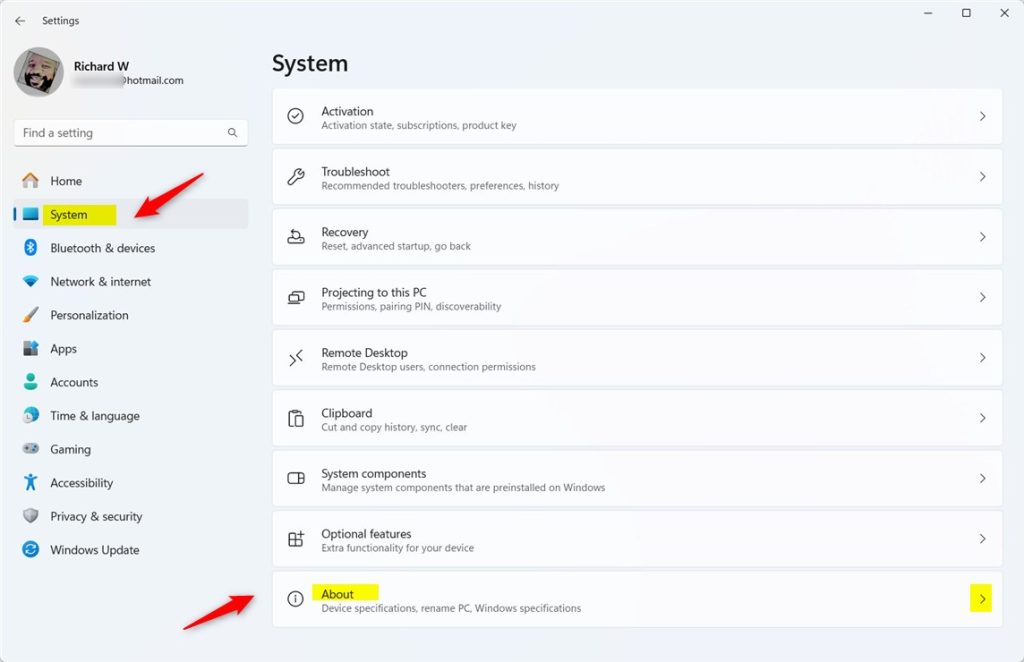
Windows 11 Settings – System > About
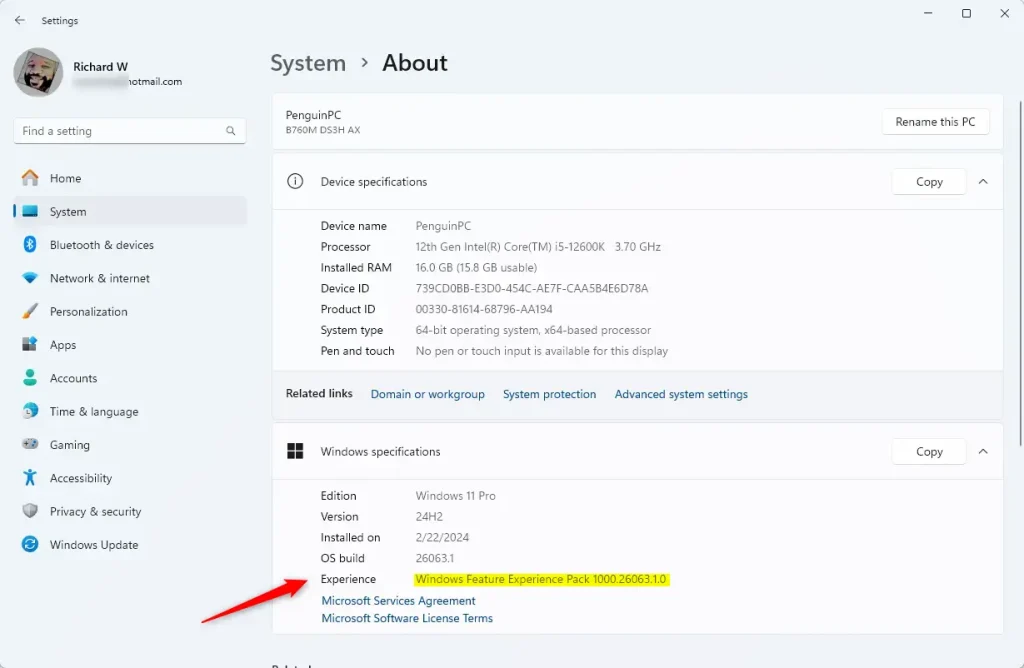
Windows Feature Experience Pack version shown here
That’s all! Now you know how to check your Windows Feature Experience Pack version anytime.
Why This Matters
The Windows Feature Experience Pack helps Microsoft send you new features faster without waiting for big Windows updates.
Knowing your version can help you understand what features and improvements you have on your PC.
It’s easy to check using the Settings app, so you can stay informed.
For more Windows tips, visit the Geek Rewind website.
Summary
Checking your Windows Feature Experience Pack version is simple. Just open Settings, go to System > About, and look for the version number under Windows specifications. This pack lets Microsoft send you new features faster than regular Windows updates. Knowing your version helps you stay informed about what features are available on your computer.
Was this guide helpful?

About the Author
Richard
Tech Writer, IT Professional
Richard, a writer for Geek Rewind, is a tech enthusiast who loves breaking down complex IT topics into simple, easy-to-understand ideas. With years of hands-on experience in system administration and enterprise IT operations, he’s developed a knack for offering practical tips and solutions. Richard aims to make technology more accessible and actionable. He's deeply committed to the Geek Rewind community, always ready to answer questions and engage in discussions.


No comments yet — be the first to share your thoughts!