Start the Windows 11 Installer from an ISO File

- 14 steps
- Needs administrator rights
- Includes a restart or sign-out
The Windows 11 installer runs straight from an ISO file (a single file that holds the contents of an installation disc) once you mount it. Right-click the ISO in File Explorer, select Mount, and run setup.exe from the virtual drive that appears.
Mounting makes Windows treat the ISO as a DVD drive, so you do not need to burn a disc or build a USB drive. This method upgrades or repairs the Windows installation you are already signed in to. It works on current Windows 11 releases such as version 25H2, and on Windows 10 PCs that meet the Windows 11 requirements.
It does not boot the PC from the ISO. For a clean install on an empty drive, you need a bootable USB drive instead.
Start the Windows 11 installer from an ISO file by right-clicking the ISO in File Explorer and selecting Mount. Then open the new DVD drive labeled Windows 11, and double-click setup.exe. Approve the User Account Control prompt with an administrator account. This upgrades or repairs the Windows you are signed in to. It does not boot the PC from the ISO.
Before You Start
- A Windows 11 ISO file. If you do not have one, read how to download the official Windows 11 ISO file from Microsoft. To get a specific build, read how to download the latest Windows 11 ISO with UUP Dump.
- An administrator account. Setup asks for administrator approval when it starts.
- A backup of your important files. Setup keeps your files by default, but a failed install can still cause data loss. If something does go missing afterwards, Windows File Recovery may help.
- Free space on the system drive. Setup needs free space on the system drive for temporary files. Check the size of the ISO, and free at least that much space. Delete what you no longer need before you begin.
- Power. Plug in a laptop. The PC restarts several times during the install.
The PC must also meet the Windows 11 minimum requirements: TPM 2.0 (a security chip), a PC that supports Secure Boot (a startup security feature that checks the system’s software is trusted), 4 GB of memory and 64 GB of storage. Setup checks all of this and tells you if the PC fails.
How to Start the Windows 11 Installer from an ISO File
These steps mount the ISO, launch the Windows 11 installer and take it through to the first sign-in. Step 5 needs administrator privileges.
- Open File Explorer. Press
Windows key + E, or select the folder icon on the taskbar.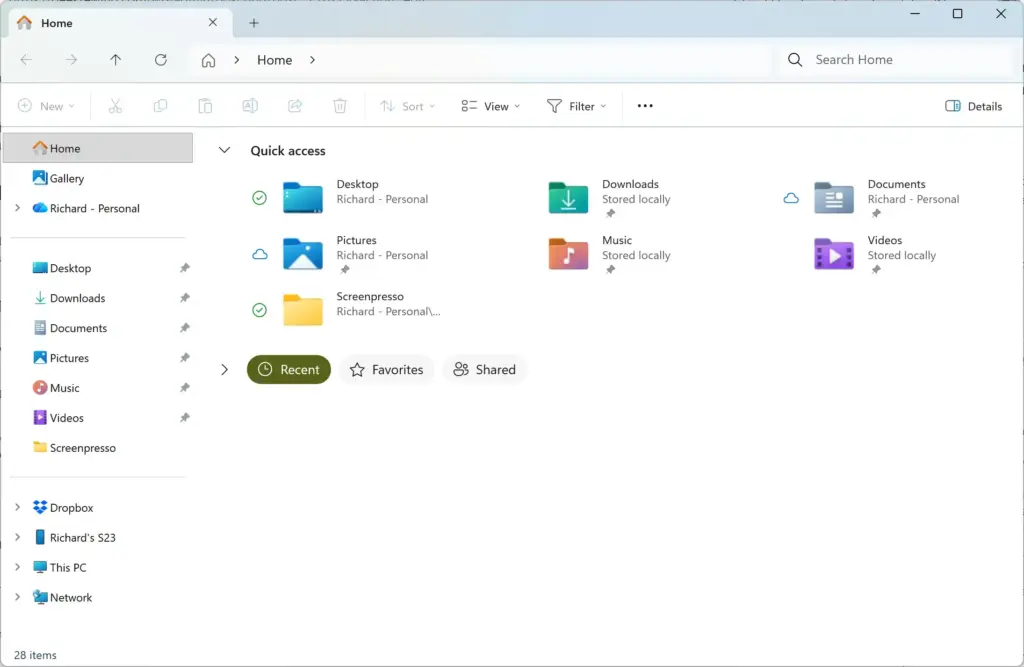
Windows 11 File Explorer showing Dropbox folder in sidebar. - Go to the folder that holds the ISO file. Downloads is the usual location. The file name ends in .iso.
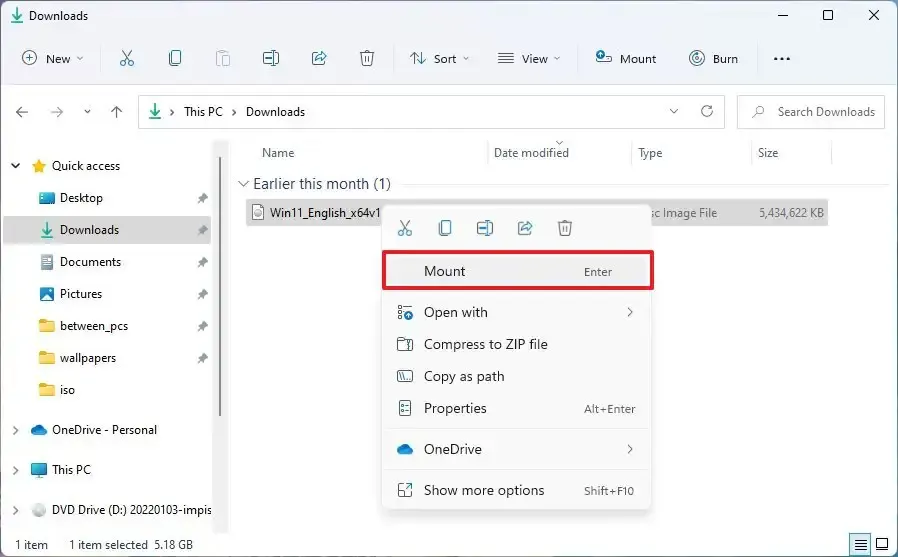
windows 11 mount iso image to perform in place upgrade - Right-click the ISO file and select Mount. Windows creates a virtual DVD drive, and File Explorer usually opens it for you. A double-click on the ISO does the same on most PCs. If you do not see Mount, select Show more options in the menu. If it is still missing, go to the troubleshooting section below.
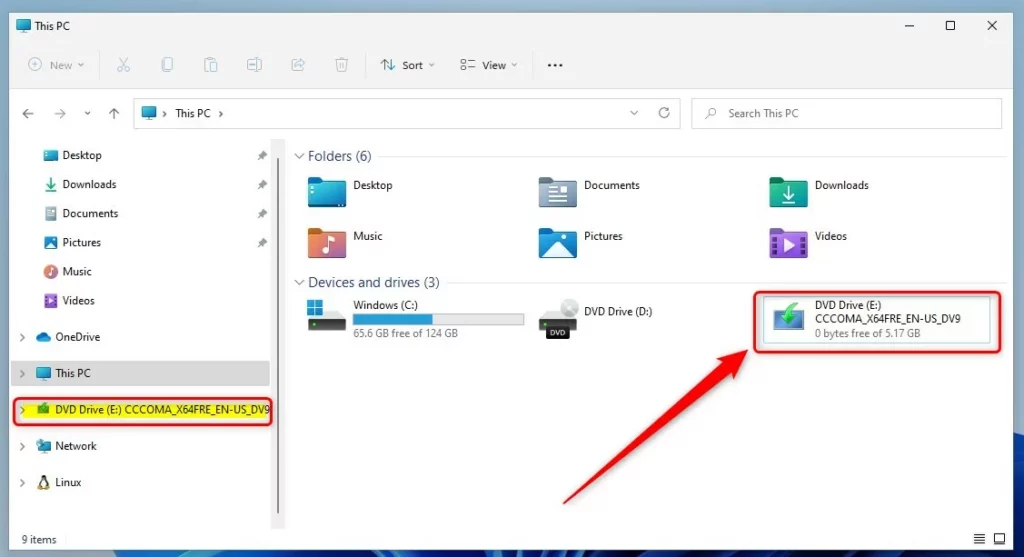
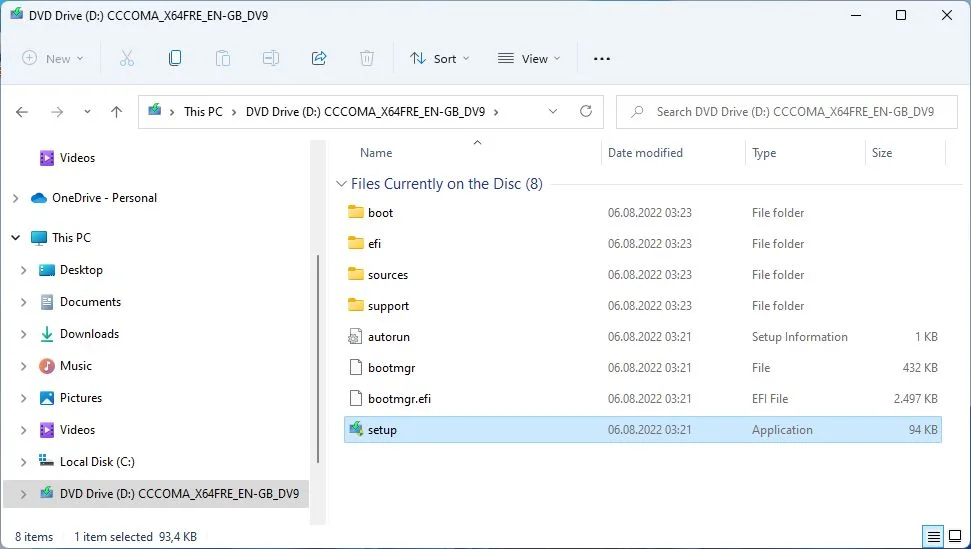
- Open the new drive if File Explorer has not already done so. Look under This PC in the left pane for a drive with a name like DVD Drive (D:) and a Windows 11 label. Inside, you see setup.exe and a sources folder, along with a few other files and folders.
- Double-click setup.exe. This step needs administrator privileges. A User Account Control prompt appears. Select Yes (or enter an administrator password if asked). The Install Windows 11 window opens after a short wait.
- Select Change how Setup downloads updates if you want to control updates. This link is optional. It lets you choose Not right now instead of the default Download and install updates (recommended). The default is the better choice for most PCs because it applies the latest fixes during the install.
- Select Next. Setup downloads updates if you left them on, then checks the PC. A progress screen tells you what it is doing.
- Read the result of the compatibility check. If the PC passes, Setup moves on automatically. If it fails, Setup shows a This PC can’t run Windows 11 message with the reasons. Fix the listed items or stop here. Setup changes nothing at this point.
- Select Accept on the license terms page. Setup does not continue until you accept.
- Look at the Ready to install page. It lists what Setup will keep, such as personal files and apps. To change that, select Change what to keep and pick an option. The next section explains each one.
- Before you select Install, know this: once it starts, do not turn the PC off, even if the screen stays black or the percentage seems stuck for several minutes. Select Install. The screen goes full size and shows a percentage. The install takes a while, and the PC restarts on its own during it.
- Leave the PC alone until it reaches the sign-in screen.
- Sign in with your usual account. Windows may run a short final setup step before the desktop appears.
- Open File Explorer, right-click the virtual DVD drive and select Eject. This removes the mounted ISO and is optional, but it keeps the drive from cluttering This PC.
To check the result, open Settings System About. The Windows specifications section shows the edition and version now installed.
Choose What Setup Keeps
The Change what to keep link opens a page with up to three options. These decide how much of your current setup survives the install.
- Keep personal files and apps. Your documents, pictures, installed programs and settings stay. This is the default and the safest choice for a repair or upgrade.
- Keep personal files only. Your files stay, but programs and most settings are removed. You reinstall your apps afterwards.
- Nothing. This removes your files, apps and settings, and it is hard to undo once the install begins. Back up everything before you choose it.
Windows may grey out an option. The usual causes are an ISO that is an older version than the one installed, or one with a different language or edition. For instance, a Pro ISO does not keep apps on a Home installation. Download an ISO that matches your current edition and language, or accept the smaller keep option.
If the Installer Will Not Start
Most failures come from the mount step or the compatibility check. Match what you see to the cases below.
The Mount Option Is Missing
Another program, often a compression tool, may have taken over ISO files. Right-click the ISO, select Open with and choose the File Explorer entry. If the file came from another PC, right-click it, select Properties and check the General tab for an Unblock box. Tick it, select Apply and try again.
The guide to mounting and unmounting ISO files in Windows 11 covers other ways to attach an ISO.
Setup Reports That the PC Cannot Run Windows 11
The message names the failing requirement, such as TPM, Secure Boot or memory. Fix what the message lists if the hardware allows it. If the PC cannot meet the requirement, Setup will not proceed. This guide does not list a supported workaround for that requirement. Do not try unsupported changes; check Microsoft’s support site for the official options.
The Keep Options Are Greyed Out
Check the edition, language and version of the ISO against the installed Windows. Open Settings System About to see what the PC runs now. Then download a matching ISO.
Setup Does Not Open or Closes Immediately
Restart the PC, then go back to the first step in the list above and work through it again. If the problem continues, copy the ISO contents to a normal folder. Open the mounted drive, select all files, copy them to a folder on the system drive, and run setup.exe from there. Copying needs several gigabytes of free space on the drive you copy to. Check the ISO’s file size first, then make sure the drive has more than that.
Undo or Stop the Process
To remove the mounted ISO at any time, right-click the virtual drive in File Explorer and select Eject. The ISO file itself stays in its folder, so you can delete it once the upgrade works.
What to Do Next
If Setup fails, note the message it shows and match it against the troubleshooting cases above. Keep the ISO file until you are sure the PC runs correctly, because you can mount it again to repair the installation. For a clean install on a blank drive, create a bootable USB drive from the same ISO.
Have a question about this guide?
Answered by AI from this guide. Good questions may be added to this page — please don't include personal details.
Did this guide fix your problem?

About the Author
Richard
Tech Writer, IT Professional
Richard is a writer at Geek Rewind who turns complex IT tasks into clear, step-by-step guides. He draws on years of hands-on experience in system administration and enterprise IT operations, focusing on Windows, Linux and WordPress: the problems people actually run into, and the fixes that work. His server and WordPress guides come from systems he runs himself. Richard builds and maintains the platform behind Geek Rewind, from its Ubuntu servers and Nginx configuration to its custom WordPress plugins. Many new tutorials start with readers' questions, and he's always glad to answer them in the comments.
No comments yet — be the first to share your thoughts!