How to Mount and Unmount ISO Files in Windows 11
Mounting an ISO file in Windows 11 turns it into a virtual disc drive you can use without burning it to a DVD or CD. An ISO file is essentially a perfect copy of an entire disc, like a software installer or a game.
Windows 11 can handle this directly through File Explorer, meaning you don’t need to download any extra tools. This feature became built-in starting with Windows 8, making it easy to access the files inside an ISO as if you’d put a real disc in your computer.
Unmounting simply removes this virtual drive. It’s incredibly handy for installing older games or software that came on disc images.
Mount an ISO by opening File Explorer, selecting the ISO, and clicking Mount in the ribbon or context menu. Unmount it by right-clicking the virtual drive under This PC and selecting Eject.
What happens when you mount an ISO?
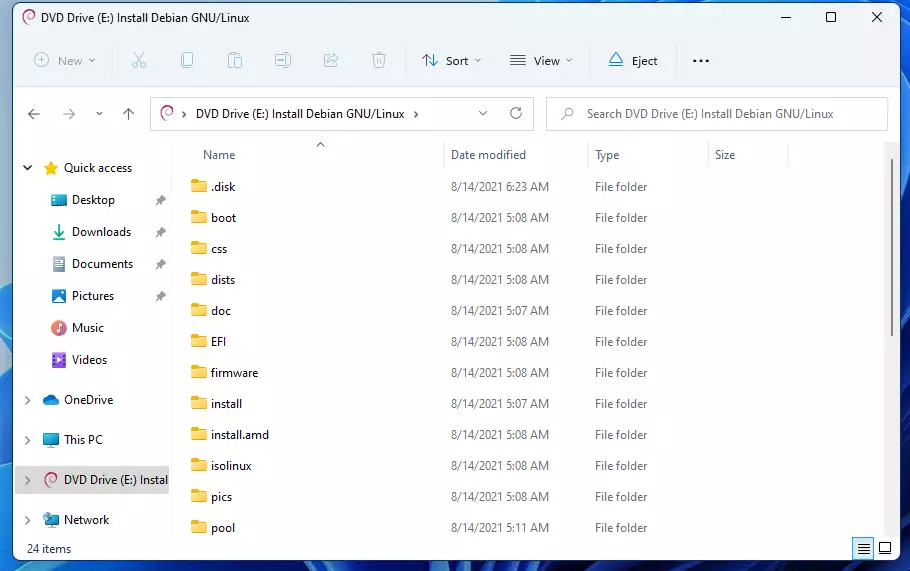
Mounting an ISO file in Windows 11 makes it appear as a new drive in File Explorer, just like a CD or DVD.
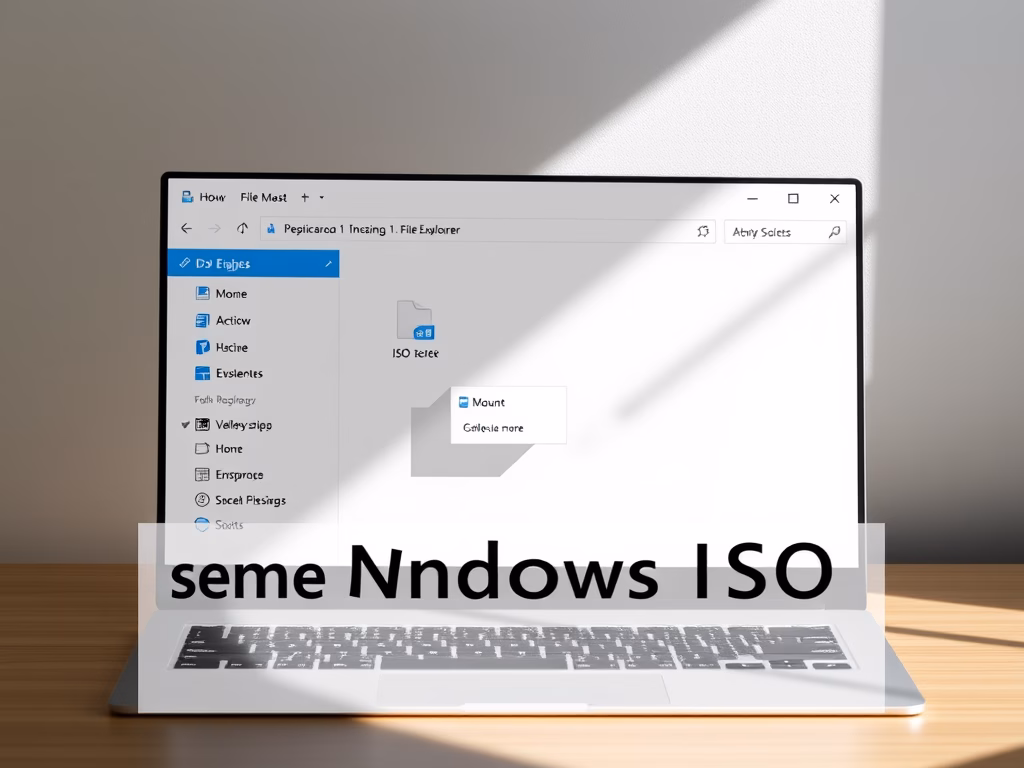
How to mount ISO files 🪟 Windows 11 using File Explorer
Mounting ISO files in Windows 11 using File Explorer is straightforward. Find the ISO file you want to use, click it once to select it, and then click the ‘Mount’ button in the toolbar at the top. Alternatively, right-click the ISO file and choose ‘Mount’ from the menu that pops up.
- Open File Explorer.
- Locate your ISO file.
- Select the file and look at the top ribbon menu.
- Click the Mount button.

Alternatively, right-click the file and choose Mount from the context menu. This creates a virtual drive that appears under This PC.
How to unmount a virtual drive
Unmounting an ISO file disconnects the ISO's contents from your computer and frees up system resources. To unmount an ISO file, open File Explorer, navigate to 'This PC', find the drive letter assigned to your ISO, right-click it, and select 'Eject'.
- Open File Explorer and navigate to This PC.
- Find the virtual drive icon.
- Right-click the drive and select Eject.

The drive will disappear from your system immediately.
Advanced: Mounting via PowerShell
Users who prefer commands can mount ISO files in Windows 11 with PowerShell. Open PowerShell as an administrator and type the command to mount your ISO. The command to mount is `Mount-DiskImage -ImagePath` followed by the full path to your ISO file.
- Right-click the Start button and select Terminal (Admin).
- Type the following command and press Enter:
Mount-DiskImage -ImagePath "C:\path\to\your\file.iso" - To unmount, use:
Dismount-DiskImage -ImagePath "C:\path\to\your\file.iso"
Troubleshooting: Missing Mount option
If the ‘Mount’ option doesn’t appear when right-clicking an ISO file in Windows 11, it usually means Windows isn’t set to open ISO files with File Explorer by default. To fix this and restore the ‘Mount’ option, instruct Windows to always use File Explorer for ISOs.
- Right-click your ISO file and select Open with > Choose another app.
- Select Windows Explorer from the list.
- Check the box that says Always use this app to open .iso files.
- Click OK.
Summary
Mounting and unmounting ISO files in Windows 11 uses built-in tools like File Explorer or PowerShell, with straightforward fixes for common issues.
Can I mount an ISO file without third-party software?
Yes. Windows 11 natively supports ISO and IMG files. Downloading extra programs like WinRAR or Daemon Tools is not necessary. The built-in File Explorer context menu or PowerShell commands can be used to mount disk images directly within the operating system.
How do I burn an ISO to a disc after mounting?
Mounting an ISO does not burn it to a disc. To burn an ISO, right-click the file in File Explorer and select ‘Burn disc image’. A blank writable CD or DVD inserted into a physical optical drive is required to complete this process successfully.
Does 🪟 Windows 11 support all ISO file types?
Windows 11 supports standard ISO and IMG files. However, some specialized or compressed disk images created by third-party software might not mount natively. If an error is encountered, the file may be corrupted or use a proprietary format requiring the original software to open.
Was this guide helpful?

About the Author
Richard
Tech Writer, IT Professional
Richard, a writer for Geek Rewind, is a tech enthusiast who loves breaking down complex IT topics into simple, easy-to-understand ideas. With years of hands-on experience in system administration and enterprise IT operations, he’s developed a knack for offering practical tips and solutions. Richard aims to make technology more accessible and actionable. He's deeply committed to the Geek Rewind community, always ready to answer questions and engage in discussions.


No comments yet — be the first to share your thoughts!