How to Use Storage Sense in Windows 11

Storage Sense in Windows 11 is a built-in tool that cleans up your drive for you. It deletes temporary files, empties the Recycle Bin , and can clear old items from your Downloads folder. Turning it on keeps free space from running out, so your PC stays responsive and you don’t have to clean up by hand.
You can set Storage Sense to run on its own when disk space gets low, or schedule it to run every day, every week or every month. It is part of both Windows 11 Home and Pro, so the steps below are the same on either edition.
Run Storage Sense by opening Settings, navigating to System Storage, clicking Storage Sense, and then clicking “Run Storage Sense now.” This automatically frees up disk space by deleting temporary files and emptying the Recycle Bin .
How to Run Storage Sense Now
You don’t have to wait for a schedule. You can run Storage Sense yourself and clean up the drive immediately. Press the Win plus I to open the Settings app, click System, then select Storage. From there you can start Storage Sense right now.
Running it manually uses the cleanup options you have already configured. By default, Storage Sense removes temporary files and leaves your Downloads folder alone, so your personal files are not touched. If you changed the Downloads setting earlier, check it first, because a manual run will follow that setting too. No restart is needed, and nothing is installed or changed on your system.
- Open the Settings app: Click the Start menu (the Windows icon in the bottom-left corner), then click Settings. Or press
Windows key + Ion your keyboard to open Settings quickly. The Settings window should now be open. Learn more about opening Settings - In the Settings window, click System on the left side. The System options appear on the right.
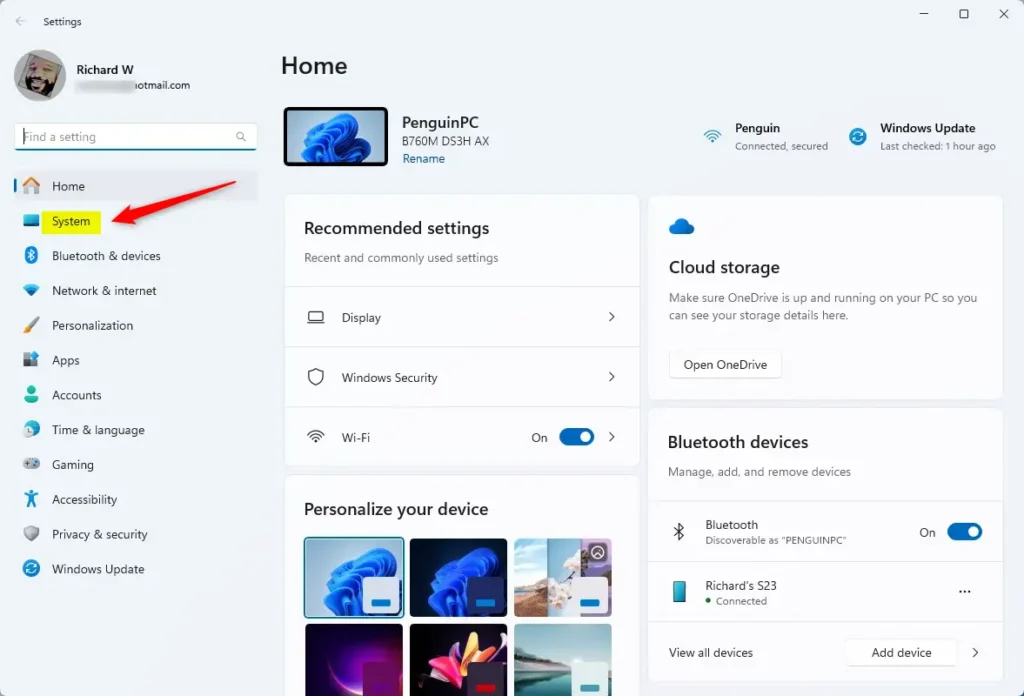
System in the Settings app - On the right side, click Storage. You should see a bar showing how full your drive is, with a breakdown by file type (apps, temporary files, and so on).
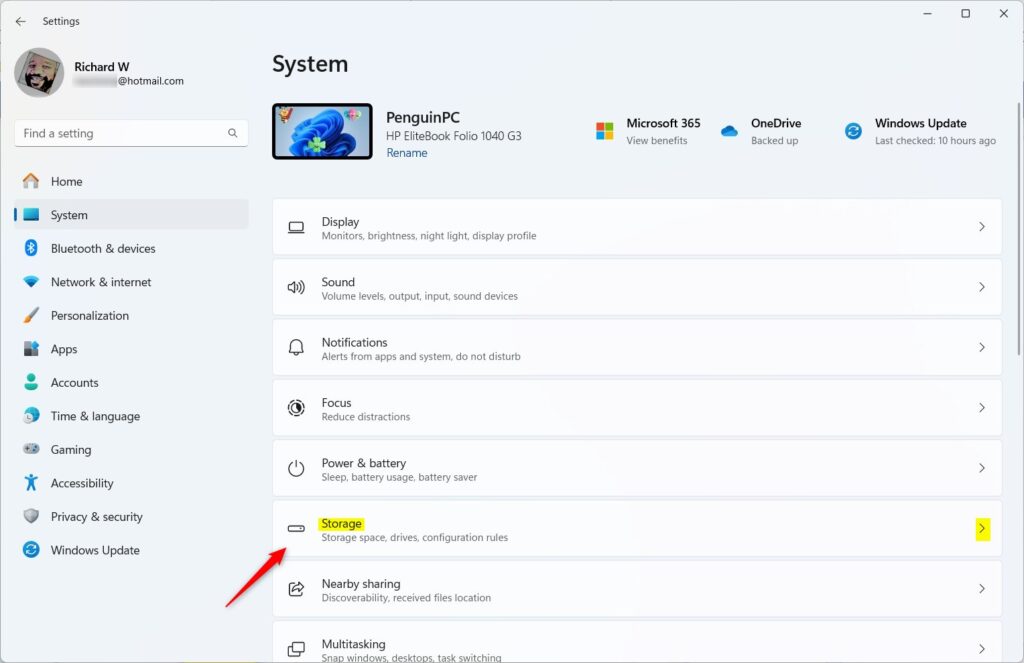
Windows 11 Storage settings tile in the Settings app - Scroll down and find Storage Sense, then click it. This opens the Storage Sense page, where you can turn automatic cleanup on or off and choose when it runs. If some options are greyed out or show a message that your organization manages them, the PC is controlled by a work or school policy, and you will need to ask your administrator.
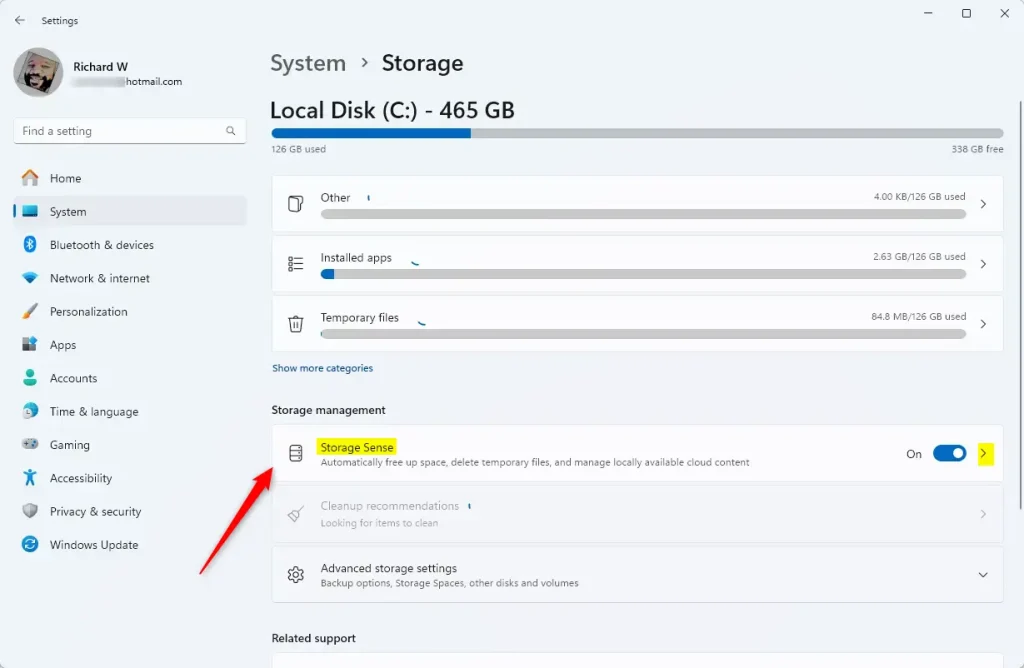
Storage Sense tile in Settings - Scroll to the bottom of the page and click the Run Storage Sense now button to start cleaning up your disk. The cleanup starts right away, and you can keep working while it runs.
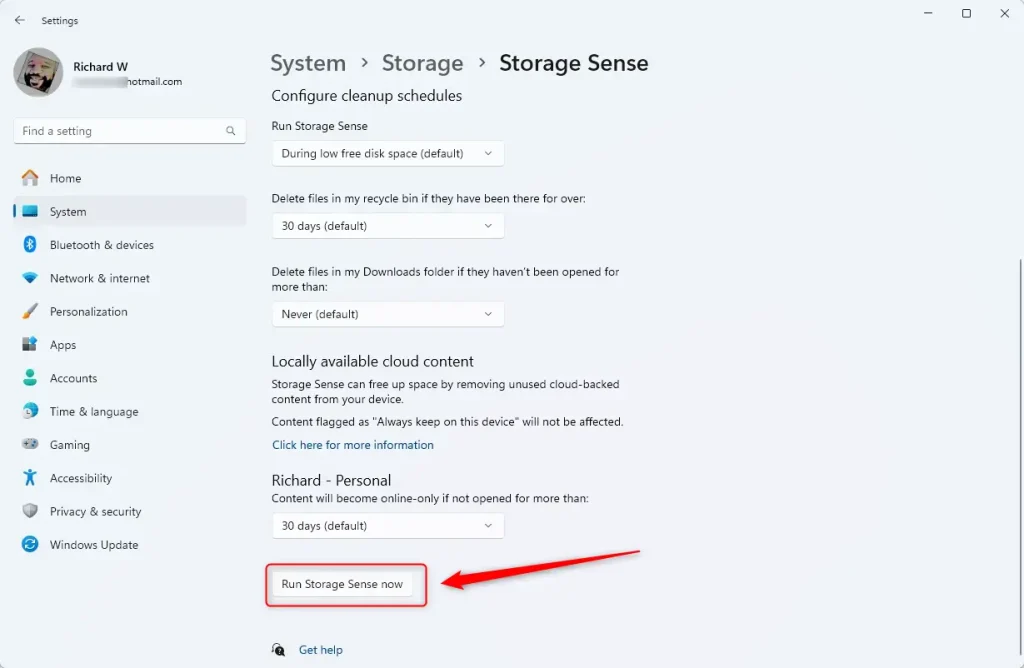
Run Storage Sense now button - Wait a moment. Windows will show you how much space it cleared. If the number is small, your drive didn’t have much temporary data to remove. If it is large, you will see the extra free space on the Storage page.
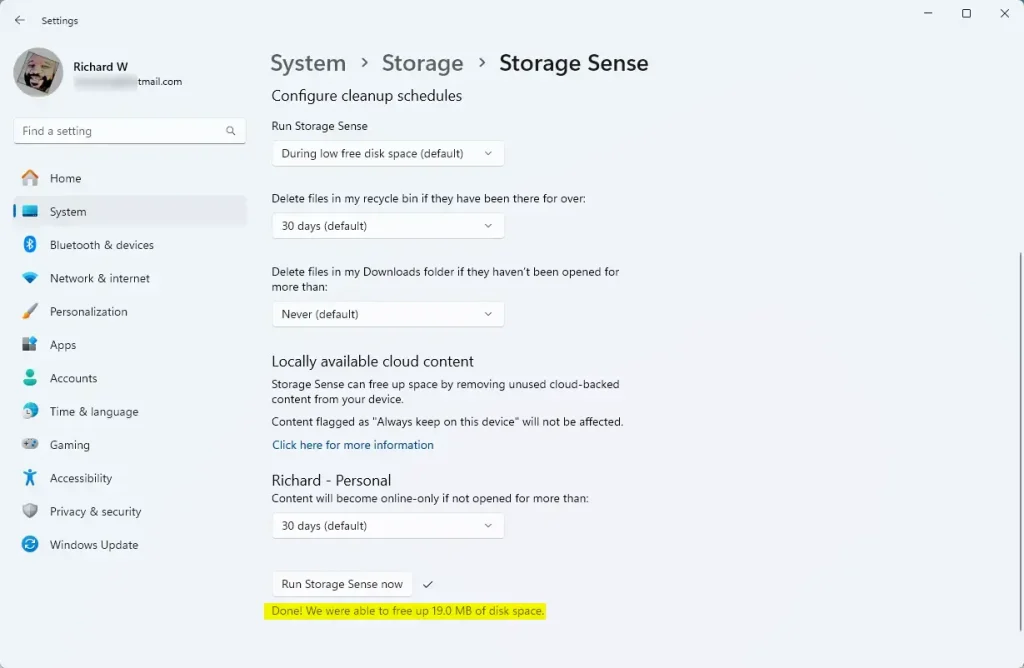
Storage Sense results showing freed space - When finished, you can close the Settings window. Files that Storage Sense deleted cannot be undone, except items still in the Recycle Bin that it has not yet emptied.
Summary
Storage Sense in Windows 11 is a handy tool that automatically deletes unneeded files to free up disk space. Run it by hand when you need space quickly, or turn on automatic cleanup so you don’t have to think about it. If you ever want it to stop, return to Settings System Storage Storage Sense and switch off the automatic cleanup option.
Was this guide helpful?

About the Author
Richard
Tech Writer, IT Professional
Richard is a writer at Geek Rewind who turns complex IT tasks into clear, step-by-step guides. He draws on years of hands-on experience in system administration and enterprise IT operations, focusing on Windows, Linux and WordPress: the problems people actually run into, and the fixes that work. His server and WordPress guides come from systems he runs himself. Richard builds and maintains the platform behind Geek Rewind, from its Ubuntu servers and Nginx configuration to its custom WordPress plugins. Many new tutorials start with readers' questions, and he's always glad to answer them in the comments.



No comments yet — be the first to share your thoughts!