How to Use Drag-and-Drop File Sharing in Windows 11

Drag and drop files by clicking a file and holding, then dragging it to the top of your screen to reveal the sharing tray. Drop the file onto your desired app in the tray to share it. This feature requires enabling via ViVeTool in Windows Insider builds.
What is Drag-and-Drop Sharing?
Drag-and-drop file sharing in Windows 11 lets you send pictures, videos, and documents to nearby devices, open apps, and chat windows straight from your desktop or File Explorer . It moves files without cloud storage, USB drives, or email attachments.
It works between Windows 11 computers running version 22H2 or newer that have Wi-Fi and Bluetooth turned on. The transfer uses a peer-to-peer connection, so the data stays local and moves in seconds.
One caveat: the feature is still in testing (see the sections below). On a regular, non-Insider build you may need the ViVeTool steps in this guide before the tray shows up. It works the same on Windows 11 Home and Pro.
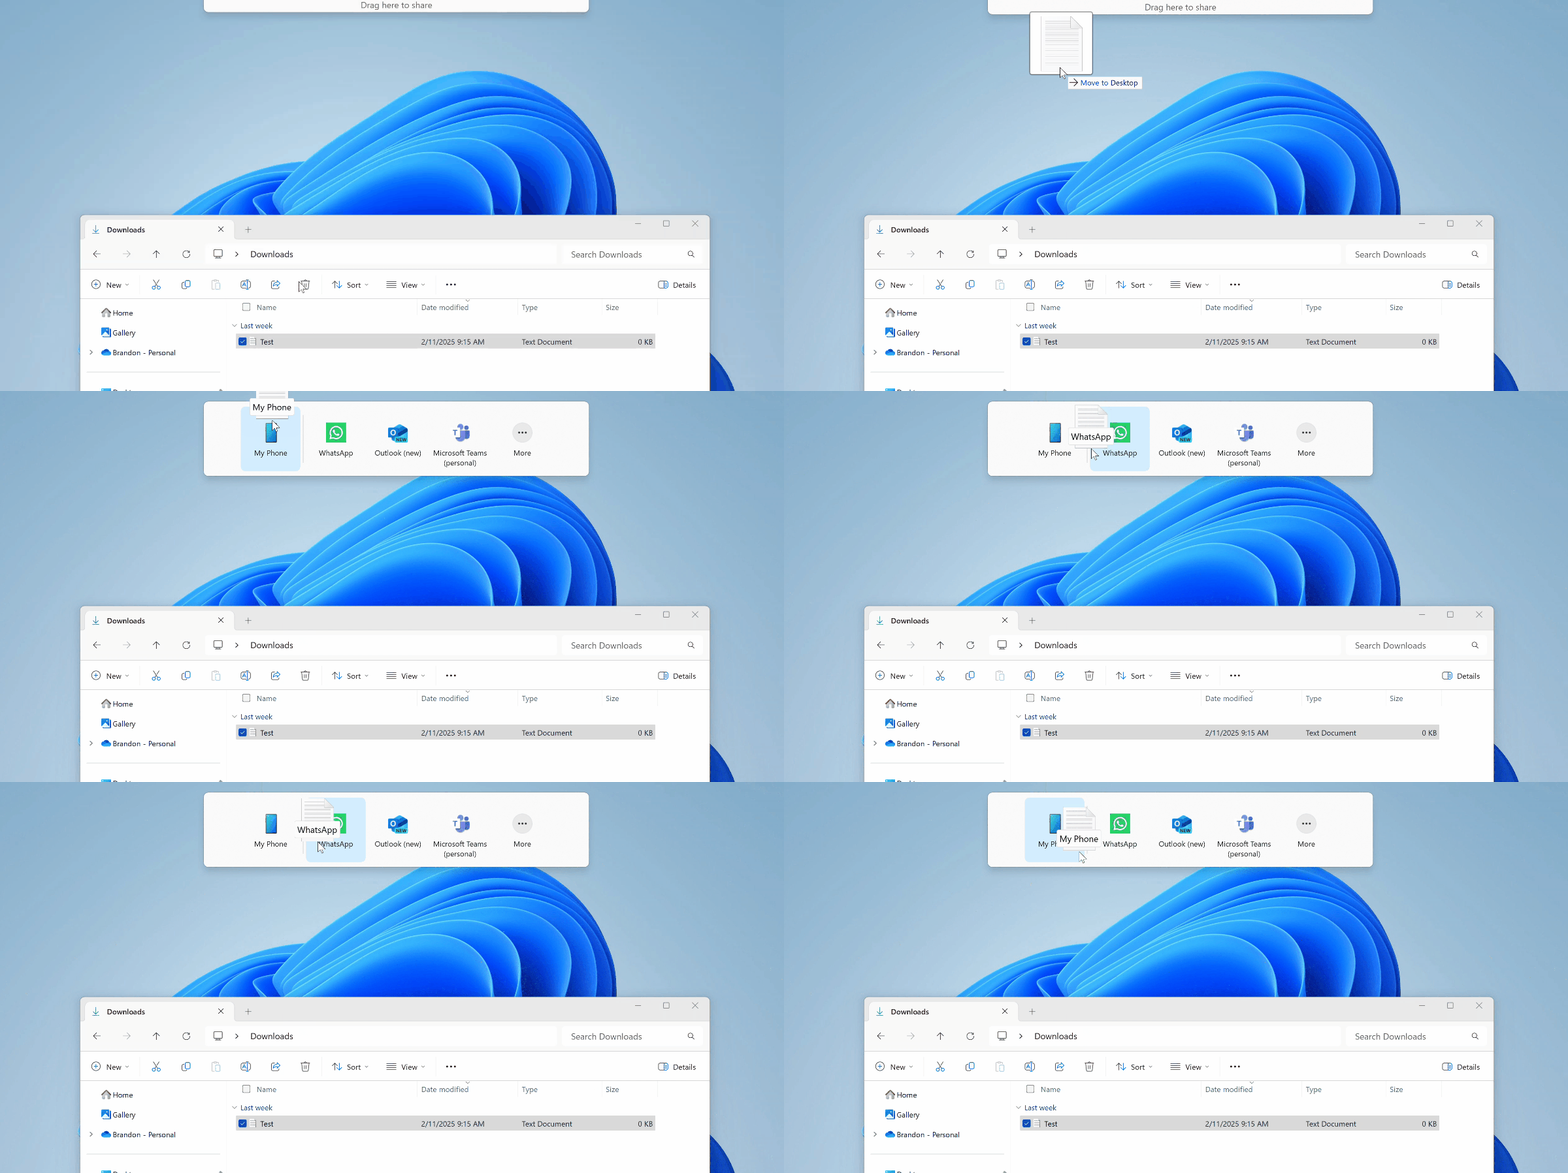
When you drag a file from File Explorer or the desktop, a small tray appears at the top of the screen. It lists the apps that can take the file right away.
To see it, click and hold a file, then move the pointer toward the top edge of the screen. Keep the mouse button held down. If you let go too early, the tray disappears and the file stays where it was.
Why Use This Feature?
The main benefit is speed. You skip the app menus: no Share button, no browsing for a file inside a chat window, no attaching. You drop the file onto the app you want.
That adds up during a busy day, especially if you send screenshots, documents, or photos many times an hour.
How to Turn On This Feature
For now, this feature lives in Windows 11 Insider Builds. These are preview releases Microsoft uses to test features before a general rollout.
To switch it on, you need ViVeTool, a popular open-source utility for managing experimental Windows settings. These settings are unfinished, so expect some rough edges. Don't try this on a computer you can't afford to have misbehave.
Step 1Download ViVeTool
Start by getting ViVeTool and learning how to use it. This guide covers the download and setup:
How to Enable Hidden Features with ViVeTool
Finish that guide first. The command later in this tutorial only works once ViVeTool is ready to run.
Step 2Open Command Prompt or Windows Terminal
ViVeTool changes system settings, so you must open the command line with administrator rights.
- Press Windows key + S to open Windows Search.
- Type Command Prompt or Windows Terminal. The app appears at the top of the results.
- Right-click the app and select Run as administrator.
- Click Yes if User Account Control asks for permission. The window opens, and its title bar should show "Administrator".
⚠️ Administrator privileges are required. If you skip this, the command fails with an access error. Close the window and reopen it as administrator.
Step 3Enable Drag-and-Drop Sharing
- Make sure the command window is in the folder where you placed ViVeTool, as explained in the guide linked above.
- Type or copy this command, then press Enter:
vivetool /enable /id:45624564,53397005
- Check the output. ViVeTool normally prints a short message saying the feature configuration was set. An error message means the command did not apply.
- Restart the computer. Open Start Power Restart The change only takes effect after a reboot.
To undo the change, run ViVeTool again with the disable option instead of enable, using the same feature ID as in the command above, then restart.
How to Share Files Using Drag-and-Drop
- Find the file you want to share on your desktop or in File Explorer.
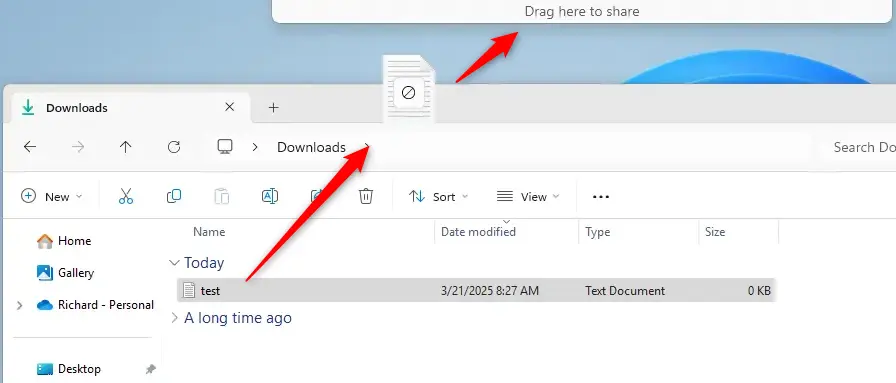
- Click and hold the file. Drag it towards the top of your screen.
- The sharing tray will appear. It shows apps you can drop your file onto.
- Drop the file on the app you want to share it with. Need more options? Select "More…" to open the Windows share window.
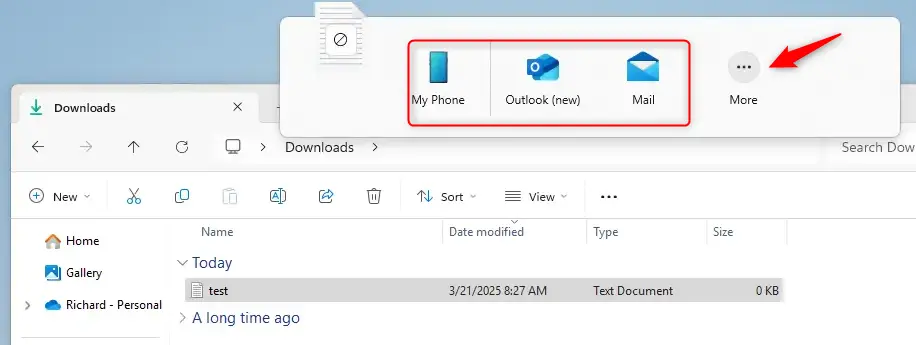
Windows 11 drag and drop file sharing lets you send documents or photos to apps and contacts by holding a file with your mouse and moving it to the top of the screen. A sharing tray opens there, and you drop the file onto the app you want. You don't have to open extra windows or menus.
If nothing happens when you drag, check three things: you restarted after running the ViVeTool command, you are on a build that includes the feature, and you are holding the mouse button the whole time.
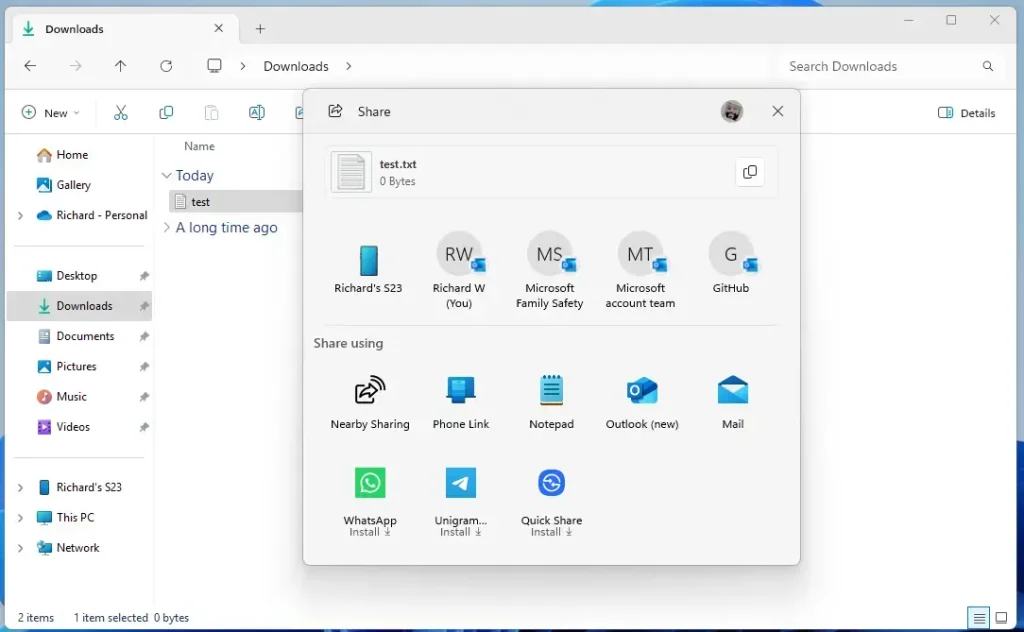
Windows 11 shows a dedicated share tray along the top border of the monitor. Here is the sequence:
- Click and hold a document or image on the desktop or in File Explorer.
- Drag it upward. The share tray appears along the top of the screen.
- Release the mouse button over an application in the tray. The transfer completes.
If you change your mind mid-drag, move the file back down and release it away from the tray. Nothing is sent.
Summary
Microsoft describes this feature in Windows 11 Insider Preview Build 22635.4950 (Beta). Once it rolls out broadly, dragging files to the top of the screen will work natively, with no workarounds like ViVeTool.
More info from Microsoft: Windows 11 Insider Preview Build 22635.4950 (Beta)
Have a question about this guide?
Answered by AI from this guide. Good questions may be added to this page — please don't include personal details.
Did this guide fix your problem?

About the Author
Richard
Tech Writer, IT Professional
Richard is a writer at Geek Rewind who turns complex IT tasks into clear, step-by-step guides. He draws on years of hands-on experience in system administration and enterprise IT operations, focusing on Windows, Linux and WordPress: the problems people actually run into, and the fixes that work. His server and WordPress guides come from systems he runs himself. Richard builds and maintains the platform behind Geek Rewind, from its Ubuntu servers and Nginx configuration to its custom WordPress plugins. Many new tutorials start with readers' questions, and he's always glad to answer them in the comments.
No comments yet — be the first to share your thoughts!