Enable Modern Standby Network Connectivity in Windows 11
Modern Standby is a new sleep mode in Windows 11 that helps your computer save power while still staying connected to the internet or your network. This works like your smartphone — your device can quickly “wake up” and still get notifications, emails, and alerts even when it’s sleeping.
This guide will show you how to turn Modern Standby network connectivity on or off, so you can choose whether your device stays connected during sleep or saves more battery by disconnecting.
You enable Modern Standby network connectivity by navigating to Control Panel, then Hardware and Sound, and finally Power Options. From there, change your active plan settings and adjust “Network connectivity in Standby” under advanced power settings. You can choose to enable, disable, or let Windows manage the connection.
What is Modern Standby Network Connectivity?
- Connected state: Your device stays connected to WiFi or other networks during sleep, so you get updates and notifications instantly.
- Disconnected state: Your device turns off network connections during sleep, which can save battery but means no updates until you wake it up.
- Managed by Windows: Windows decides when to keep the network on or off to balance notifications and battery life.
How to Change Modern Standby Network Settings in 🪟 Windows 11
Before you start, make sure your PC supports Modern Standby.
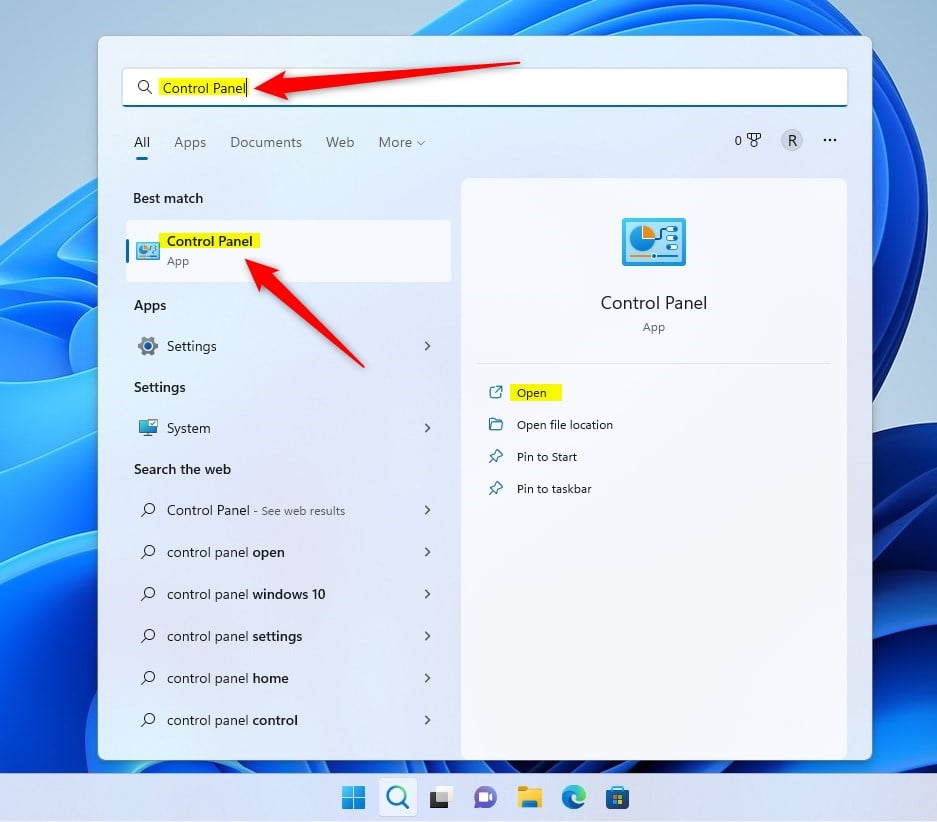
Step 1Open Control Panel
1. Click the Start menu (the Windows icon in the bottom-left corner).
2. Type Control Panel in the search box.
3. Click on the Control Panel app from the search results.
Step 2Go to Power Options
In Control Panel, click Hardware and Sound, then select Power Options.
Control Panel > Hardware and Sound > Power Options
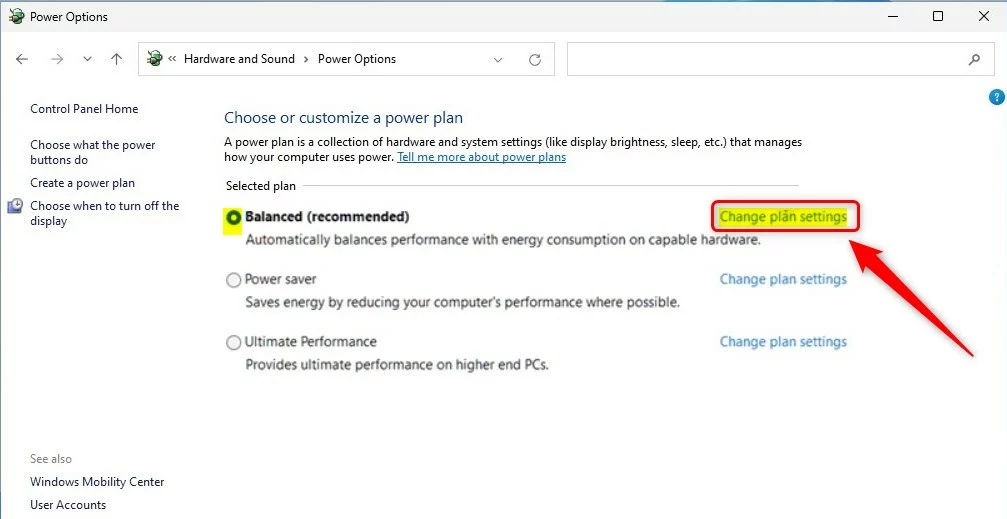
Step 3Change Power Plan Settings
Next, find your current active power plan and click Change plan settings next to it.
Step 4Open Advanced Power Settings
Click Change advanced power settings.

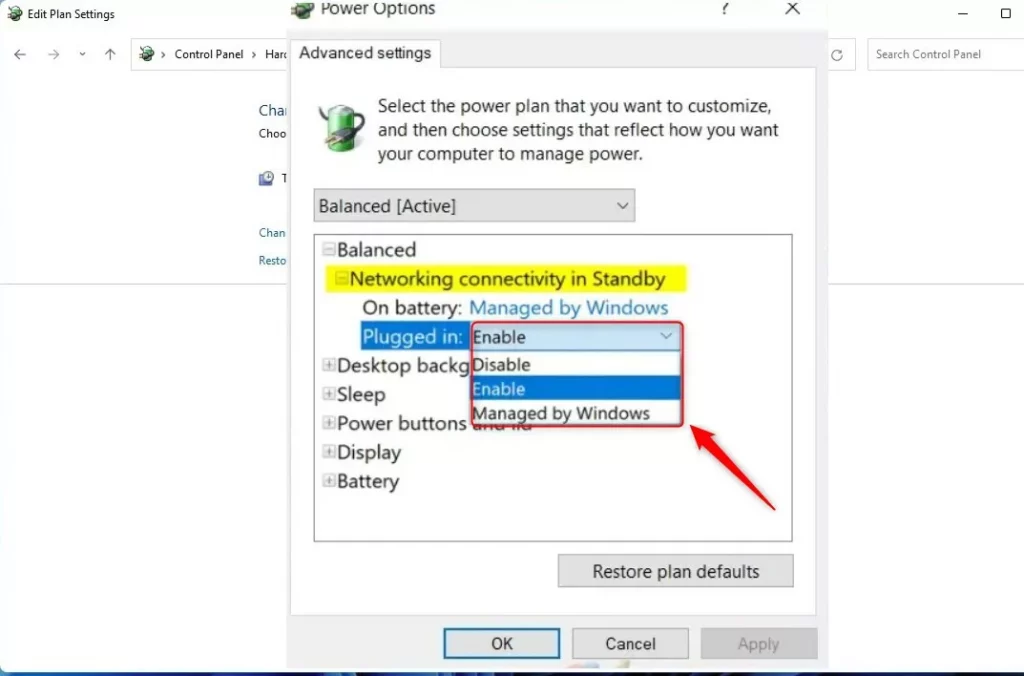
Step 5Adjust Network Connectivity in Standby
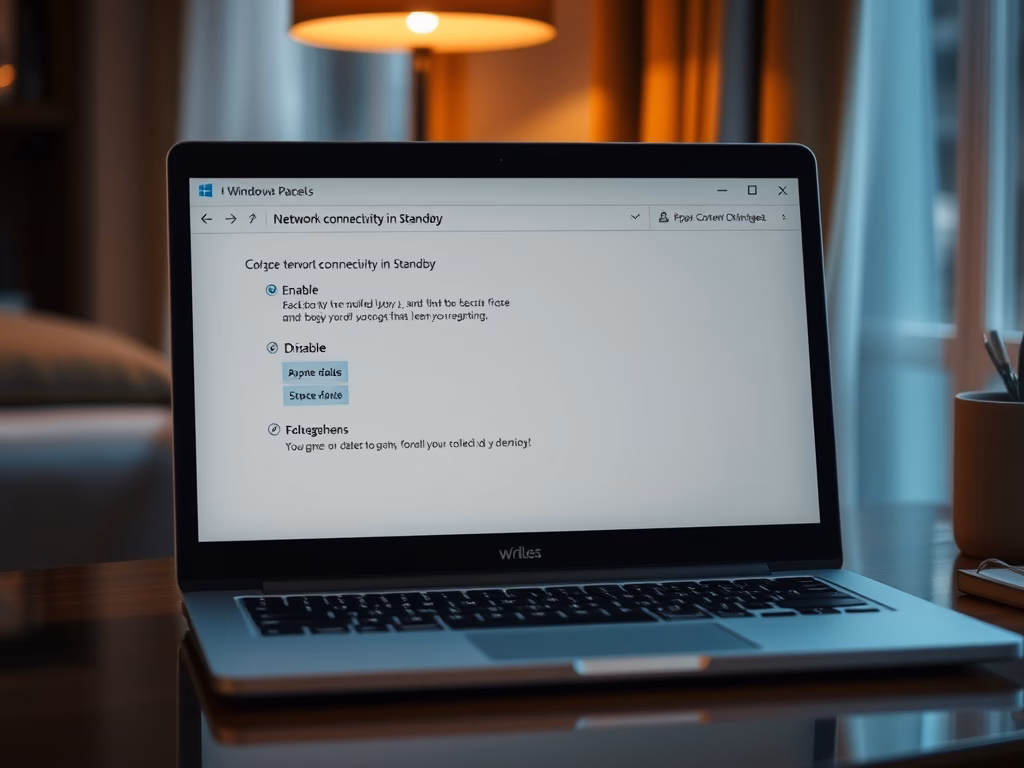
In the new window, scroll to find Network connectivity in Standby. You’ll see two sets of options:
- On battery: choose Disable, Enable, or Managed by Windows.
- Plugged in: choose Disable, Enable, or Managed by Windows.
Pick the settings that fit your needs:
- Enable: Stay connected during sleep.
- Disable: Disconnect to save battery.
- Managed by Windows: Let Windows decide what’s best.
When done, click OK to save.
Alternative: Use Local Group Policy Editor
If you prefer, you can also change these settings using the Local Group Policy Editor. This tool is usually for more advanced users but works well if you want quick access.
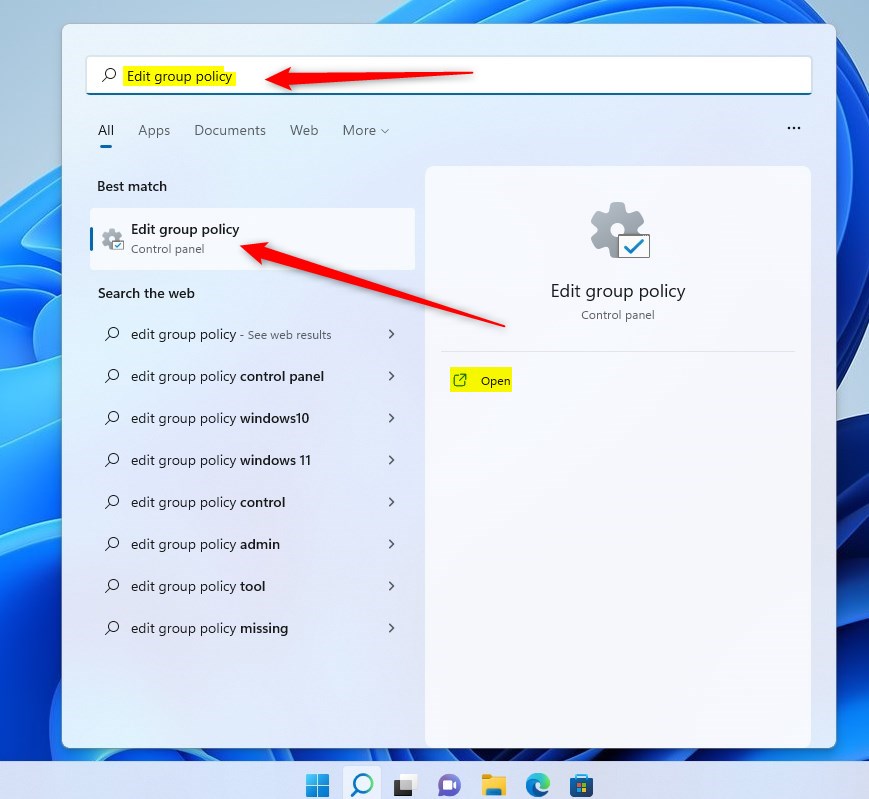
Step 1Open Local Group Policy Editor
1. Click the Start menu.
2. Type Edit group policy.
3. Click on Edit group policy in the results.
Step 2Go to Sleep Settings
In the left panel, follow this path:
Computer Configuration > Administrative Templates > System > Power Management > Sleep Settings
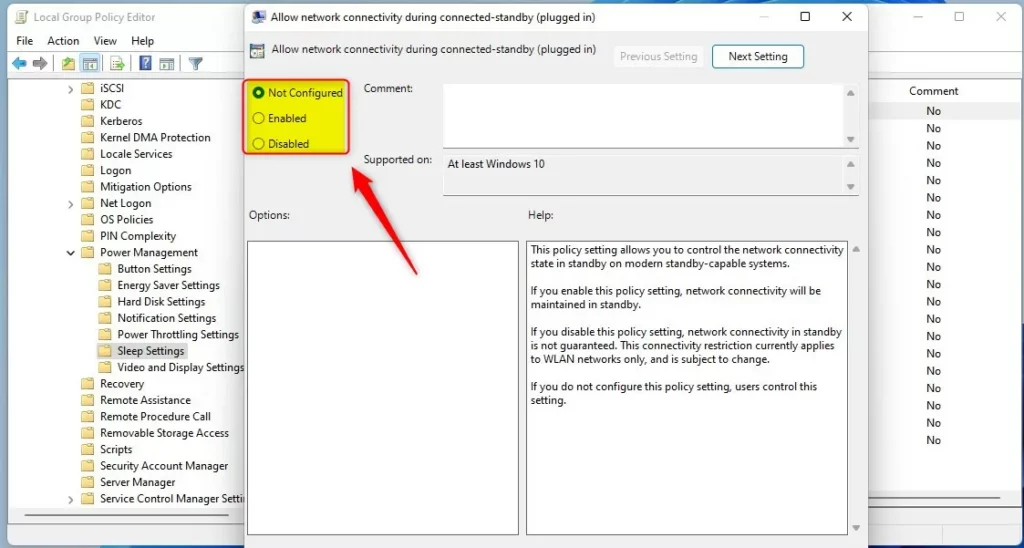
Step 3Change Connectivity Settings
On the right side, find these two settings:
- Allow network connectivity during connected-standby (plugged in)
- Allow network connectivity during connected-standby (on battery)
Double-click each one, then select:
- Not Configured (default)
- Enabled – Keep network connected during standby.
- Disabled – Network may disconnect during standby.
Click Apply and then OK for each setting.
Summary
- Modern Standby lets your PC stay connected to networks while sleeping.
- You can choose to keep the connection on, turn it off, or let Windows decide.
- Adjust these settings via Control Panel or Local Group Policy Editor.
- Changing these can help balance getting notifications and saving battery power.
By following these simple steps, you can control how your Windows 11 device uses the network during sleep to best fit your needs!
Was this guide helpful?

About the Author
Richard
Tech Writer, IT Professional
Richard, a writer for Geek Rewind, is a tech enthusiast who loves breaking down complex IT topics into simple, easy-to-understand ideas. With years of hands-on experience in system administration and enterprise IT operations, he’s developed a knack for offering practical tips and solutions. Richard aims to make technology more accessible and actionable. He's deeply committed to the Geek Rewind community, always ready to answer questions and engage in discussions.


No comments yet — be the first to share your thoughts!