How to Turn On or off Dynamic Lock to Automatically Lock Windows 11

Dynamic Lock is a built-in Windows 11 feature that locks your PC when you walk away. It watches the Bluetooth signal from your paired phone. Your screen stays unlocked while the phone is nearby. Roughly 30 to 60 seconds after the phone moves out of Bluetooth range, Windows locks itself.
You must pair your phone with your Windows 11 PC over Bluetooth before the feature will work. Once that is done, setup takes less than two minutes in the Settings app. Dynamic Lock is available in both Home and Pro editions. It only locks the PC. It never unlocks it when you come back, so you still sign in the usual way.
Open Settings Accounts Sign-in options, scroll to Dynamic Lock, and check the box next to “Allow Windows to automatically lock your device when you’re away.” The feature locks your PC 30 to 60 seconds after your paired Bluetooth phone moves out of range, with no restart needed.
What is Dynamic Lock?
Dynamic Lock connects to your phone over Bluetooth and notices when the signal drops as you leave. That keeps the PC secure without you having to remember a manual shortcut every time you step away.
It helps most if you often get up from your desk. Instead of pressing Win+L each time, you can let the PC lock itself. The shortcut still works, and it is faster, so keep using it when you can.
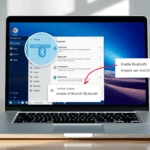
Important Note: Dynamic Lock needs Bluetooth . Turn Bluetooth on for both your Windows 11 PC and your smartphone, and make sure the two are paired. If the phone is not paired, the setting will not do anything useful. The pairing steps are near the end of this guide.
Setting Up Dynamic Lock Through Windows Settings
This is the standard way to set up Dynamic Lock, and it is the one most people should use. Everything you need is in the Settings app on your PC. You do not need administrator tools or the registry.
Step 1Open Windows Settings
Open Settings with either of these methods:
- Press Windows key + I on your keyboard.
- Or click the Start button, then click the Settings gear icon.
The Settings window should open, with a list of categories down the left side.

Step 2Go to Accounts and Sign-in Options
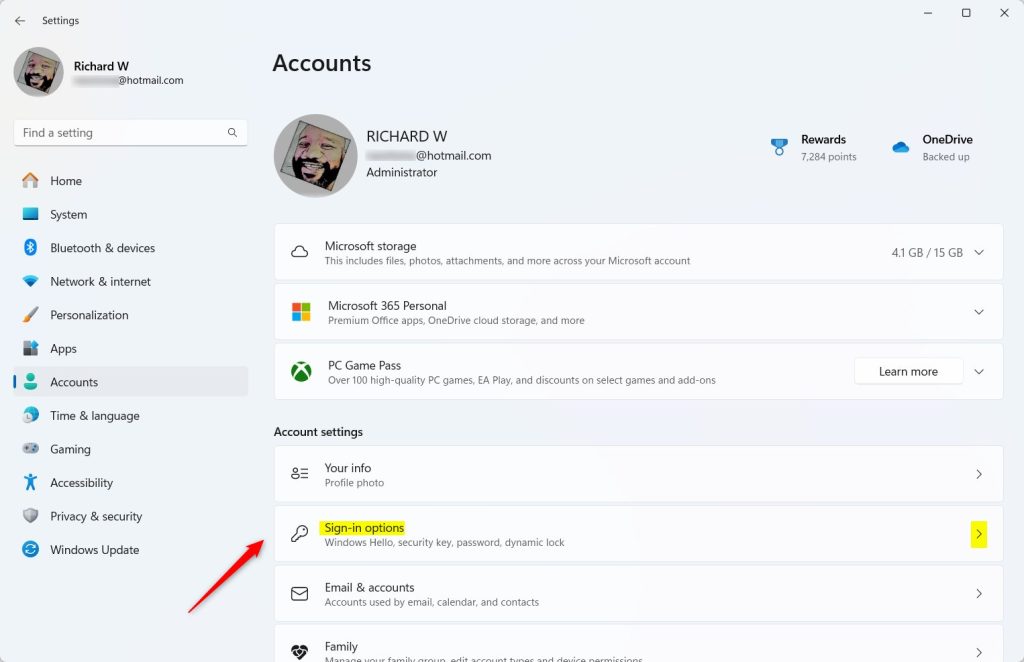
- In the Settings window, click Accounts in the left-hand list.
- On the right, click Sign-in options.
You should now see a list of sign-in methods, such as PIN, password and fingerprint or face recognition if your hardware supports them. Dynamic Lock is in the Additional settings area further down the page. You may need to scroll to reach it.
Step 3Configure Dynamic Lock
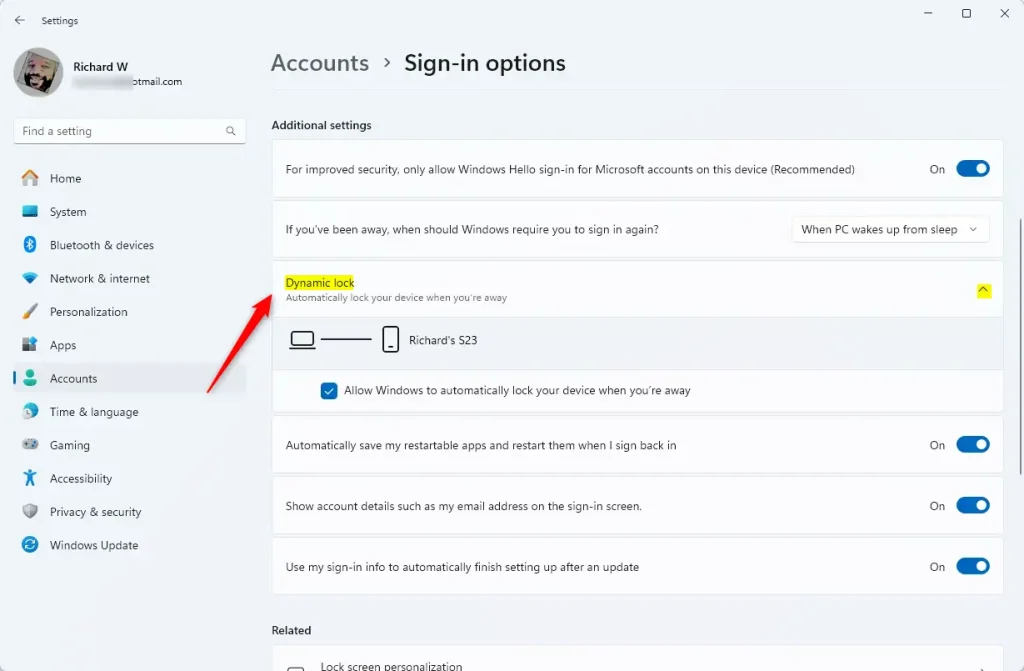
The Dynamic Lock checkbox decides whether your PC uses the Bluetooth connection to your paired phone to lock itself. Find it in the Sign-in options page and tick or untick it:
- To turn Dynamic Lock ON: Check the box that says "Allow Windows to automatically lock your device when you're away."
- To turn Dynamic Lock OFF: Make sure the box next to "Allow Windows to automatically lock your device when you're away" is NOT checked. This is how it is set by default.
If you cannot find the option, scroll further down and expand the Dynamic Lock section. If no phone is paired yet, Windows will not be able to use the feature. Pair the phone first (see the pairing section below), then come back to this page.
Step 4Close Settings
You do not need to click a Save button. The setting takes effect as soon as you tick or untick the box, and you can simply close the Settings window. No restart is needed. The feature starts working the next time you walk away with your paired phone.
Practical Tip: After you turn on Dynamic Lock, test it. Make sure your phone is paired and carry it with you, then walk away from your PC. Wait a minute or two, then check whether the PC has locked itself. This confirms that the Bluetooth connection works and the feature is on.
If the Bluetooth signal is very strong, you may need to walk further away than you expect before the signal drops enough to trigger the lock. If you leave the phone on your desk, the PC will not lock, because the phone never leaves range.
Understanding Dynamic Lock Through the Windows Registry (Advanced Users)
The Registry Editor is a tool for viewing and changing system configuration settings. Advanced users can use it to switch Dynamic Lock on or off without opening the Settings app. Take care here, because a wrong value in the wrong place can cause system problems. For most people the Settings method above is simpler and safer.
The Dynamic Lock setting is controlled by one value in the Windows Registry. The steps below show how to find it or create it.
Accessing the Registry Editor
The quickest way to open the Registry Editor is the Run box. You will have to confirm a User Account Control prompt, so you need an account with administrator rights.
To open the Registry Editor:
- Press Windows key + R to open the Run box.
- Type
regeditand press Enter, or click OK. - If a User Account Control (UAC) message appears, click Yes.
The Registry Editor window should open, with a folder tree on the left and values on the right.
Registry Path and Value for Dynamic Lock
The setting for Dynamic Lock resides here:
HKEY_CURRENT_USER\Software\Microsoft\Windows NT\CurrentVersion\Winlogon
Inside this location, look for a value called EnableGoodbye. It should be a DWORD (32-bit) Value, which is a common data type for registry entries. If you do not see it, the setting has probably never been changed from the default, and you can create the value yourself in the next section.
Turning Dynamic Lock ON via Registry
To enable Dynamic Lock through the registry, go to the path below and set a DWORD value. If the value is missing, create it in the same folder.
- Go to the registry path:
HKEY_CURRENT_USER\Software\Microsoft\Windows NT\CurrentVersion\Winlogon - On the right-hand side, look for a DWORD value named EnableGoodbye.
- If it is not there, right-click in the empty space on the right side, select New DWORD (32-bit) Value, and name it
EnableGoodbye. - Double-click the EnableGoodbye value to edit it.
- In the Value data box, type
1. - Make sure Base is set to Hexadecimal.
- Click OK. The value list should now show your new number next to EnableGoodbye.
- Close the Registry Editor.
A Value data of 1 means Dynamic Lock is turned on. If the change does not show up in Settings right away, sign out and back in, then check the Sign-in options page again.
Turning Dynamic Lock OFF via Registry
To disable Dynamic Lock through the registry, set the same DWORD value to zero. The path is in your user settings, so the change applies to your account.
- Go to the registry path:
HKEY_CURRENT_USER\Software\Microsoft\Windows NT\CurrentVersion\Winlogon - On the right-hand side, look for a DWORD value named EnableGoodbye.
- If it is not there, create it as described in the previous section.
- Double-click the EnableGoodbye value to edit it.
- In the Value data box, type
0. - Make sure Base is set to Hexadecimal.
- Click OK.
- Close the Registry Editor.
A Value data of 0 means Dynamic Lock is turned off. This is the default setting. To undo the change later, set the value back to the enabling number from the previous section, or tick the checkbox in Settings.
Be careful, and back up the registry before you change anything. In the Registry Editor, you can do this with File Export.
Pairing Your Phone with Your 🪟 Windows 11 PC
For Dynamic Lock to work, your phone and PC must be connected over Bluetooth. If they are not paired yet, follow the steps below.
Step 1Turn on Bluetooth
Make sure Bluetooth is on for both your Windows 11 PC and your smartphone. On the PC, look in Settings under Bluetooth & devices. On the phone, look in the quick settings menu or in the Bluetooth page of its settings. If your PC has no Bluetooth option at all, it may lack a Bluetooth adapter, and Dynamic Lock will not be available until you add one.
Step 2Add a Device on Your PC
On your Windows 11 PC:
- Open Settings by pressing Windows key + I.
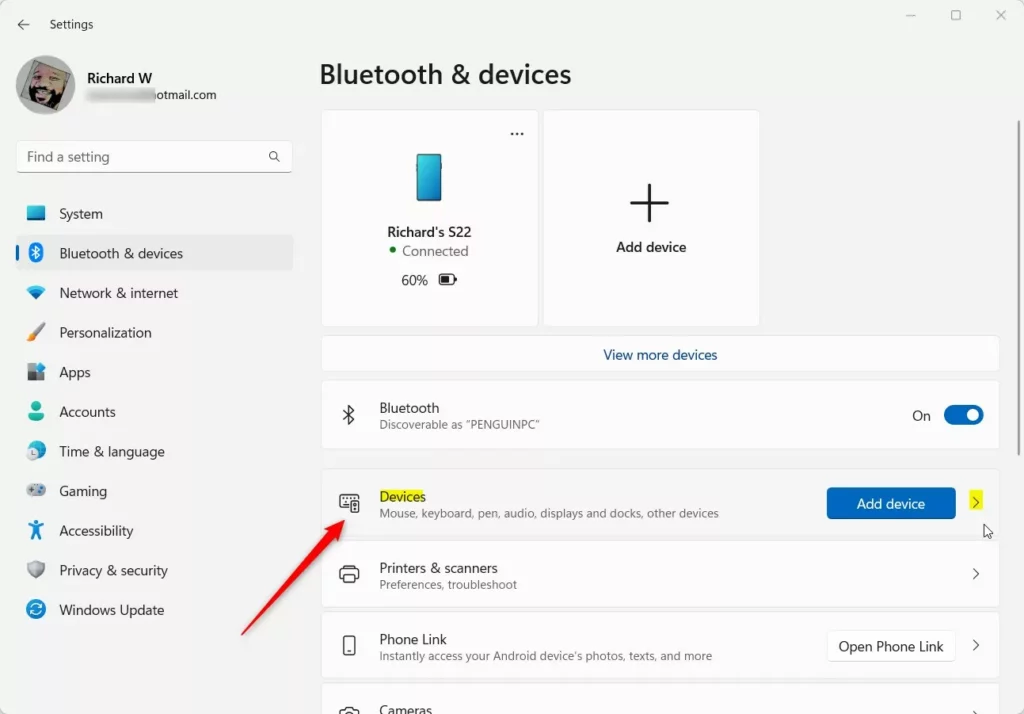
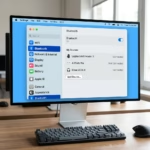
- Click Bluetooth & devices.
- Click Add device.
- In the Add a device window, select Bluetooth.
Windows should start scanning for nearby Bluetooth devices.
Step 3Make Your Phone Discoverable
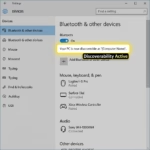
On your smartphone, open the Bluetooth settings and make sure the phone can be seen by other devices (discoverable or visible). On many phones, simply keeping the Bluetooth settings page open is enough. The exact steps depend on your phone model and operating system (Android or iOS).
Step 4Select Your Phone on Your PC
Your PC will search for nearby Bluetooth devices. When your phone appears in the list on the PC, click it. If it does not appear after a minute, check that Bluetooth is on and the phone is discoverable. Also make sure the phone is close to the PC.
Step 5Finish Pairing
Windows and your phone will each show a security code or a pairing request. Check that the codes match, then accept the request on both devices. Once the phone shows as connected, Windows can track its proximity, which is what Dynamic Lock relies on. Keep the connection active, or the automatic lock will not work.
Practical Tip: Keep your phone's Bluetooth on all the time if you plan to use Dynamic Lock regularly. Keep the phone close enough to the PC while you work, so the connection stays strong.
Summary
Dynamic Lock locks your PC automatically by tracking your phone's Bluetooth signal. Setting it up takes a paired phone and one checkbox in Sign-in options. You can also control it through the registry, but the Settings method is simpler and safer for most users.
How do I turn on dynamic lock in 🪟 Windows 11?
Open Settings and go to Accounts Sign-in options Dynamic lock. Turn on the toggle for 'Allow Windows to detect when you've stepped away and automatically lock your device'. Your phone must be paired over Bluetooth first for this to work.
How to make computer lock automatically in 🪟 Windows 11?
Dynamic Lock locks your PC when your paired phone moves out of Bluetooth range. Alternatively, use Storage Sense to set an idle timeout: go to Settings System Storage Storage Sense, then enable 'Automatic User Lock' and set the inactivity time.
Is dynamic lock necessary?
No. Dynamic Lock is optional and works only if you have a Bluetooth-paired phone. If you don't use a phone or prefer manual locking, you can skip it entirely. Windows 11 works fine without Dynamic Lock enabled.
How to stop 🪟 Windows 11 from locking itself?
Open Settings Accounts Sign-in options Dynamic lock and turn off the toggle. If you've set an idle timeout in Storage Sense, go to Settings System Storage Storage Sense and disable 'Automatic User Lock'.
Was this guide helpful?

About the Author
Richard
Tech Writer, IT Professional
Richard is a writer at Geek Rewind who turns complex IT tasks into clear, step-by-step guides. He draws on years of hands-on experience in system administration and enterprise IT operations, focusing on Windows, Linux and WordPress: the problems people actually run into, and the fixes that work. His server and WordPress guides come from systems he runs himself. Richard builds and maintains the platform behind Geek Rewind, from its Ubuntu servers and Nginx configuration to its custom WordPress plugins. Many new tutorials start with readers' questions, and he's always glad to answer them in the comments.

No comments yet — be the first to share your thoughts!