How to Turn On or off Dev Drive Protection in Windows 11

Windows 11 Dev Drive Protection lets you control how Microsoft Defender treats your development drives. This guide shows how to turn it on or off in Windows 11, using either the Windows Security app or the Registry Editor.
Open Windows Security, go to Virus & threat protection, then Manage settings, and toggle Dev Drive protection on or off. You can also use the Registry Editor for advanced control.
What is Dev Drive?
Dev Drive is a special storage volume in Windows 11. It is built to make your computer faster, especially for people who develop software. Builds, package restores and large source trees involve many small file reads and writes, and that is where a Dev Drive helps most.
By default, Dev Drive is set up for best speed and works with Windows security tools such as your antivirus. You do not need to configure anything for it to work. The steps below are only for when you want to change how the antivirus treats the drive.
How Does Dev Drive Protection Work?
Dev Drive Protection helps balance speed and safety by changing how your antivirus checks files on a Dev Drive. With protection on, Microsoft Defender can scan in a way that slows your builds less. With it off, files are scanned the standard way, which is usually slower on a busy development drive.
Turn it off only if you have a reason, such as testing a scan problem or following your organization’s rules. You can switch it back on at any time.
| Protection Mode | Scan Type | What Happens | Simple Explanation |
|---|---|---|---|
| Off | Synchronous (Real-time) | Every time you open a file, your antivirus scans it immediately. | Open the file now, scan it now. |
| On | Asynchronous | Files open quickly, and scanning happens in the background after. | Open the file now, scan it later. |
Want to learn more about how this affects your computer’s speed? Check out this official Microsoft page about Dev Drive performance.
How to Turn Dev Drive Protection On or Off Using Windows Security App
The Windows Security app is the easiest way to turn Dev Drive Protection on or off. It works the same on Windows 11 Home and Pro. If a prompt asks for administrator approval, click Yes.
- Open the Windows Security app. Click the Start menu (the Windows icon on the taskbar) and type Windows Security. Click the app when it appears in the results.

Search Windows Security app in Start menu - In the Windows Security app, click Virus & threat protection on the left menu. You should see the scan and protection overview for your PC.
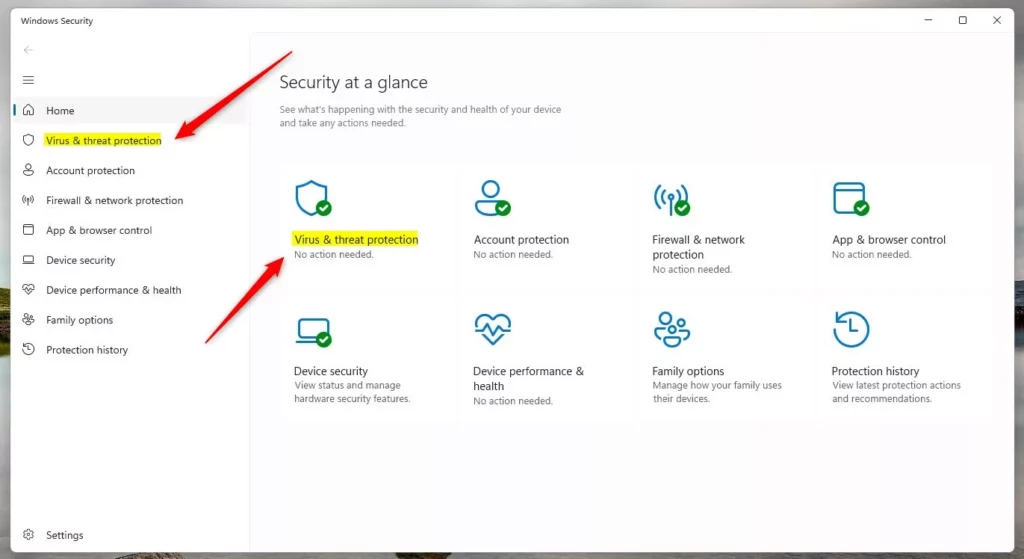
Windows Security Virus and threat protection - Scroll down and click Manage settings under Virus & threat protection settings. The list of protection toggles should now open.
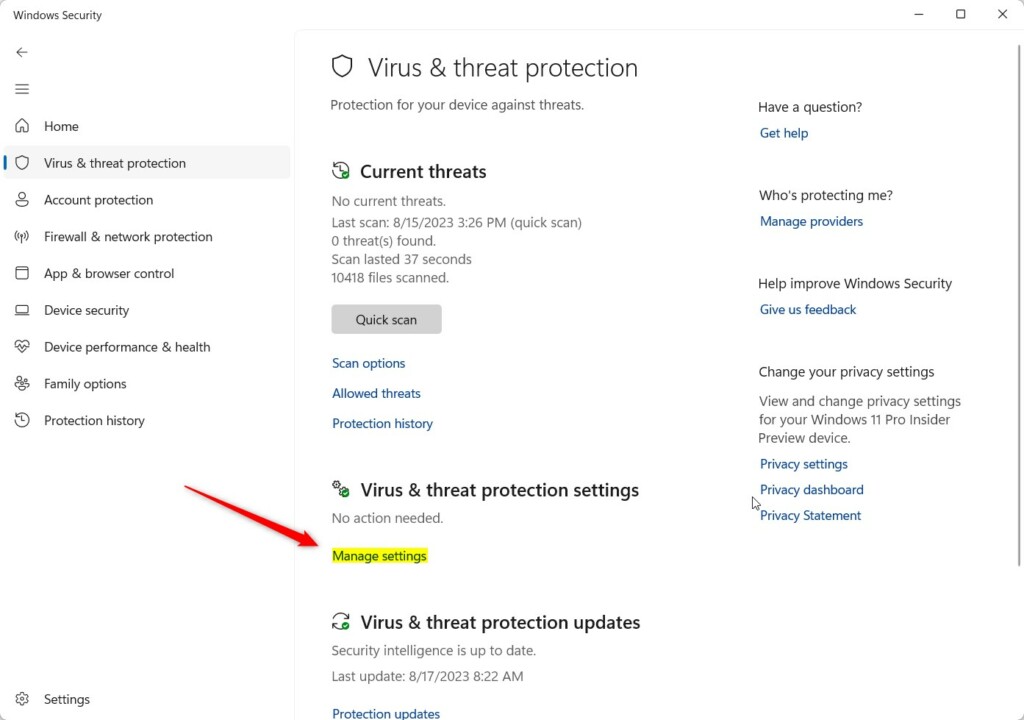
Windows Security Virus & Threat Protection Manage Settings link. - Find the Dev Drive protection option and switch the toggle to On or Off, as you want. The toggle should change right away.
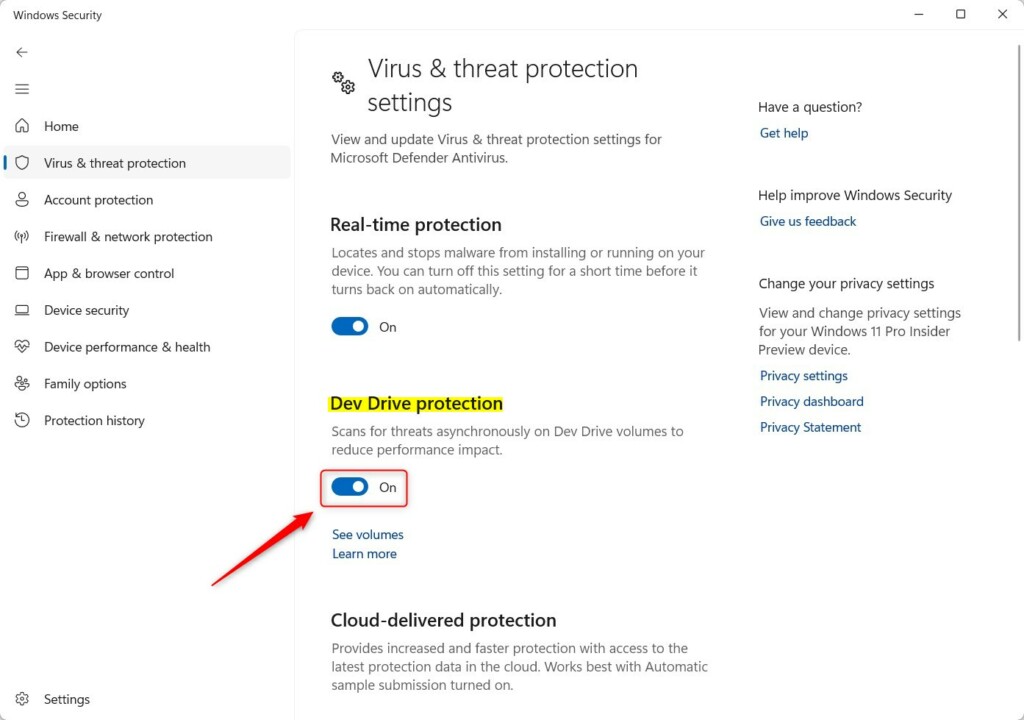
Toggle Dev Drive Protection On or Off - Close the app when you're done. No restart is normally needed.
You need to have Real-time protection on to control Dev Drive protection. Turn it on in the same Virus & threat protection settings list, then come back to the Dev Drive toggle.
If the option is still missing or greyed out, your PC may be managed by your organization, or another antivirus may be handling protection. In that case, the setting may be controlled by an administrator.
How to Turn Dev Drive Protection On or Off Using the Registry (Advanced Users)
Advanced users can turn Dev Drive Protection on or off by changing a setting in the Windows Registry Editor. Use this method only if you are comfortable editing the registry. A wrong change can cause problems, so consider backing up the key first (in Registry Editor, right-click the key and choose Export).
- ⚠️ REQUIRES ADMIN PRIVILEGES: Open Registry Editor by pressing
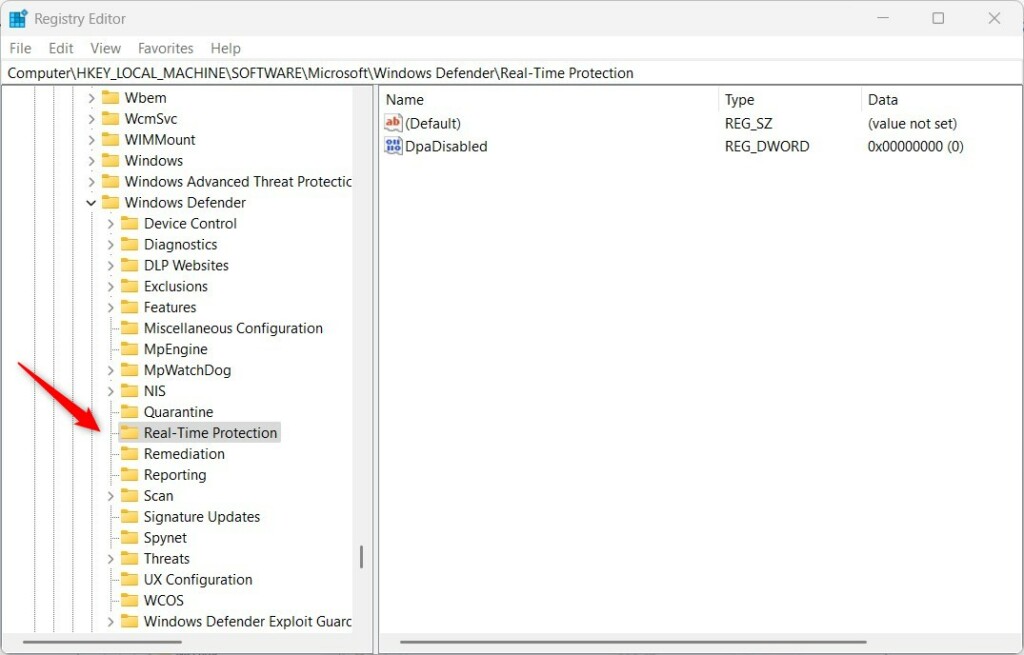
Windows + R, typingregedit, and hitting Enter. If a User Account Control prompt appears, click Yes. - Go to this folder path:
HKEY_LOCAL_MACHINE\SOFTWARE\Microsoft\Windows Defender\Real-Time Protection - If the Real-Time Protection folder is missing, right-click Windows Defender, select New Key, and name it Real-Time Protection. The new key should appear under Windows Defender.
- Inside Real-Time Protection, right-click an empty area on the right side and choose New DWORD (32-bit) Value.
- Name the new value
DisableAsyncScanOnOpen. - Double-click
DisableAsyncScanOnOpenand set the value data:0to turn ON Dev Drive protection1to turn OFF Dev Drive protection
- Click OK and close the Registry Editor. Then open Windows Security and check the Dev Drive protection toggle to confirm the change. If it still shows the old state, restart your PC.
To undo the change, go back to the same value and set it to the opposite number, or delete the value to return to the default behavior.
Summary
You can turn Dev Drive Protection on or off in Windows 11 using either the Windows Security app or the Registry Editor. The Windows Security app is the simpler choice and is enough for most people.
If you want more control or prefer advanced settings, you can use the Registry Editor. Just remember that Real-time protection must be on for the Windows Security toggle to work.
Remember, Dev Drive Protection helps balance speed and security on your Windows 11 PC.
For more details, see the official Microsoft page: Microsoft Defender Endpoint Performance Mode.
Was this guide helpful?

About the Author
Richard
Tech Writer, IT Professional
Richard is a writer at Geek Rewind who turns complex IT tasks into clear, step-by-step guides. He draws on years of hands-on experience in system administration and enterprise IT operations, focusing on Windows, Linux and WordPress: the problems people actually run into, and the fixes that work. His server and WordPress guides come from systems he runs himself. Richard builds and maintains the platform behind Geek Rewind, from its Ubuntu servers and Nginx configuration to its custom WordPress plugins. Many new tutorials start with readers' questions, and he's always glad to answer them in the comments.
No comments yet — be the first to share your thoughts!