How to Enable LSA Protection in Windows 11

LSA Protection in Windows 11 safeguards your login details by securing the LSASS.exe process.
This security feature uses technology called Protected Process Light (PPL). It stops bad programs from getting into LSASS.exe, which is the part of Windows that handles your login information and security tokens.
Activating LSA Protection makes it much harder for hackers to grab your usernames and passwords directly from your computer’s memory.
This extra layer of defense against stolen credentials is available in Windows 11 starting from version 21H2, helping to keep your PC’s sensitive data safer.
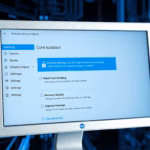
Enable LSA Protection by opening Windows Security, navigating to Device security, then Core isolation, and toggling Local Security Authority protection to On. This requires UEFI and Secure Boot to be enabled in your BIOS.
Hardware Prerequisites
Before enabling this, ensure your PC meets these requirements:
- UEFI and Secure Boot: Your computer must be set to UEFI mode with Secure Boot enabled in your BIOS settings.
- Windows 11 22H2 or newer: This feature is fully integrated into recent versions of Windows 11.
How to Verify if LSA Protection is Active
You can check if LSA Protection is active on your Windows 11 computer using Task Manager. This security feature helps protect your login information. Checking it is a quick process that involves looking for a specific setting related to lsass.exe.
- Press Ctrl+Shift+Esc to open Task Manager.
- Go to the Details tab.
- Right-click the column headers and select Select columns.
- Check the box for Elevated or Protected Process.
- Find lsass.exe in the list. If it shows as a protected process, the feature is active.
Troubleshooting and Compatibility
Enable or Disable LSA via Windows Security
This is the easiest way to manage your settings. Requires admin privileges.
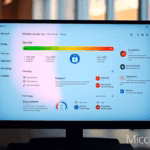
- Click the Start menu and type Windows Security. Select the app.
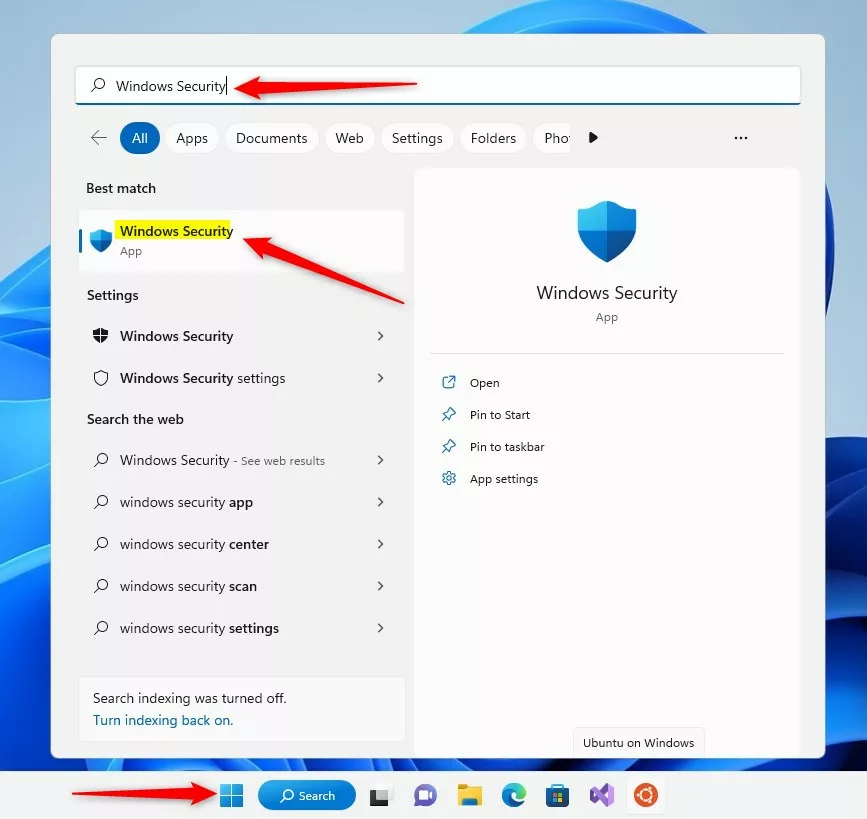
windows security app search on start menu - Click Device security on the left menu.
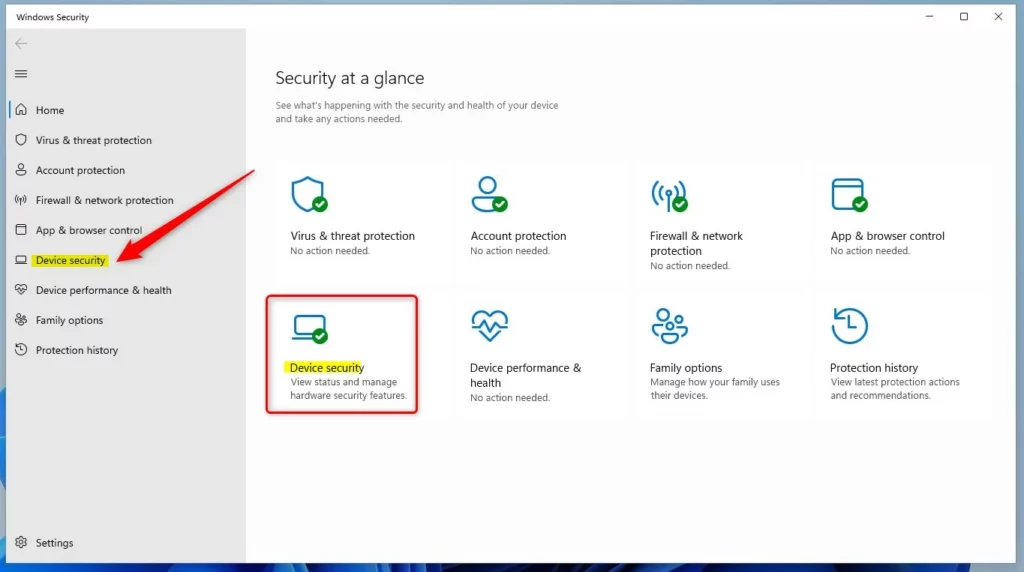
windows 11 security app device security option - Click the Core isolation details link.
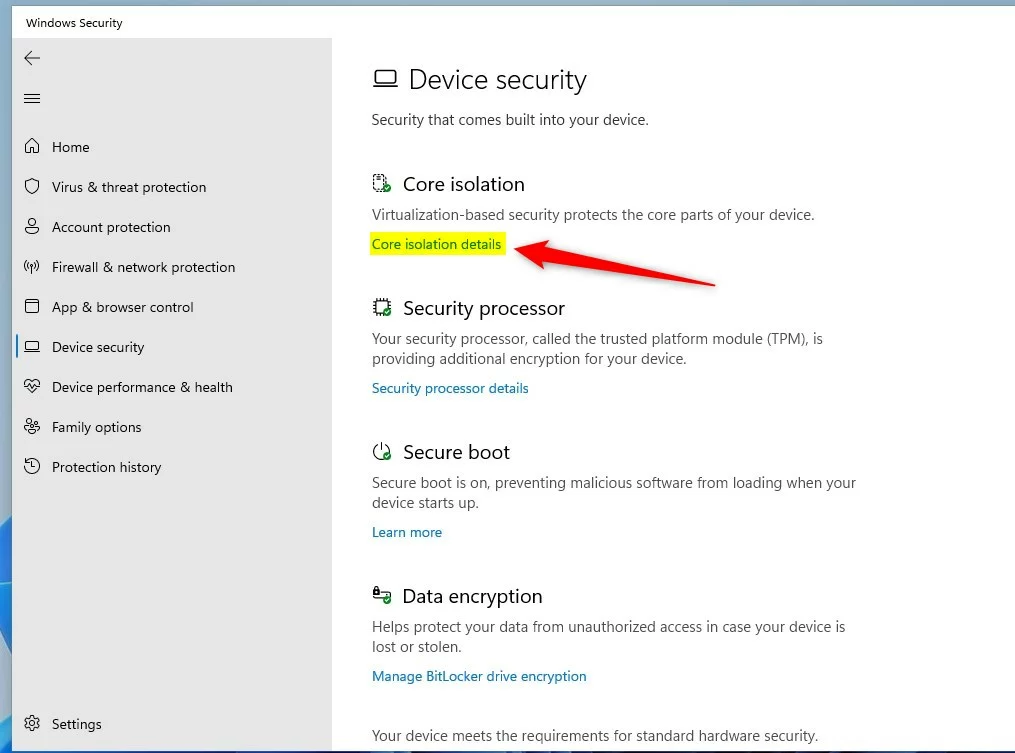
windows 11 core isolation details link - Find Local Security Authority protection. Toggle the switch to On.
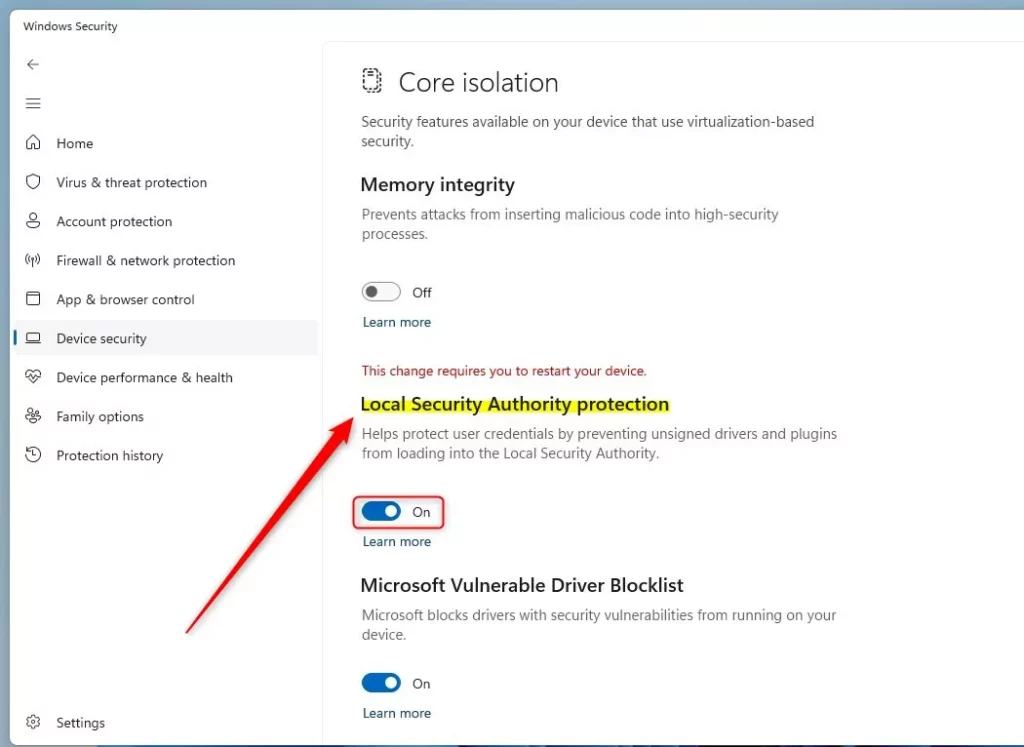
windows local security authority protection button
Enable or Disable LSA via Registry Editor
- Open the Registry Editor.
- Go to:
HKEY_LOCAL_MACHINE\SYSTEM\CurrentControlSet\Control\Lsa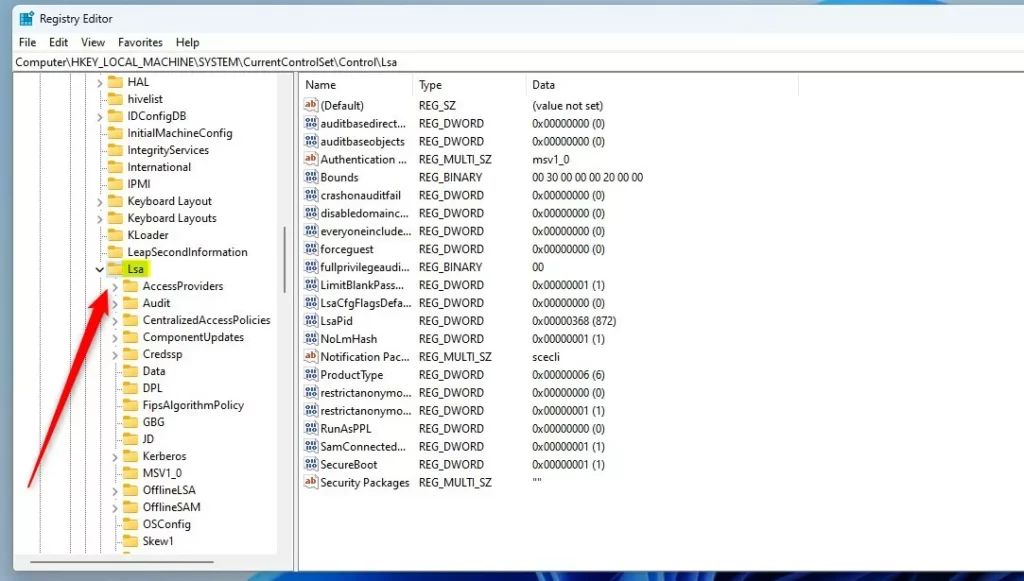
windows local security authority protection windows registry - Right-click in the empty space, select New > DWORD (32-bit) Value, and name it
RunAsPPL. - Set the Value data to
1to enable or0to disable.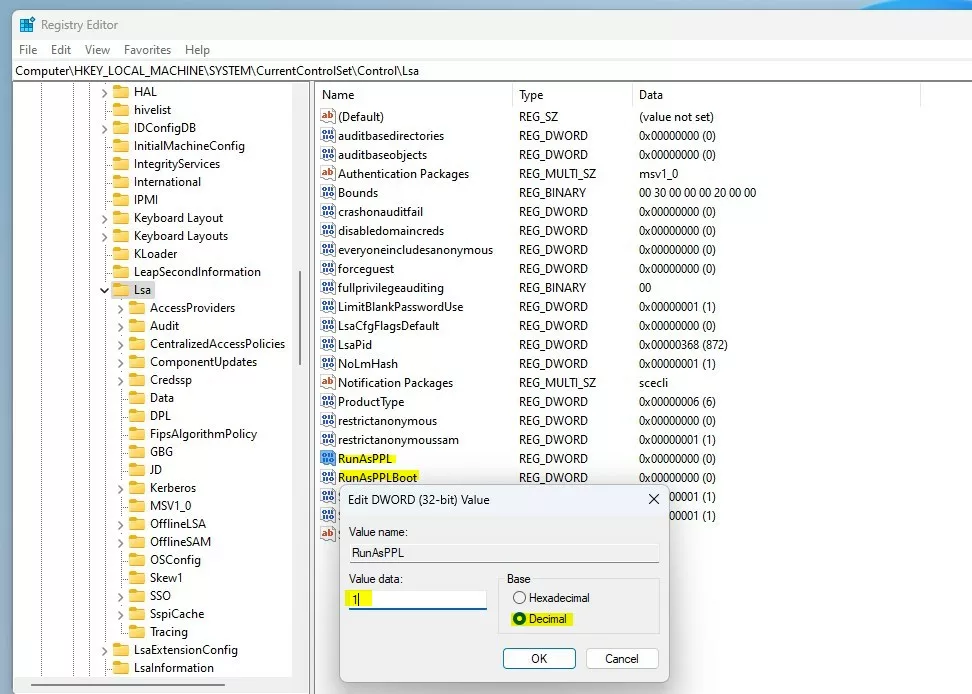
windows local security authority protection windows registry value data
Enable or Disable LSA via Group Policy
Requires admin privileges.
- Open the Local Group Policy editor.
- Go to: Computer Configuration > Administrative Templates > System > Local Security Authority.
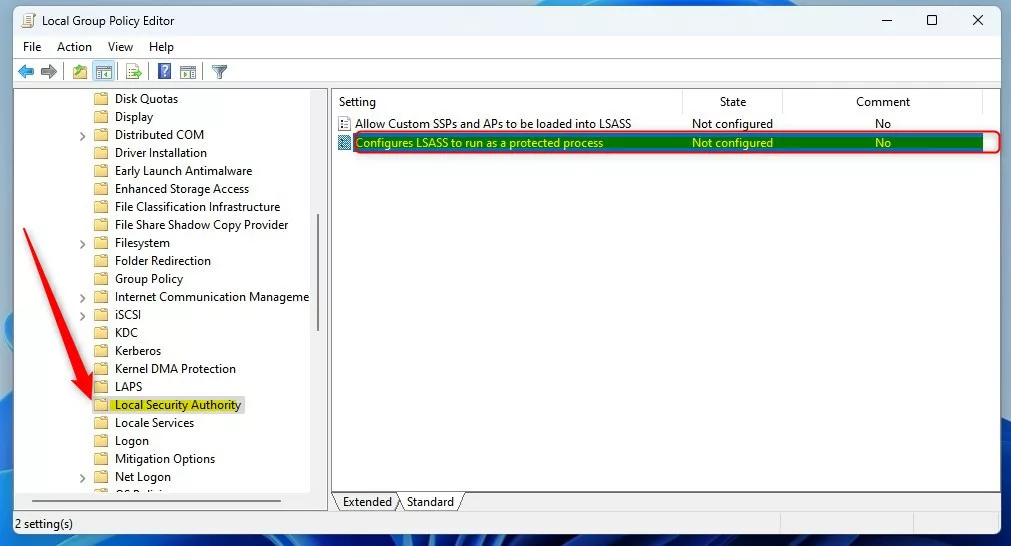
windows local security authority protection local group policy editor - Double-click Configure LSASS to run as protected process and set it to Enabled.
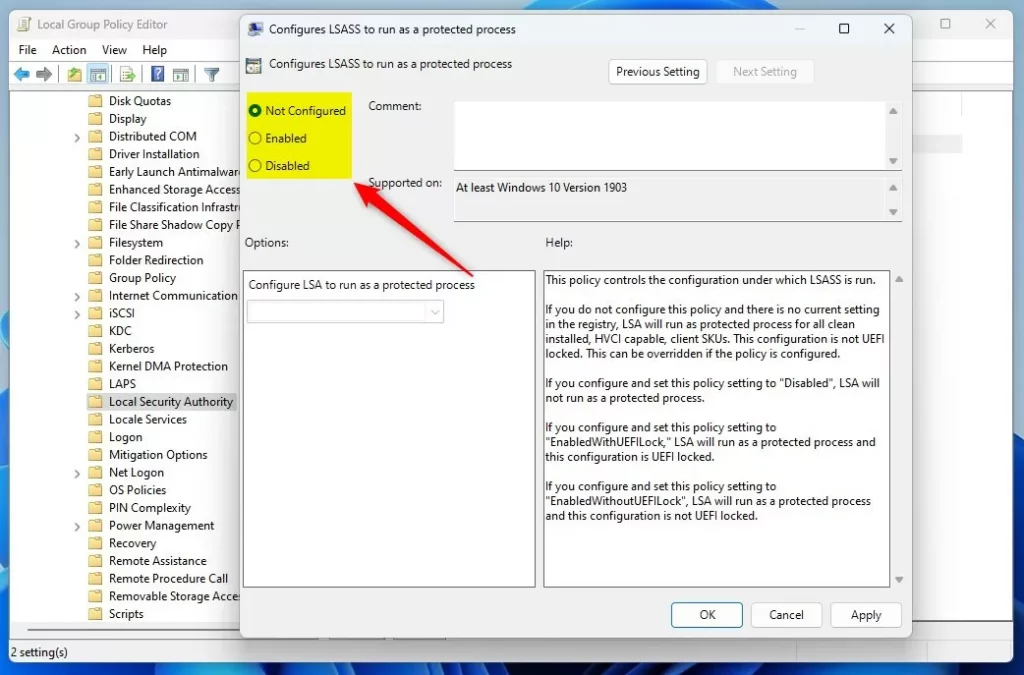
windows local security authority protection local group policy editor options
For advanced technical details, visit the official Microsoft Learn documentation.
Summary
LSA Protection in Windows 11 is a key security feature that stops bad programs from stealing your passwords and login info.
Why is LSA Protection missing from my Windows Security settings?
If you can’t find the LSA Protection setting in Windows Security, it’s likely because your computer’s hardware doesn’t support it or needs a quick update.
What is the difference between LSA protection and Credential Guard?
LSA Protection uses PPL to stop unauthorized processes from accessing the LSASS process. Credential Guard goes further by using virtualization-based security to isolate secrets in a separate container that even the operating system kernel cannot access. Both work together to provide a layered defense against credential theft.
Was this guide helpful?

About the Author
Richard
Tech Writer, IT Professional
Richard, a writer for Geek Rewind, is a tech enthusiast who loves breaking down complex IT topics into simple, easy-to-understand ideas. With years of hands-on experience in system administration and enterprise IT operations, he’s developed a knack for offering practical tips and solutions. Richard aims to make technology more accessible and actionable. He's deeply committed to the Geek Rewind community, always ready to answer questions and engage in discussions.
No comments yet — be the first to share your thoughts!