How to Enable Core Isolation Memory Integrity in Windows 11
Core Isolation Memory Integrity in Windows 11 acts like a digital bodyguard for your PC, defending it against sneaky, low-level attacks. This security tool works by creating a separate, super-secure area in your computer’s memory.
It uses advanced technology called Virtualization-based Security (VBS) and Hypervisor-protected Code Integrity (HVCI). This separate space stops any unapproved software or bad code from messing with your Windows system, especially blocking malware that targets driver vulnerabilities.
Basically, Windows 11 checks every driver before it runs to make sure only safe, trusted code gets loaded onto your system. To use this feature, your PC needs hardware virtualization turned on, which helps keep your most important system processes safe and sound.
Open Windows Security, navigate to Device security, then Core isolation details, and toggle the Memory integrity switch to On. This feature protects your system kernel by preventing malicious drivers from running.
How to enable or disable Core Isolation Memory Integrity
You can turn Core Isolation Memory Integrity on or off through Windows Security to add an extra layer of protection against malware. This feature helps keep your PC safe by ensuring that only trusted drivers can load when Windows starts up. If you want to use it, here’s how to find and adjust the setting.
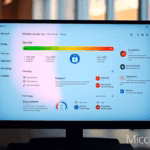
- In the search box on your taskbar, type Windows Security and select it from the list.

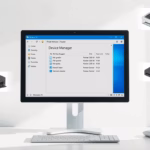
open windows security app - Inside the Windows Security window, click on Device security.
- On the next page, click the link labeled Core isolation details.

windows 11 core isolation memory integrity - Toggle the Memory integrity switch to On or Off.

windows 11 turn on memory integrity core isolation
Troubleshooting Incompatible Drivers
If you can’t turn on Core Isolation Memory Integrity, the problem is likely an old or incorrect driver. Drivers are small programs that help Windows talk to your hardware. To fix this, you need to find and update these drivers, often by visiting your computer maker’s website for the latest versions.
To fix this, you should visit your computer manufacturer’s website. Look for updated drivers for your hardware. If you cannot find an update, you may need to uninstall the device or the software associated with that driver. You can often find the specific file path, such as 📁C:\Windows\System32\drivers, to identify the culprit.
Comparison of Windows Security Features
| Feature | Purpose |
|---|---|
| Core Isolation | Uses virtualization to isolate core processes. |
| Secure Boot | Ensures only trusted firmware boots the PC. |
| Kernel-mode Hardware-enforced Stack Protection | Protects against memory-based attacks. |
Summary
Core Isolation Memory Integrity is a security feature that uses virtualization to protect your computer’s core system from harmful software.Why is Memory Integrity greyed out?
Memory Integrity might be greyed out if your computer’s hardware doesn’t support virtualization, or if this setting is turned off in your computer’s BIOS.


No comments yet — be the first to share your thoughts!