Enhance Windows 11 Security with System Guard

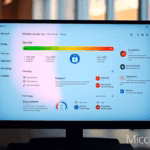
System Guard in Windows 11 helps protect your PC by checking its core startup code for threats. This security feature is part of Windows Defender and works to stop malware that tries to infect your computer’s firmware before Windows itself even starts.
Think of it like a security guard for your PC’s essential startup instructions. It makes sure these instructions are clean and haven’t been tampered with by malicious software.
This is important because some very nasty viruses can hide in this startup code, meaning your regular antivirus might miss them. System Guard checks your PC’s firmware every time you turn it on, ensuring a safe start.
If System Guard detects any unauthorized changes to your firmware, it steps in to block the bad code. This helps keep your personal files and system safe from hidden threats.
You enhance Windows 11 security by enabling System Guard’s firmware protection through the Windows Security app under Device security, then Core isolation details. If unavailable, adjust the registry at 🗝️HKEY_LOCAL_MACHINE\SYSTEM\CurrentControlSet\Control\DeviceGuard\Scenarios\SystemGuard.
Enable Firmware Security in Windows
You can turn on firmware security in Windows 11 directly from the Windows Security app if your computer supports this feature. This setting helps protect your system’s core startup process from unauthorized changes.
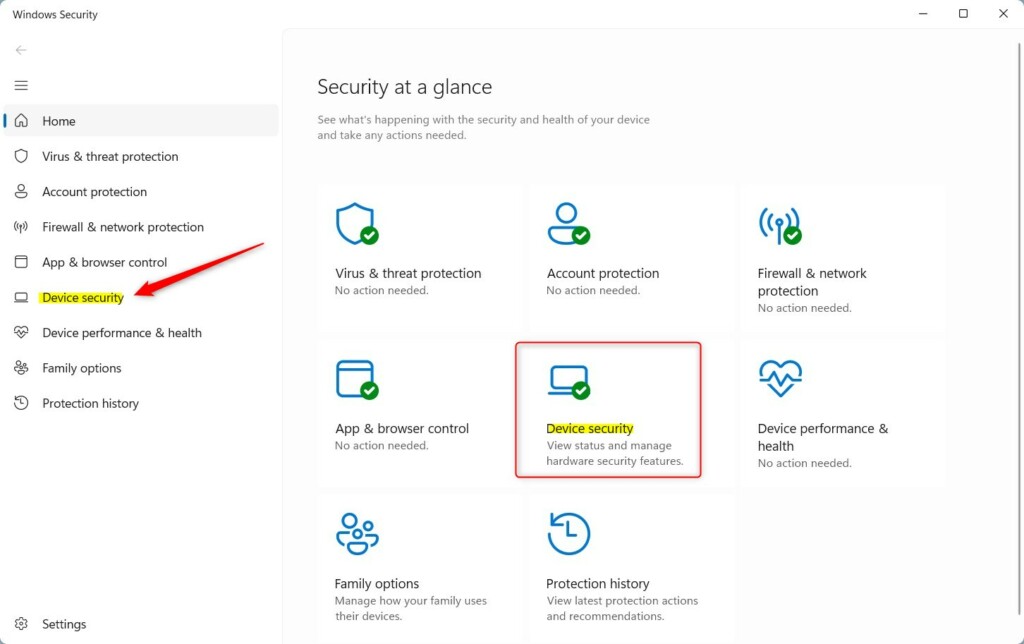
- Open the Windows Security app.
- Go to Device security.
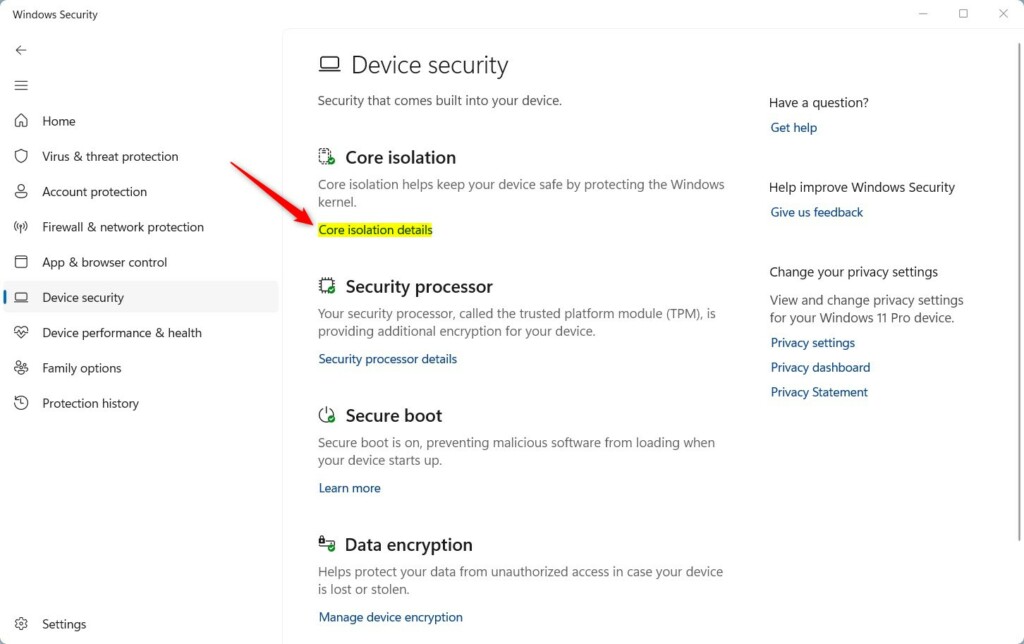
- Click the Core isolation details link.
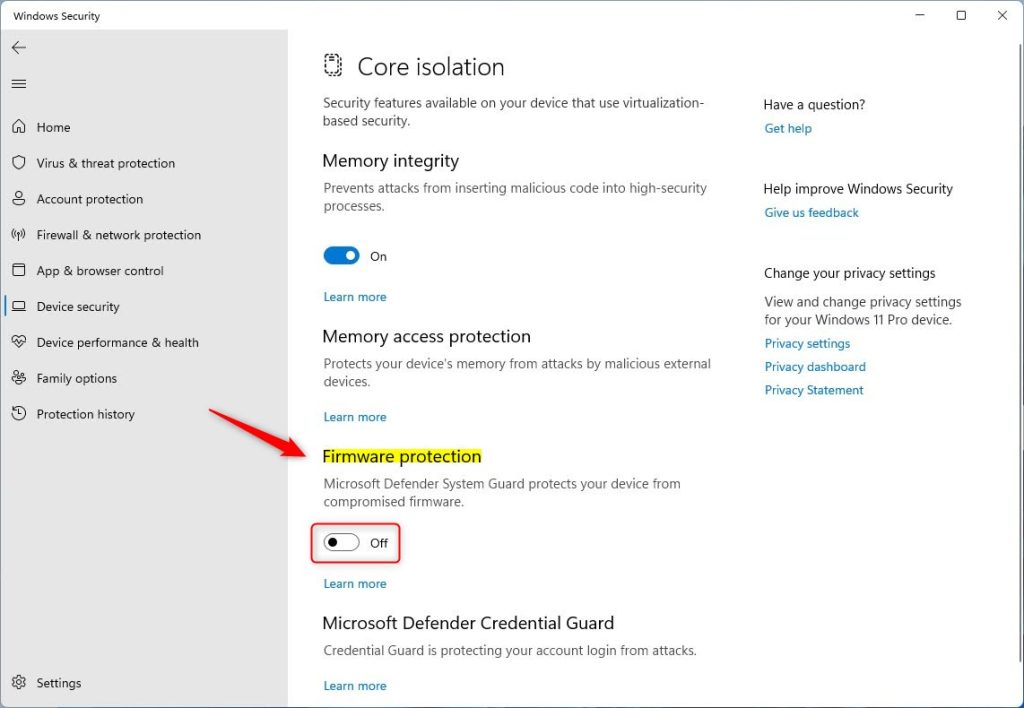
- Toggle the Firmware protection switch to On.
Open Registry Editor and navigate to this path:
HKEY_LOCAL_MACHINE\SYSTEM\CurrentControlSet\Control\DeviceGuard\Scenarios\SystemGuard
Enable Firmware Protection via Registry
If you can't find the option to turn on firmware protection in Windows Security, you can still enable it using the Windows Registry editor. This method requires a small change to a specific setting within your computer's system files.
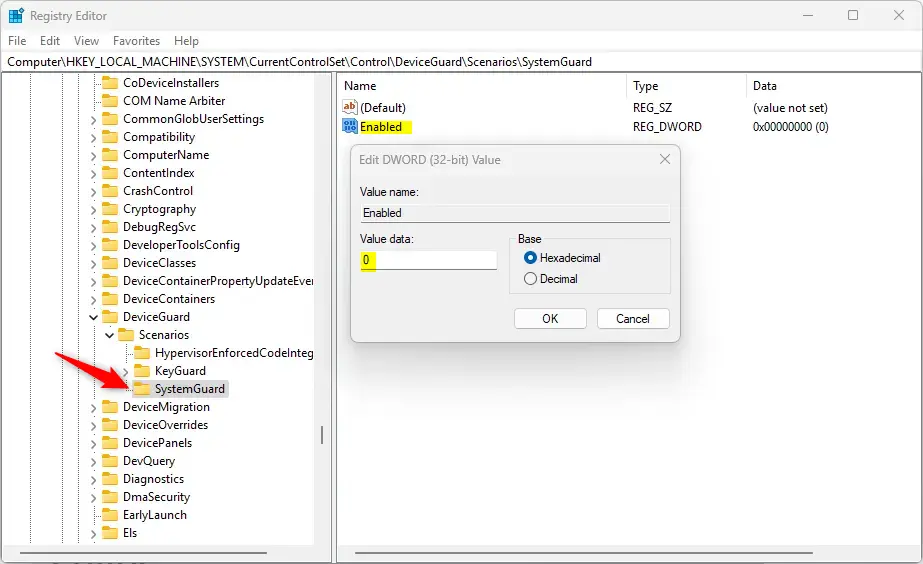
Head to this folder path in the Registry Editor:
Computer\HKEY_LOCAL_MACHINE\SYSTEM\CurrentControlSet\Control\DeviceGuard\Scenarios\SystemGuard
- Right-click in the empty space, select New, then DWORD (32-bit) Value.
- Name this new value Enabled.
- Double-click Enabled and set the value to 1 to turn it on, or 0 to turn it off.
Restart your computer to apply the changes.
For more technical details, visit Microsoft.
Summary
Enabling firmware protection is a smart way to lock down your Windows 11 PC. By establishing a hardware-based security check during startup, you're protecting your system against advanced malware that standard tools might miss. These steps ensure your computer starts in a clean, trusted state every single time.
Was this guide helpful?

About the Author
Richard
Tech Writer, IT Professional
Richard, a writer for Geek Rewind, is a tech enthusiast who loves breaking down complex IT topics into simple, easy-to-understand ideas. With years of hands-on experience in system administration and enterprise IT operations, he’s developed a knack for offering practical tips and solutions. Richard aims to make technology more accessible and actionable. He's deeply committed to the Geek Rewind community, always ready to answer questions and engage in discussions.


No comments yet — be the first to share your thoughts!