How to Enable Remember My Apps in Windows 11

Remember my apps is a Windows 11 feature that automatically restores your previous Microsoft Store downloads when you set up a new computer or reinstall the operating system. This tool pins your past app icons directly to the taskbar and Start menu , so you can click them to download your programs again without searching through the store.
You need to sign in with the same Microsoft account you used on your old device for this feature to work properly. Once you log in, Windows 11 brings back your software setup in just a few clicks.
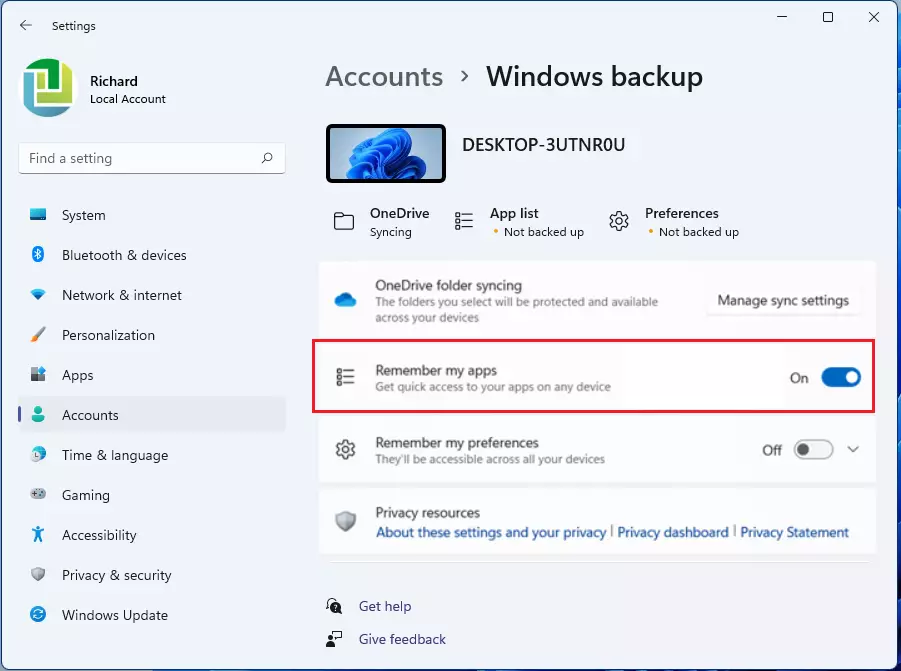
Enable “Remember my apps” by going to Settings Accounts Windows backup. Toggle the “Remember my apps” switch to On. This syncs your Microsoft Store apps to your account for easier reinstallation on new devices.
Why use this feature?
Behind the scenes, the operating system saves your software list directly to your cloud profile so it stays ready for the next setup.
What happens when you are done?
Activating Remember My Apps instructs Windows 11 to save the app list to a Microsoft account, preparing those programs for restoration on a new PC.
Prerequisites for Syncing
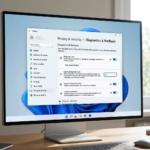
Requirements for the Remember My Apps Windows 11 feature include signing in with a personal Microsoft account rather than a work or school account. You also need an active internet connection and turned-on diagnostic data settings so Windows can save your app list to the cloud for future setups.
- You must be signed in with a personal Microsoft account.
- This feature does not work with work or school accounts.
- You must have an active internet connection.
- Diagnostic data settings must be enabled to allow cloud sync.
How to Enable Remember My Apps
Remember My Apps Windows 11 tracking is a built-in tool that lets Windows save your installed apps so you can restore them easily on a new PC. You can turn on this setting through the Windows backup menu in your main system settings to speed up your next computer setup.
1. Open Settings by pressing the Windows key + I on the keyboard or clicking Start System Settings to choose Settings.

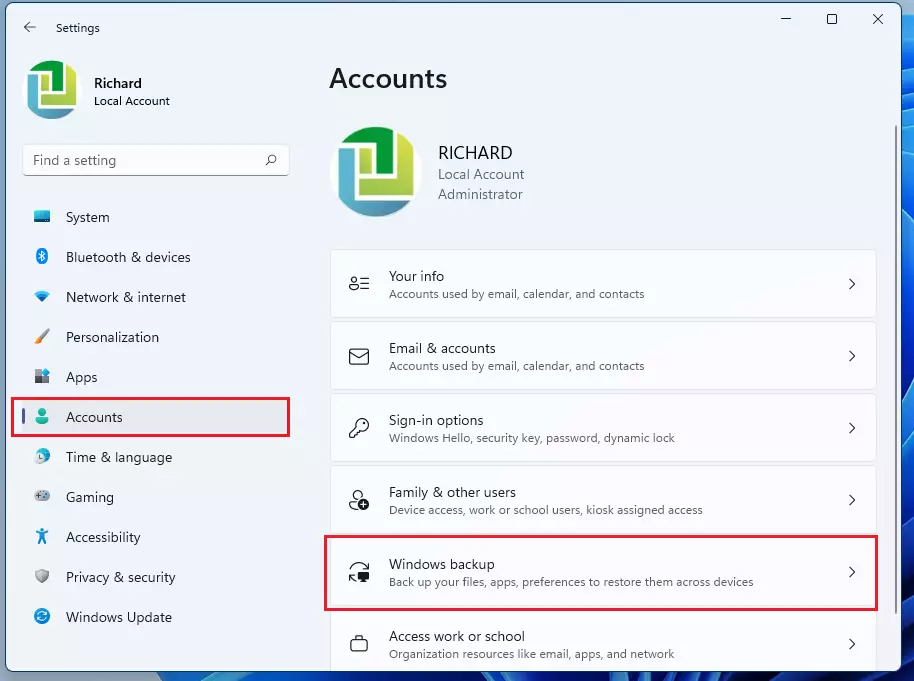
2. Select the Accounts tab on the left side of the Settings menu.
3. Choose the Windows backup tile to view additional options.
4. Locate the Remember my apps option and switch the toggle to the On position.
5. Close the Settings app once finished.
Troubleshooting: Why is the toggle greyed out?
A greyed-out toggle typically means diagnostic data is turned off, which blocks cloud sync.
How to Force a Sync
Unresponsive settings require signing out of the Microsoft account and signing back in to force a sync. Alternatively, opening the Windows Backup app from the Start menu and clicking the Back up button manually triggers an update to cloud storage.
How to Disable the Feature
Turning off the Remember My Apps Windows 11 feature stops Windows from tracking your installed programs for future setups. You can disable this setting through the backup menu in your system settings, though you need to turn off Windows backup on all connected devices first if you want to clear your saved data from the cloud entirely.
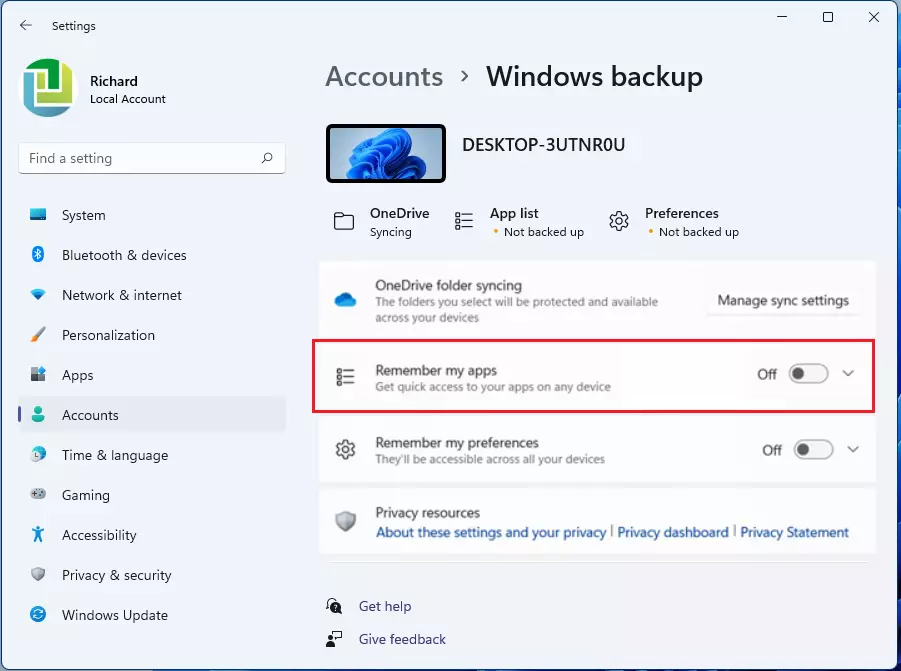
To remove backed-up settings from the cloud entirely, turn off Windows backup on all connected devices first. Proceed with the following steps afterward:
- Go to account.microsoft.com/devices.
- Scroll to the bottom of the page.
- Select the button that says Clear stored settings.
Summary
The Remember My Apps feature in Windows 11 maintains app consistency across devices by synchronizing them with a Microsoft account.
Does 'Remember my apps' restore desktop apps or only Microsoft Store apps?
The tool focuses strictly on Microsoft Store software. Traditional desktop programs packaged as .exe or .msi files require manual installation. Specific desktop software may still require manual downloading and setup after the initial synchronization process finishes.
Does this feature work on 🪟 Windows 11 Pro and Home editions?
Yes, the Remember my apps feature operates on both Windows 11 Home and Windows 11 Pro editions. Using a personal Microsoft account alongside active diagnostic data settings ensures the feature functions properly on either operating system version.
Was this guide helpful?

About the Author
Richard
Tech Writer, IT Professional
Richard, a writer for Geek Rewind, is a tech enthusiast who loves breaking down complex IT topics into simple, easy-to-understand ideas. With years of hands-on experience in system administration and enterprise IT operations, he’s developed a knack for offering practical tips and solutions. Richard aims to make technology more accessible and actionable. He's deeply committed to the Geek Rewind community, always ready to answer questions and engage in discussions.

No comments yet — be the first to share your thoughts!