How to Enable or Disable Microsoft Defender in Windows 11
You can enable or disable Microsoft Defender in Windows 11 to control your PC’s built-in antivirus.
Microsoft Defender is Windows 11’s primary security software, offering real-time defense against viruses and malware.
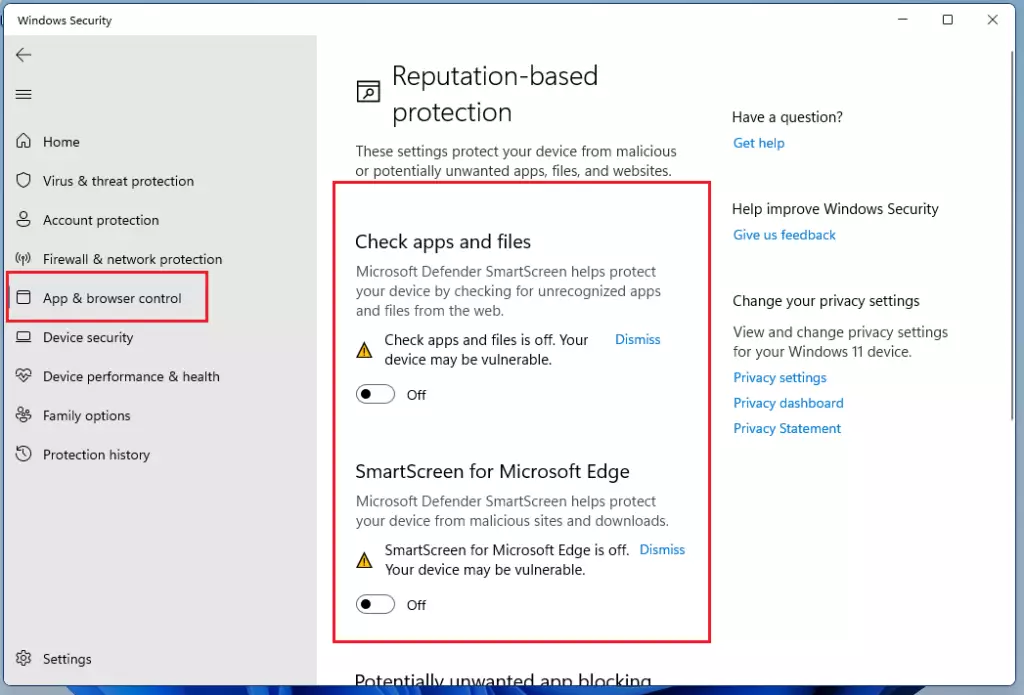
For instance, the SmartScreen feature within Defender actively blocks dangerous websites and downloads. While disabling it offers temporary control, it significantly increases your vulnerability to cyber threats if you lack an alternative security solution.
This guide shows you precisely how to manage Microsoft Defender’s status using Windows 11’s settings and the Group Policy Editor.
You can enable or disable Microsoft Defender via Windows Settings by going to Privacy & security, then Windows Security, and clicking Open Windows Security. From there, manage Virus & threat protection or Firewall & network protection settings.
How to Enable Microsoft Defender
You can turn on Microsoft Defender easily through your Windows 11 Settings.
1. Open the Settings app by pressing Windows key + I on your keyboard or by clicking Start then Settings.
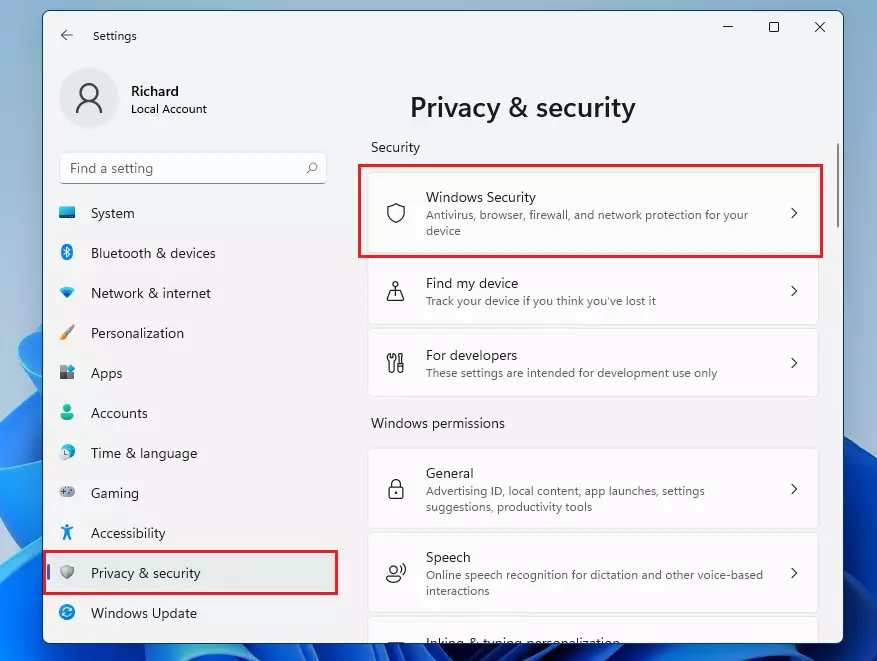
2. In the menu on the left, click Privacy & security. Then, click Windows Security on the right side.
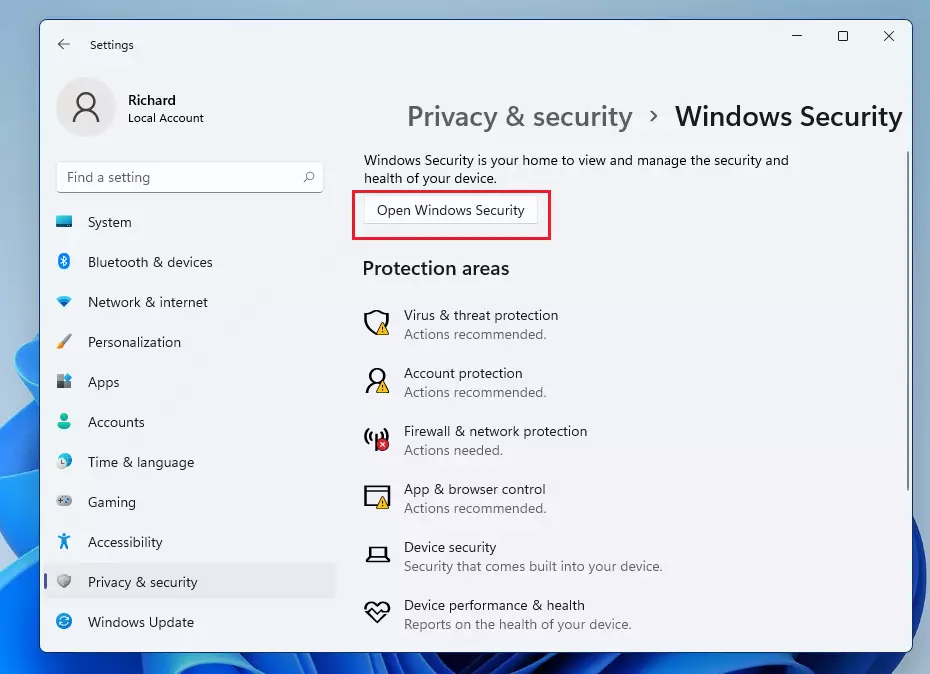
3. Click the Open Windows Security button.
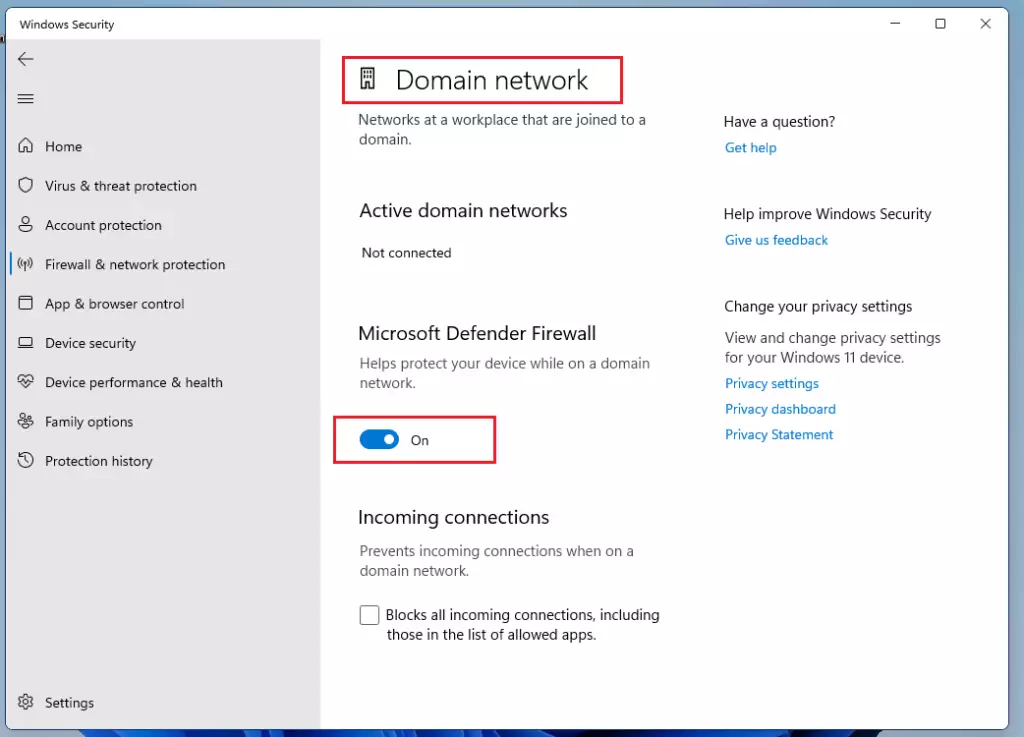
Managing Firewall Settings
Your firewall settings control how your computer connects to networks like home Wi-Fi or public hotspots.
- Domain network: Used for office or business computers.
- Private network: Used for home or trusted work networks.
- Public network: Used for places like airports or coffee shops.
Note: Changing these settings requires admin privileges.
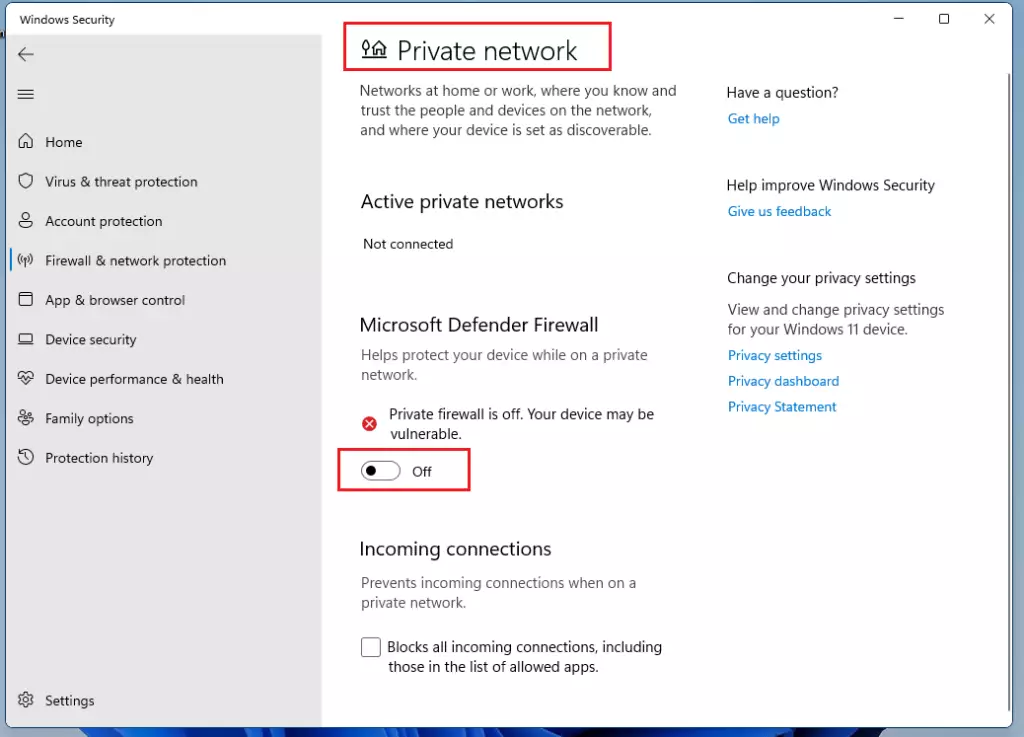
Click on each network profile to turn the firewall on or off.

Managing Virus Protection
- Click Virus & threat protection in the left menu.
- Click Manage settings.
- Toggle Real-time protection and Cloud-delivered protection to the On position.
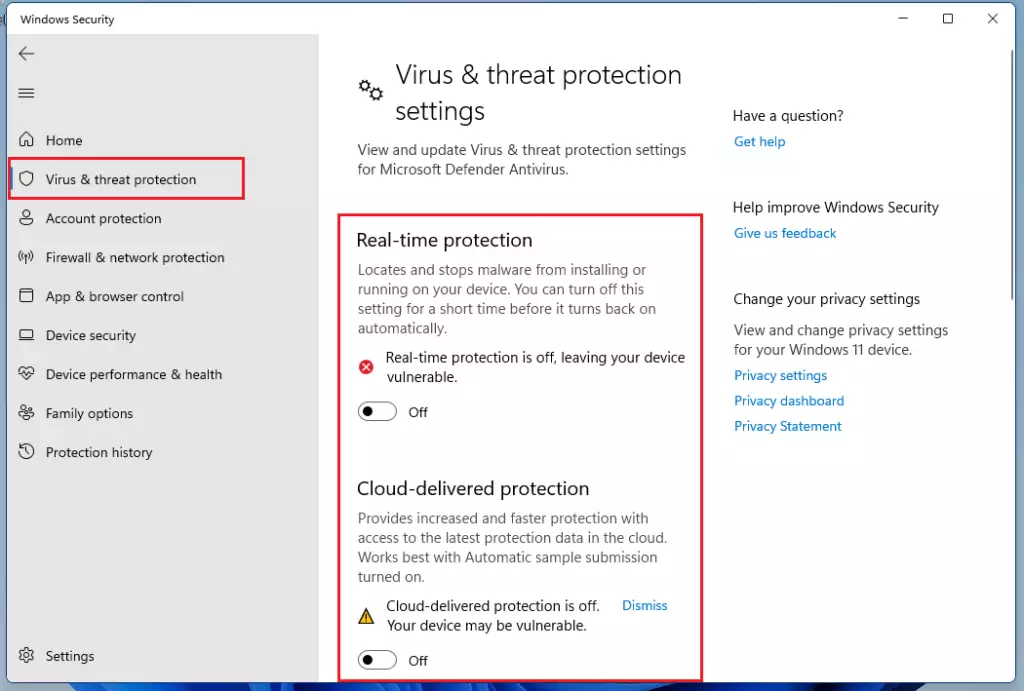
You can also check App & browser control to ensure your settings are active.
Summary
Keeping Microsoft Defender turned on is really important for protecting your Windows 11 PC from viruses and harmful software. You should only turn it off if you’re installing another security program that might cause problems. It’s easy to check and manage these settings anytime through your Windows Security options.
Was this guide helpful?

About the Author
Richard
Tech Writer, IT Professional
Richard, a writer for Geek Rewind, is a tech enthusiast who loves breaking down complex IT topics into simple, easy-to-understand ideas. With years of hands-on experience in system administration and enterprise IT operations, he’s developed a knack for offering practical tips and solutions. Richard aims to make technology more accessible and actionable. He's deeply committed to the Geek Rewind community, always ready to answer questions and engage in discussions.


I get an error saying: “You will need a new app to open this windowsdefender link”. All my options are to open the Microsoft Store which does not give any other options after all.
I have same issue, and i am still searching solution. I found one more thing Windows defender service is stopped and it is not getting started.
Hi .. I can’t open Windows Sercurity .. it doesn’t run any progress … and I don’t see protection arena like pic.2
i have the same problem i can’t open the windows security
This this post.
Enable the service 🙂
Service.msc in the search bar
Find the windows Defender process and enable is click on start and that problem is gone.
Not true. Mine starts and stops immediately thereafter. An sfc /scannow shows no issues. I also have Malwarebytes installed and I know it likes to disable Windows Defender but that should not stop me from enabling it again.
Windows Defender and Windows Update not working in Windows 11 LITE
[…] post shows students and new users steps to turn on or off Microsoft Defender Antivirus Real-time Protections in Windows 11. Microsoft Defender Always-on protection consists of […]
[…] How to protect against viruses and malware in Windows 11 […]
[…] post shows students and new users steps to turn on or off Microsoft Defender Antivirus Cloud-delivered Protections in Windows 11. Microsoft Defender works seamlessly with its […]
[…] The Firewall & network protection section provides settings to control who and what can access your network. Users can also use the Firewall & network protection section to turn on or off Microsoft Defender Firewall. […]
[…] Windows 11 comes with a built-in firewall called Windows Defender Firewall. […]
[…] This article explains how to enable or disable Microsoft Defender Antivirus in Windows 11. […]