How to Turn On or Off Cloud Protection for Microsoft Defender Antivirus in Windows 11
You can turn cloud protection on or off for Microsoft Defender Antivirus in Windows 11. This feature uses Microsoft’s cloud services to detect threats in real-time.
Cloud-delivered protection, sometimes called Microsoft Defender Cloud-based Protection, uses the latest security information from Microsoft’s huge online network to quickly find and block new malware. This feature provides an extra layer of security beyond your device’s local definitions.
When you enable cloud protection, you get almost instant detection against new and evolving threats, sometimes even before they have a signature known to your device. For example, Microsoft Defender can detect new variants of ransomware within minutes of their emergence online.
Open Windows Security, go to Virus & threat protection, click Manage settings, and toggle Cloud-delivered protection On or Off. Alternatively, use Windows Terminal commands or Group Policy Editor to manage this setting.
Before You Start
- You need to be signed in as an administrator on your PC to change these settings. Check your account type
Option 1Turn On or Off Cloud Protection Using Windows Security
- Click the Start button or press the Windows key, then open Windows Security.
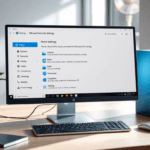
- Click on Virus & threat protection.
You can easily turn Windows Defender cloud protection on or off right from the Windows Security app.
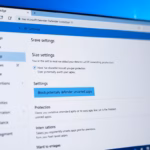
- Under Virus & threat protection settings, click Manage settings.

You can easily turn Windows Defender cloud protection on or off right from the Windows Security app.
- Find Cloud-delivered protection and toggle it On (recommended) or Off.

You can now close Windows Security.
Option 2Turn On or Off Cloud Protection Using Commands
- Open Windows Terminal (Admin). You can choose either PowerShell or Command Prompt inside the terminal.
- Type or paste one of the commands below and press Enter to run it.
To Turn On Cloud Protection (Default)
PowerShell Set-MpPreference -MAPSReporting 2or
PowerShell Set-MpPreference -MAPSReporting AdvancedTo Turn Off Cloud Protection
PowerShell Set-MpPreference -MAPSReporting 0or
PowerShell Set-MpPreference -MAPSReporting DisabledClose Windows Terminal when finished.
Option 3Enable or Disable Cloud Protection Using Local Group Policy Editor
Note: The Local Group Policy Editor is only available on Windows 11 Pro, Enterprise, or Education editions.
- Press Windows + R, type
gpedit.msc, and press Enter to open the Local Group Policy Editor. - Navigate to:
Computer Configuration > Administrative Templates > Windows Components > Microsoft Defender Antivirus > MAPS

To Enable Cloud Protection
Set the policy to ‘Not Configured’ (this is the default). This allows you to use Options 1 and 2 to manage cloud protection.
To Disable Cloud Protection
Set the policy to ‘Enabled’ to turn off cloud protection and block Options 1 and 2 from changing it.
Close the Group Policy Editor when done.
Option 4Enable or Disable Cloud Protection Using the Registry
Warning: Editing the registry can cause problems if done incorrectly. Please back up your registry before making changes.
To Enable Cloud Protection (Default)
reg delete "HKLMSOFTWAREPoliciesMicrosoftWindows DefenderSpynet" /v SpynetReporting /fTo Disable Cloud Protection
reg add "HKLMSOFTWAREPoliciesMicrosoftWindows DefenderSpynet" /v SpynetReporting /t REG_DWORD /d 0 /fAfter making changes, restart your computer for them to take effect.
Summary
- Cloud-delivered protection helps Microsoft Defender find new threats quickly by using online cloud technology.
- You can turn this feature on or off using Windows Security, Commands, Group Policy Editor, or the Registry.
- Make sure you are an administrator to change these settings.
- Choose the method that feels easiest or most comfortable for you.
- Keep your antivirus protection up to date to stay safe from new threats.
Cloud protection for Windows Defender helps your computer spot new threats faster by using the internet.
Is Microsoft Defender for Cloud needed?
Yes. Azure Security Center was renamed Microsoft Defender for Cloud in 2021 to better reflect its expanded capabilities and support for protecting hybrid and multicloud environments.
Is Microsoft Defender for Cloud free?
Defender for Cloud helps you protect resources across Azure, other clouds, and on-premises through its Free tier and enhanced security capabilities.
How to enable cloud-based protection in Windows defender?
Go to Endpoint security > Antivirus > Create policy. Under Platform, select Windows 10 and later. Under Profile, select Microsoft Defender Antivirus. Enable or disable Cloud-delivered protection, configure Sample submission, and set Cloud block level.
Was this guide helpful?

About the Author
Richard
Tech Writer, IT Professional
Richard, a writer for Geek Rewind, is a tech enthusiast who loves breaking down complex IT topics into simple, easy-to-understand ideas. With years of hands-on experience in system administration and enterprise IT operations, he’s developed a knack for offering practical tips and solutions. Richard aims to make technology more accessible and actionable. He's deeply committed to the Geek Rewind community, always ready to answer questions and engage in discussions.


No comments yet — be the first to share your thoughts!