How to Hide Content When Notifications Are on the Lock Screen in Windows 11
Windows notifications can be helpful for staying informed, but they can also become a distraction. You can control whether notification content appears on your Windows 11 lock screen to protect your privacy.
This setting prevents apps from displaying message previews or other sensitive details when your PC is locked. This way, anyone nearby can’t easily see your private information. For instance, apps like Mail or Microsoft Teams might show a message summary if this privacy setting isn’t enabled.
Choosing to hide notification content adds an extra layer of security. It ensures only you can see the full details of your alerts once your device is unlocked.
Go to Settings > System > Notifications. For each app, click its name and turn off the “Show notification content on the lock screen” toggle to hide private information when your computer is locked.
Control Notifications for Each App
Managing Notifications Per App: Sometimes you need notifications from an app, but not every single one. Perhaps your social media apps send too many alerts, or a game keeps popping up with updates while you’re working. Windows lets you manage this on an app-by-app basis.
Hide Content on the Lock Screen
You can hide private information from appearing on your Windows 11 lock screen to keep your data safe. This setting is great for privacy. When your computer is locked, private information won’t appear on the lock screen.
- Open Settings
Click the Start button (the Windows flag icon). Then click the gear icon for “Settings.” You can also press the Windows key + I on your keyboard.
- Go to System
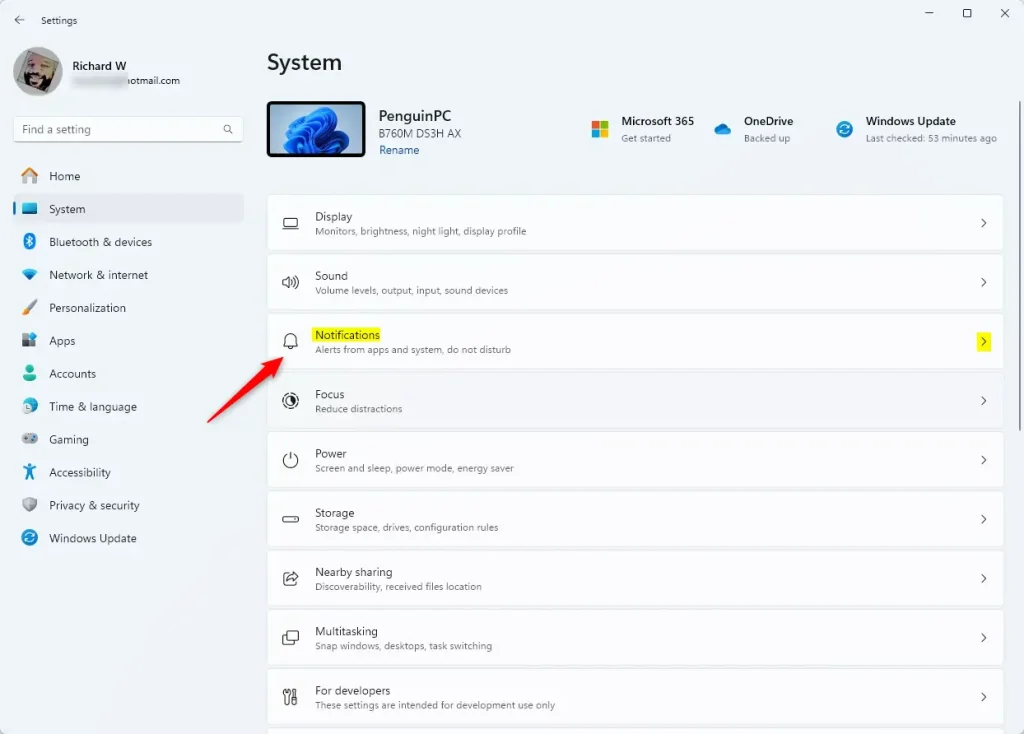
In the Settings window, click on “System” in the left sidebar.
- Find Notifications
In the System settings, click on “Notifications.”
- Find App Settings
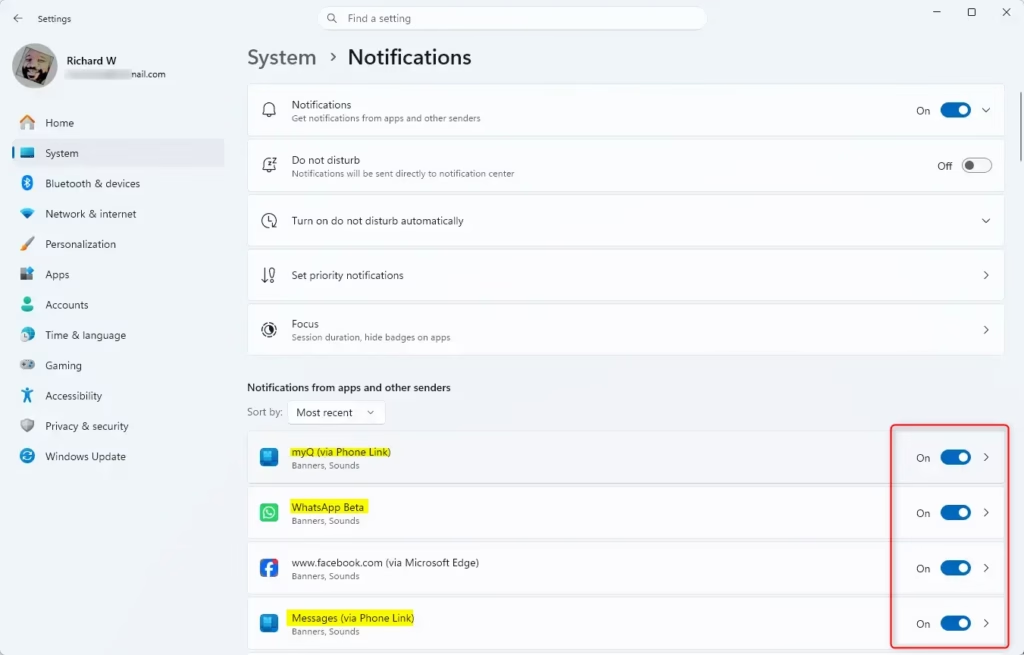
Scroll down to the section “Notifications from apps and other senders.” You will see a list of apps that send notifications.
- Choose an App
Click on the name of the app you want to change settings for. This takes you to its specific settings.
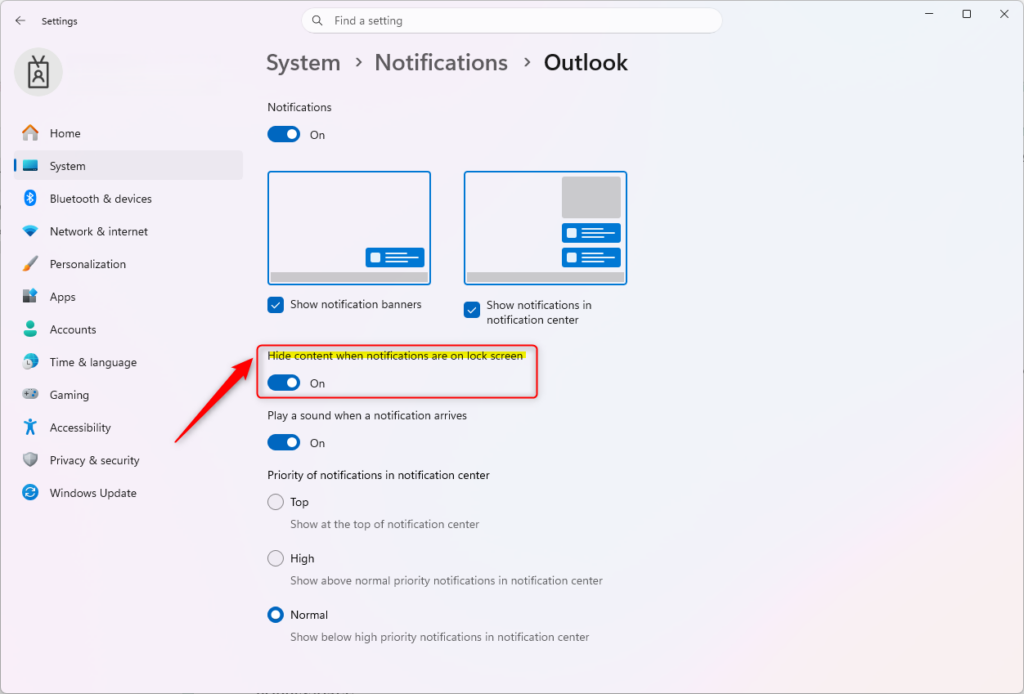
- Change the Lock Screen Setting
Look for an option like “Show notification content on the lock screen.” There might be a toggle switch next to it. Turn this toggle OFF to hide content on the lock screen. Turn it ON to show content.
Warning: Be careful about what information apps might show. For apps like email or messaging, it’s best to keep this setting OFF for your lock screen.
By adjusting this setting for each app, you keep your lock screen private. For example, you might want to know you received a message, but you don’t need to see the entire message or who it’s from on your lock screen.
Reference:
Summary
This guide walked you through controlling lock screen notification content on Windows 11. By navigating to Settings > System > Notifications, individual app settings can be adjusted. This helps protect your privacy by hiding sensitive information when your computer is locked.
Was this guide helpful?

About the Author
Richard
Tech Writer, IT Professional
Richard, a writer for Geek Rewind, is a tech enthusiast who loves breaking down complex IT topics into simple, easy-to-understand ideas. With years of hands-on experience in system administration and enterprise IT operations, he’s developed a knack for offering practical tips and solutions. Richard aims to make technology more accessible and actionable. He's deeply committed to the Geek Rewind community, always ready to answer questions and engage in discussions.
No comments yet — be the first to share your thoughts!