How to Enable or Disable Snipping Tool in Windows 11
You can enable or disable the Snipping Tool in Windows 11 using either the Registry Editor or Group Policy Editor.
The Snipping Tool is a built-in Windows utility that helps you capture screenshots and even record your screen. It’s a handy tool for quick documentation or sharing visuals.
For example, you can prevent users from accessing the Snipping Tool by modifying a specific registry key, such as `DisableCapture` located under `🗝️HKEY_LOCAL_MACHINE\SOFTWARE\Policies\Microsoft\Windows\System`.
This allows you to control its availability, whether for security reasons in a business environment or to simplify your system.
You enable or disable the Snipping Tool by editing the registry. Open Registry Editor, navigate to `AllowScreenCapture`, and set the value to 1 to enable or 0 to disable. A restart is required for the changes to take effect.
How to Use the Snipping Tool
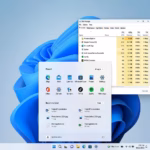
The Snipping Tool in Windows 11 makes taking screenshots super easy. You can open it by searching for “Snipping Tool” or by using the handy shortcut ⊞ Win+Shift+S to start capturing your screen right away.
After you take a screenshot, you can add notes, use the color picker, or hide sensitive text. There’s also a timer function that’s handy for capturing menus that vanish when you click elsewhere. Plus, if you need to grab text from a picture, Snipping Tool can do that too with its Optical Character Recognition (OCR) feature.
Does Snipping Tool Support Screen Recording?
Yes, the Snipping Tool is a capable Windows 11 screen recorder. You can switch the mode from the camera icon to the video camera icon in the app toolbar. Then, you can record your screen, pause, and save the video file to your computer.
Troubleshooting Common Issues
If your Snipping Tool isn’t saving screenshots, first check your Pictures folder permissions to make sure the app can write files.
Why Manage Snipping Tool Access?
Companies may want to block screen captures to protect secret data. Schools might enable it to help students create learning videos. Managing this access ensures your computer follows your specific security needs.
What Happens When You Change Settings?
When you enable the tool, all users can capture their screens. When you disable it, the app will not launch or capture any content. This is a system-wide change.
How to Enable or Disable the Snipping Tool (Admin Required)
If you need to turn the Snipping Tool on or off in Windows 11, you can do it using the Registry Editor, but you’ll need administrator rights first.
- Open the Registry Editor by typing
regeditin the Start menu. - Navigate to:
HKEY_LOCAL_MACHINE\SOFTWARE\Microsoft\PolicyManager\default\Experience\AllowScreenCapture - Double-click the value item.
- Set to 1 to enable or 0 to disable.
- Restart your computer to apply the changes.
Summary
The Snipping Tool helps you capture screenshots easily, with shortcuts like ⊞ Win+Shift+S saving you time.
How do I open Snipping Tool in 🪟 Windows 11?
You can open the Snipping Tool in Windows 11 by typing “Snipping Tool” after pressing the Windows Key, or use the faster ⊞ Win+Shift+S shortcut to capture a specific screen area.
Was this guide helpful?

About the Author
Richard
Tech Writer, IT Professional
Richard, a writer for Geek Rewind, is a tech enthusiast who loves breaking down complex IT topics into simple, easy-to-understand ideas. With years of hands-on experience in system administration and enterprise IT operations, he’s developed a knack for offering practical tips and solutions. Richard aims to make technology more accessible and actionable. He's deeply committed to the Geek Rewind community, always ready to answer questions and engage in discussions.


[…] the Snipping Tool, you can redact text, disable screen capture and recording, including system audio and microphone when recording, disable automatically saving screenshots, […]
[…] the Windows key + Q. You can also access Click to Do through the Snipping Tool menu if you have the Snipping Tool installed. You can search for Click to Do using Windows Search to select and take action on what […]
Disable screen capturing and recording with the Snipping Tool app step very help full