
This article explains how to change the primary account in the new Outlook app on Windows 11.
The new Outlook for Windows brings the latest features and a modern and simplified design with support for Exchange-backed Microsoft 365 work or school, Outlook.com, Hotmail, and Gmail accounts.
The app has many features, including support for email signatures, external email accounts, setting out-of-office automatic replies, email sorting, subscription management, email forwarding, setting default From address, backing up your mailbox, changing the reading pane, opening a new window for a message, language translations, turn text predictions on or off, and more.
By default, the first account you set up in Outlook is automatically chosen as the primary account. You can add additional accounts and switch any account to a primary account.
The Primary Account is the account that dictates which privacy settings will apply across the app.
You may want to change your primary email account in Outlook for various reasons. For instance, you may have added a new email account and want to make it the primary one for better management of your emails. Or you may want to change the privacy settings for your primary account, which can only be done when it is selected as the primary account.
Whatever the reason, changing your primary email account in Outlook is a simple process that can be done in a few steps.
Change primary account in Outlook
As mentioned above, if you have multiple accounts in Outlook, you can change or switch the primary account anytime. By default, the first account you add is automatically the primary account.
Here’s how to change the primary account in Outlook.
First, open the new Outlook app on Windows 11.
You can do that by clicking Start -> All app -> Outlook app. Or use the Start menu search box to search for Outlook and open it.

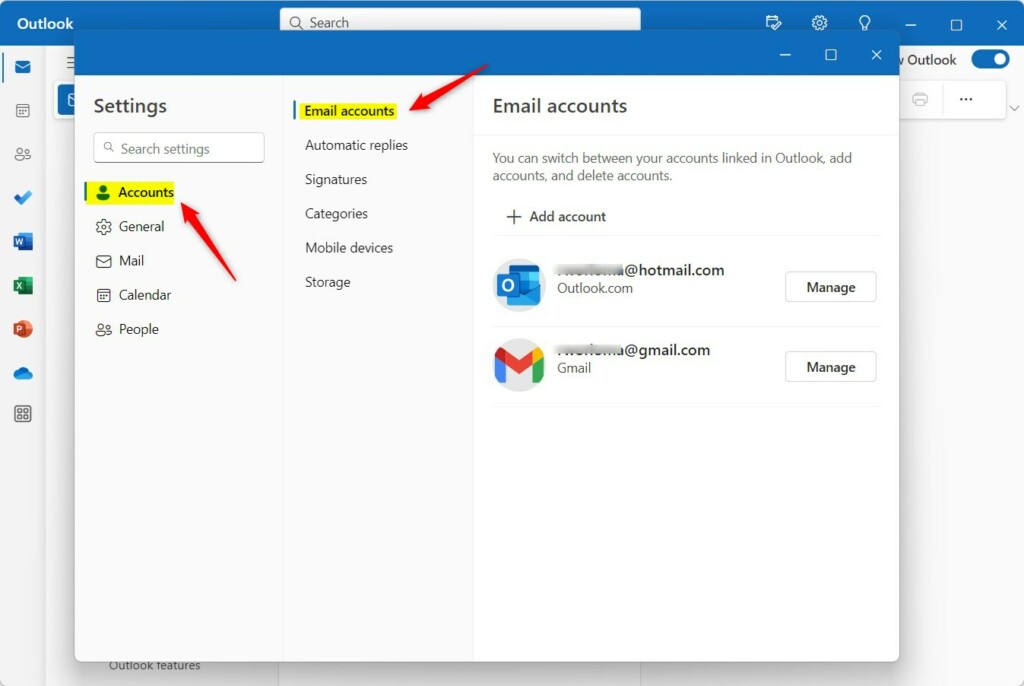
When the app opens, click the Settings button (gear on the top right) to proceed.

On the Settings page, click the Accounts tab on the left sidebar and select Email accounts on the right.
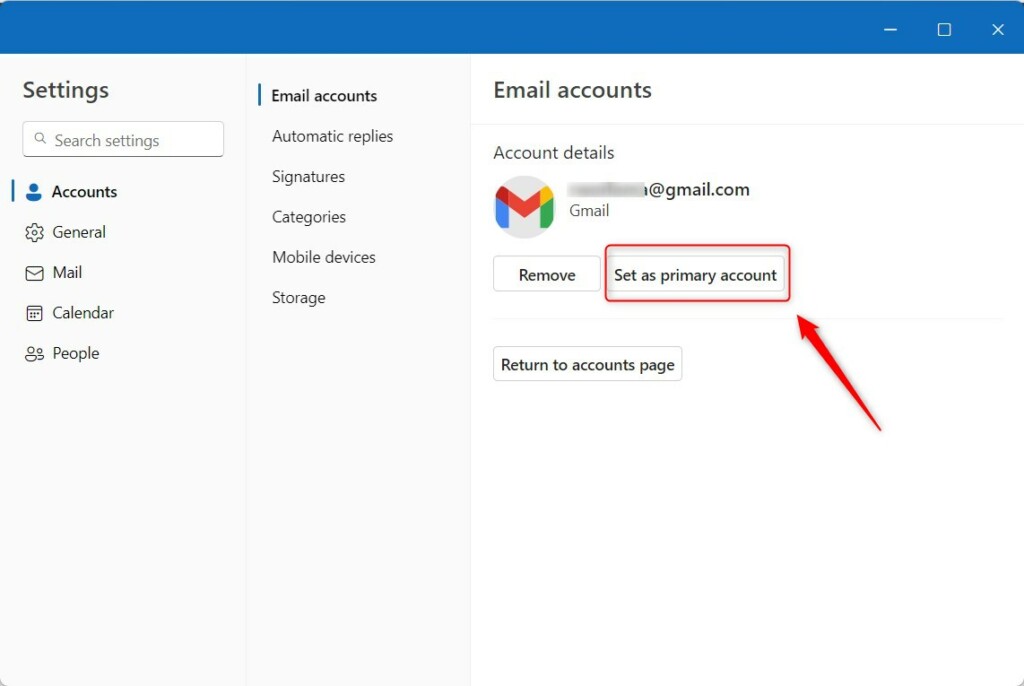
Select an account you want to make the primary account on the Email accounts setting page. There will be one account that is the primary account listed.
Then click Manage for the account you want to make primary.

On the Account details page, click the Set as primary account button to make the account the primary.
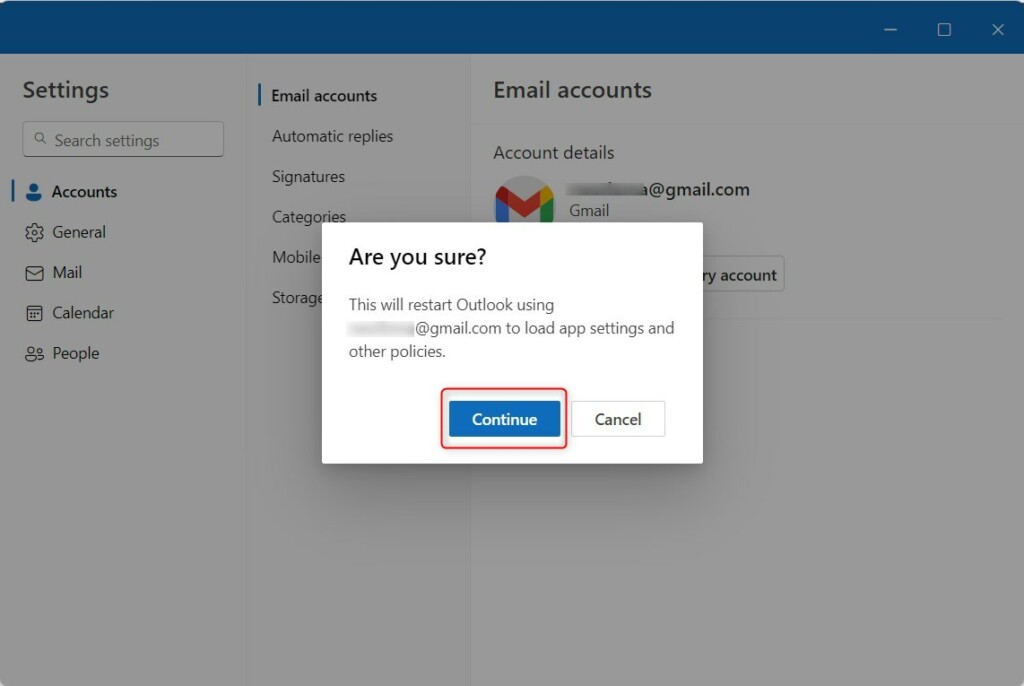
Outlook will prompt you to confirm that you want to switch the primary account. Click Continue to proceed.
Outlook will restart and make the account the primary.
Once you change the account, all the privacy settings set for that account will apply across your app.
That should do it!
Reference:
Conclusion:
- This comprehensive guide demonstrated the straightforward process of switching the primary account in Outlook on Windows 11, allowing users to manage their email accounts efficiently.
- Please utilize the comments section below the article for any additional insights, corrections, or contributions.
- The detailed steps provided equip users with the necessary knowledge to modify their primary account and understand the implications across the Outlook app.
- By following these instructions, users can effortlessly alter their primary account and ensure their privacy settings are accurately applied.


Leave a Reply to How to keep declined meetings on your Outlook calendar on Windows 11 – Geek Rewind Cancel reply