How to Start Receiving Insider Builds in Windows 11

Windows Insider builds let you test unreleased software updates and upcoming Windows 11 features months before they reach every standard PC. The Windows Insider Program delivers these early test versions through normal Windows Update once you link your Microsoft account and pick an update channel.
You join by choosing a channel in the Settings app and restarting your computer. The steps are the same on Windows 11 Home and Pro. Before you start, make sure Windows is activated and fully up to date. Back up anything important too, because pre-release builds can have bugs and, in rare cases, fail to boot. Avoid using your only work PC for this.
Open Settings , go to Windows Update , click Windows Insider Program, then Get started. Link your Microsoft account, choose a channel like Beta or Release Preview, and restart your computer. Insider builds then install through Windows Update .
Open Windows Settings
- Press Win+I on your keyboard. Or click the Start button (the Windows icon, usually at the bottom of the screen) and select the gear icon labeled Settings.
- Check that the Settings window is open and shows the list of categories on the left.

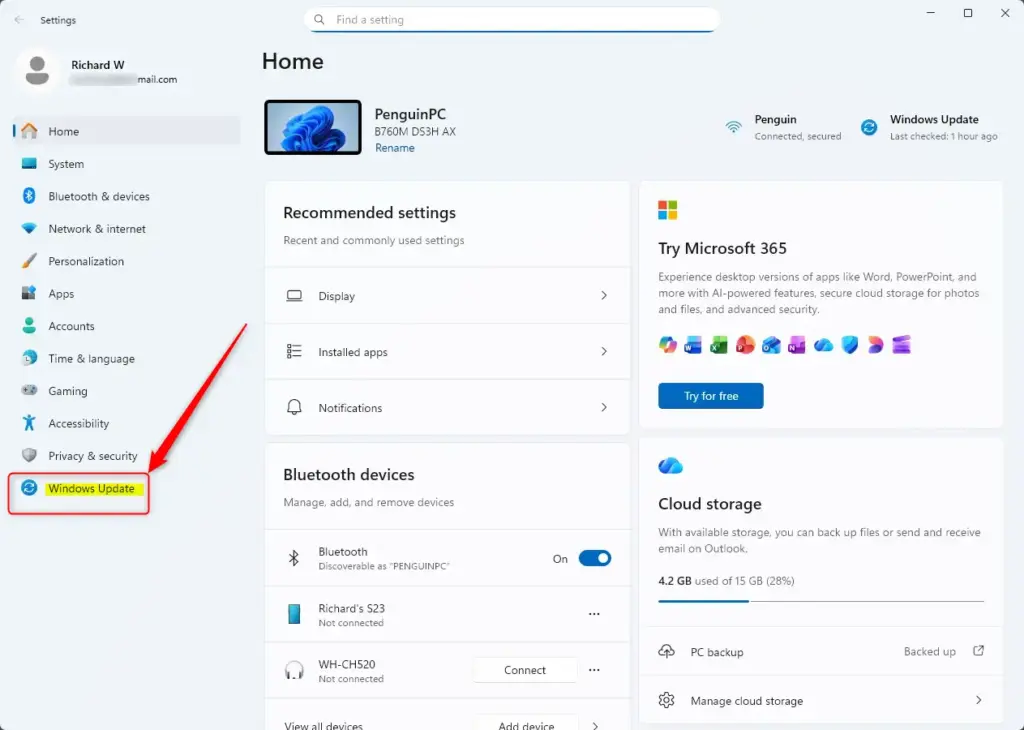
Go to Windows Update
- Find Windows Update in the left menu of the Settings app. This section controls software updates for your computer, including new build installations.
- Click Windows Update . You should now see the update status, the Check for updates button and a list of related options.
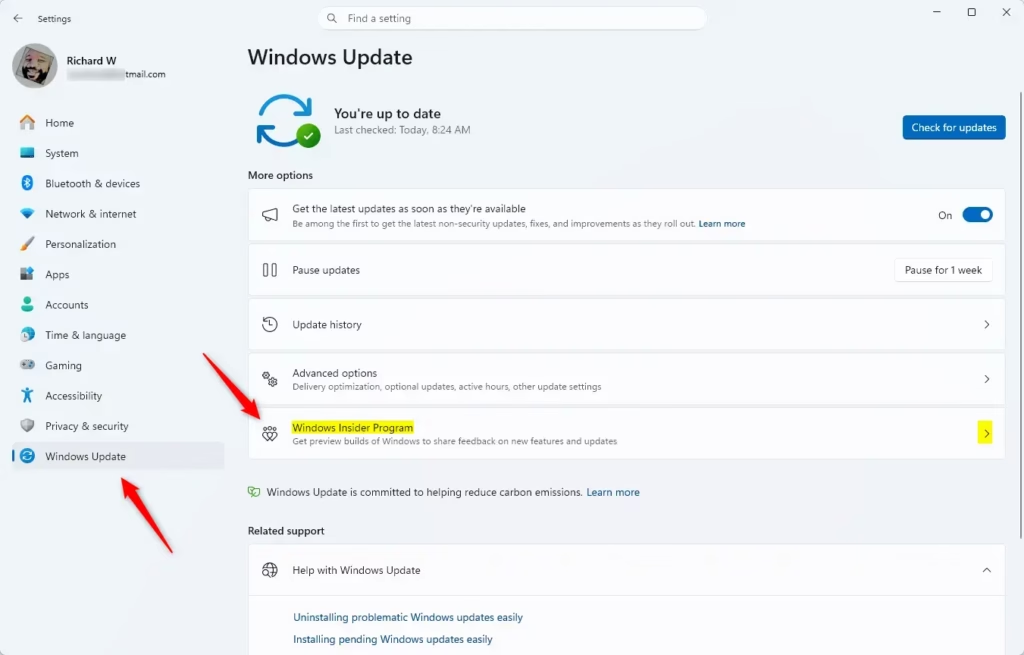
Find the Windows Insider Program
- Look for Windows Insider Program on the Windows Update screen. It is usually listed under the additional options. You may need to scroll down.
- Click Windows Insider Program. The Insider page opens.
On a work or school PC, your organization may block Insider enrollment through policy. In that case you will need to ask your IT department.
Start Linking Your Account
- Click Get started on the Windows Insider Program page. This begins the signup for this computer.
- If Windows asks, allow optional diagnostic data. Insider builds need it so Microsoft can collect feedback on the test software. You can find this setting under Settings Privacy & security Diagnostics & feedback
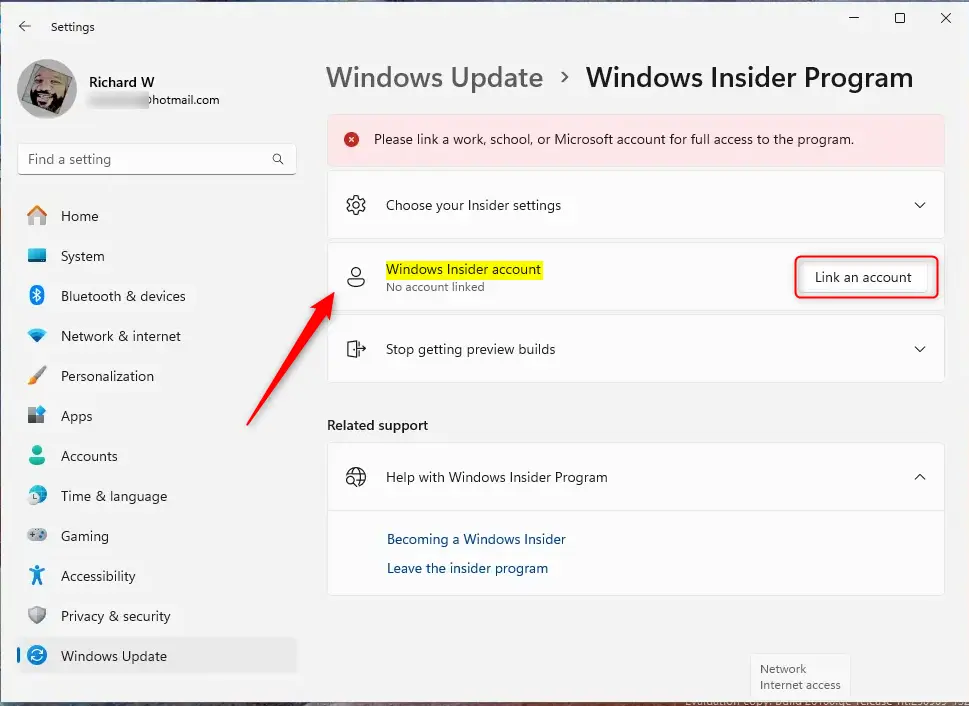
Link Your Microsoft Account
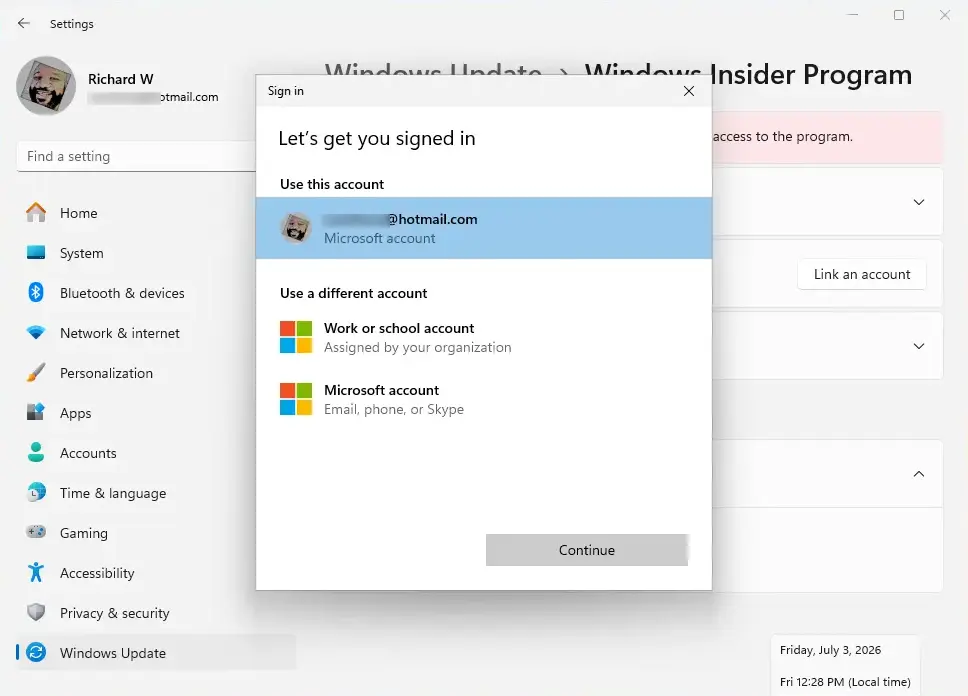
- Click Link an account and choose the Microsoft account you want to use. Microsoft uses this account to track your Insider registration.
- Sign in if prompted, then click Continue. The account now appears on the Insider page.
Use the same Microsoft account you already use on this PC if you can. That keeps things simple later if you want to leave the program.
Choose Your Insider Channel
Windows 11 Insider builds require you to pick a release channel before you can download test updates. A channel is an update track that decides how early, and how stable, your builds are. Read the options below, then choose one:
- Dev Channel: This has the very first, experimental updates. You’ll see new features here first, but it might have more bugs.
- Beta Channel: These updates are more stable than the Dev Channel. They still have new features not yet released to everyone. It’s a good choice for people who like to try new things but want some stability.
- Release Preview Channel: This channel lets you see updates and fixes before they go out to the public. It uses the next version of Windows that is almost ready. This is the most stable option for Insider updates.
It is the most experimental of all, so treat it as a test machine option only. If you are not sure which to pick, choose Beta or Release Preview. Moving to a less risky channel later can require a clean install of Windows, so choose carefully.
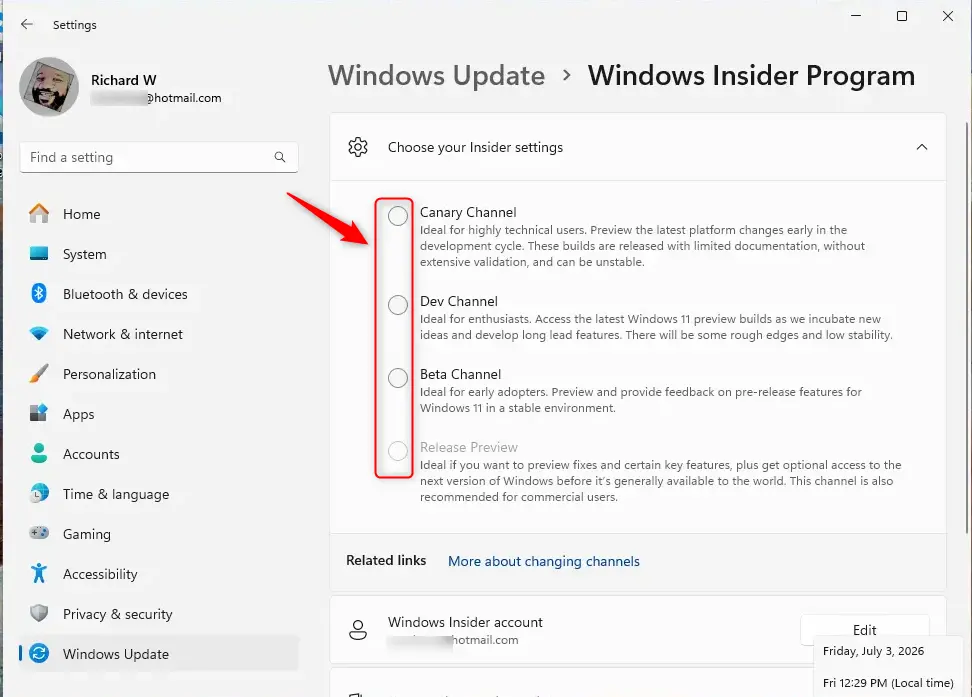
- Review the description for each channel on screen.
- Select the channel that suits your comfort level with potential risks.
- Click Continue or Confirm.
Review and Agree to Terms
- Read the agreements and program information that appear. They explain what the Insider Program does to your PC and what to expect from pre-release software.
- Click Continue or Confirm to accept when you are ready. If a prompt says a restart is needed, move on to the next step.
Restart Your Computer
- Save your open work, then restart your computer. The restart applies your Insider settings.
- After you sign back in, open Settings Windows Update and click Check for updates. Windows should start downloading the early build for your channel.
Insider builds are large, so the download and install can take a while and may need more than one restart. To leave the program later, go back to Settings Windows Update Windows Insider Program and look for the option to stop getting preview builds.
Reference:
Summary
Link your Microsoft account, pick an update channel like Dev or Beta, and restart your PC to start receiving early Windows Insider builds.
Was this guide helpful?

About the Author
Richard
Tech Writer, IT Professional
Richard is a writer at Geek Rewind who turns complex IT tasks into clear, step-by-step guides. He draws on years of hands-on experience in system administration and enterprise IT operations, focusing on Windows, Linux and WordPress: the problems people actually run into, and the fixes that work. His server and WordPress guides come from systems he runs himself. Richard builds and maintains the platform behind Geek Rewind, from its Ubuntu servers and Nginx configuration to its custom WordPress plugins. Many new tutorials start with readers' questions, and he's always glad to answer them in the comments.



No comments yet — be the first to share your thoughts!