How to fix Sound issues when you share your Computer’s Sound in Microsoft Teams

Microsoft Teams allows you to share your computer’s sound during meetings so others can hear videos or audio clips you play.
Microsoft Teams' "Include computer sound" feature allows everyone in a meeting to hear audio from the shared computer screen, not just see the visual content. This is important for presenting videos or presentations with audio elements, ensuring a complete experience for all participants.
Many users run into trouble when their shared sound doesn’t come through. This often happens when the correct settings aren’t selected.
Fixing Microsoft Teams sound sharing problems requires simple steps in Teams and Windows audio settings. You can resolve this common issue by adjusting these settings, which ensures your computer's sound plays correctly for meeting participants.
To fix quiet shared sound in Microsoft Teams, open the Sound control panel by right-clicking the speaker icon and selecting “Sounds.” Navigate to the Communications tab and select “Do nothing” under communication activity. Click Apply and OK to save the changes.
Fixing Low Shared Sound
If the sound you share in Microsoft Teams is too quiet for others, it’s usually because Windows is automatically lowering other sounds when it thinks you’re in a call.
What are Windows Communication Settings?
Windows audio settings automatically reduce other sound volumes during calls. This automatic volume reduction feature aims to improve focus on conversations. However, this same setting can also lower the volume of shared content.
Adjusting Sound Settings for Clearer Audio
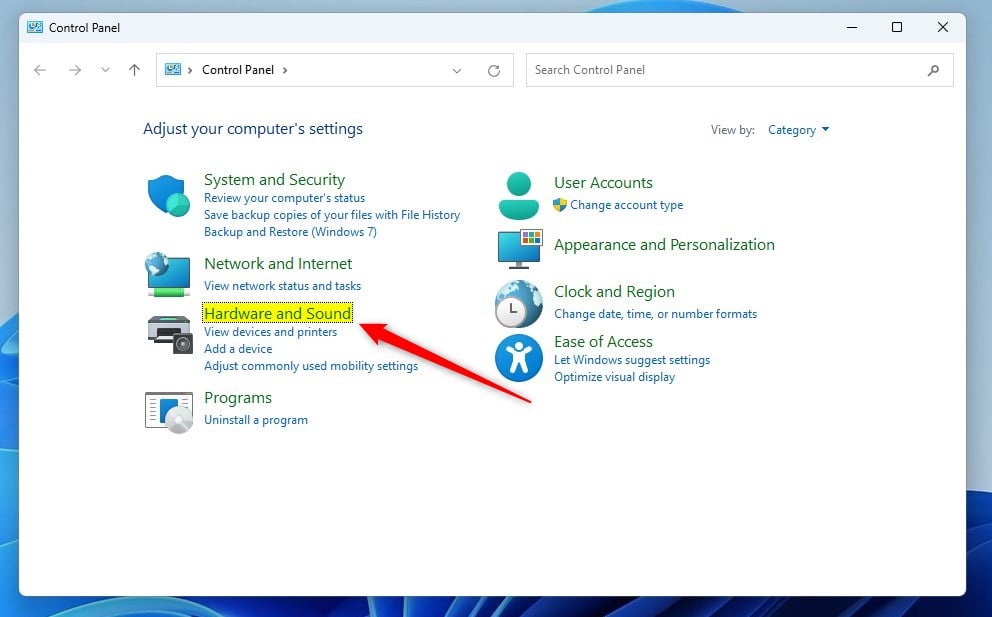
When your computer’s sound becomes quiet for others in Microsoft Teams after you share it, a simple Windows setting can fix this. This adjustment stops Windows from automatically lowering the volume of your shared computer sound, making it clearer for everyone in your meeting. Open the Sound Control Panel by right-clicking the speaker icon in your Windows taskbar (usually in the bottom-right corner of your screen).
Open the Sound Control Panel
The fastest way is to right-click the speaker icon in your Windows taskbar (usually in the bottom-right corner). In the menu that appears, choose “Sounds.” This opens the Sound control panel.
💡TipIf you don’t see “Sounds” right away, you might need to click “Open Sound settings” first. Then, look for a link called “Sound Control Panel” on the right side of that window.Go to the “Communications” Tab
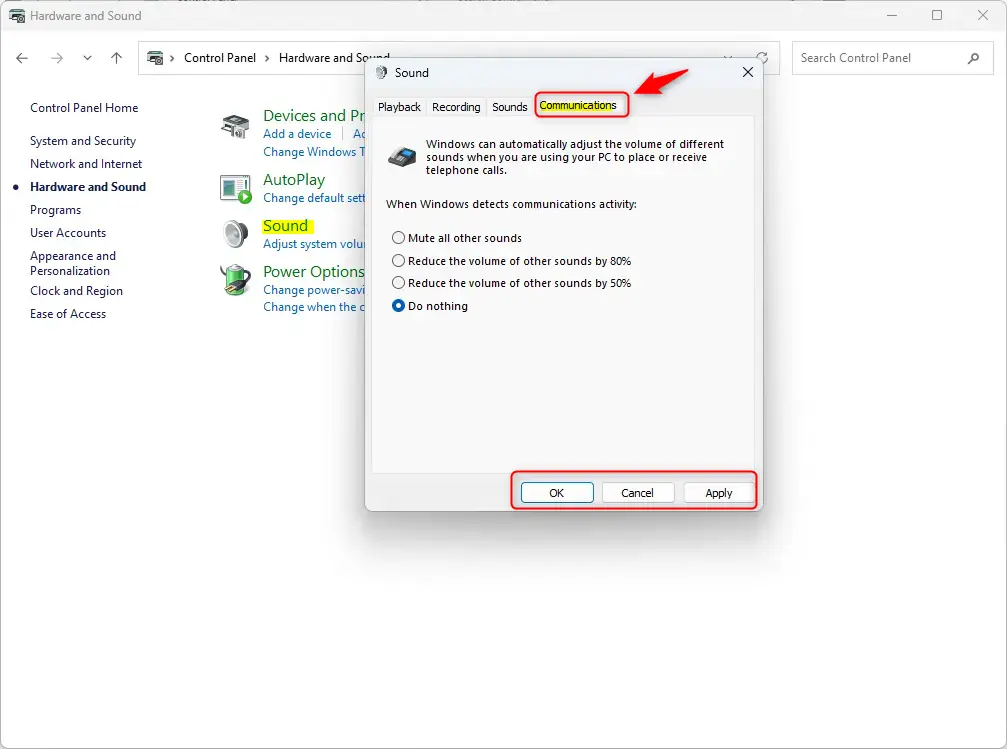
In the Sound control panel window, you’ll see tabs at the top like Playback, Recording, Sounds, and Communications. Click on the Communications tab.
Select “Do Nothing”
Under the Communications tab, you’ll see options. Find the one that says something like “When Windows detects communications activity.” Select the circle next to Do nothing. This tells Windows to keep all volumes just as you set them, even during a Teams meeting.
⚠️WarningMake sure you choose “Do nothing.” The other options will keep lowering your volume.Apply Your Changes
After choosing “Do nothing,” click the Apply button, then click OK to close the Sound control panel. Your changes are saved right away.
Reference:
Summary
If the sound you share in Microsoft Teams is too quiet, it’s likely because Windows is automatically lowering volume during calls.
How to share computer audio when sharing screen in Teams?
Include computer sound To share sound from your computer: Select Share. in your meeting controls. Turn on the Include sound toggle.
Was this guide helpful?
100% of readers found this helpful (1 votes)

About the Author
Richard
Tech Writer, IT Professional
Richard, a writer for Geek Rewind, is a tech enthusiast who loves breaking down complex IT topics into simple, easy-to-understand ideas. With years of hands-on experience in system administration and enterprise IT operations, he’s developed a knack for offering practical tips and solutions. Richard aims to make technology more accessible and actionable. He's deeply committed to the Geek Rewind community, always ready to answer questions and engage in discussions.


No comments yet — be the first to share your thoughts!