How to Schedule Automatic Maintenance on Windows 11
You can schedule automatic maintenance on Windows 11 to keep your PC running smoothly and securely.
Windows Automatic Maintenance is a built-in feature that proactively performs essential tasks like running security scans, applying software updates, and optimizing system performance.
By default, Windows 11 attempts to run these maintenance tasks at 2 AM. If your computer is powered off at that time, Windows intelligently defers the tasks until your PC is next idle.
Understanding how to adjust this schedule helps you ensure your system remains up-to-date and optimized without disrupting your active use of the computer.
Windows 11 can wake your PC from sleep to run maintenance if allowed by your power plan settings. Ensure your computer is plugged in for this feature to work reliably.
Why use 🪟 Windows 11 automatic maintenance?
Computers accumulate temporary files and registry clutter over time. Automatic maintenance gathers these chores into one scheduled window. This keeps your system fast and secure without manual intervention. It ensures your PC remains stable and protected against threats.
What happens when done?
Once maintenance completes, your system will have finished security scans, applied pending updates, and cleared temporary files. This improves overall system health and responsiveness.
How to check if maintenance is running
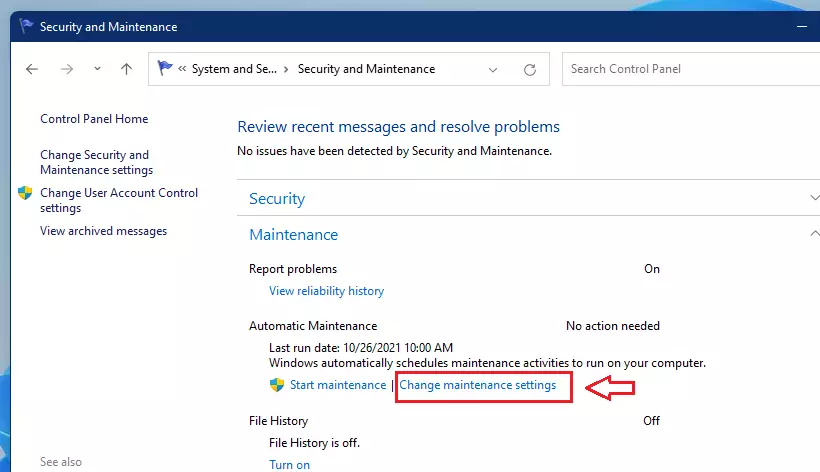
You can verify the status through the Security and Maintenance control panel. Open the Control Panel, navigate to System and Security, and select Security and Maintenance. Expand the Maintenance section to see the last run time and current status.
How to change the maintenance time
You can easily change the time when Windows 11 automatic maintenance runs if the default 2 AM doesn’t work for you. Scheduling maintenance for a time when you’re not using your PC helps keep things running smoothly without interruption. Simply follow a few steps to pick a new, better time for these important tasks.
- Open the Control Panel.
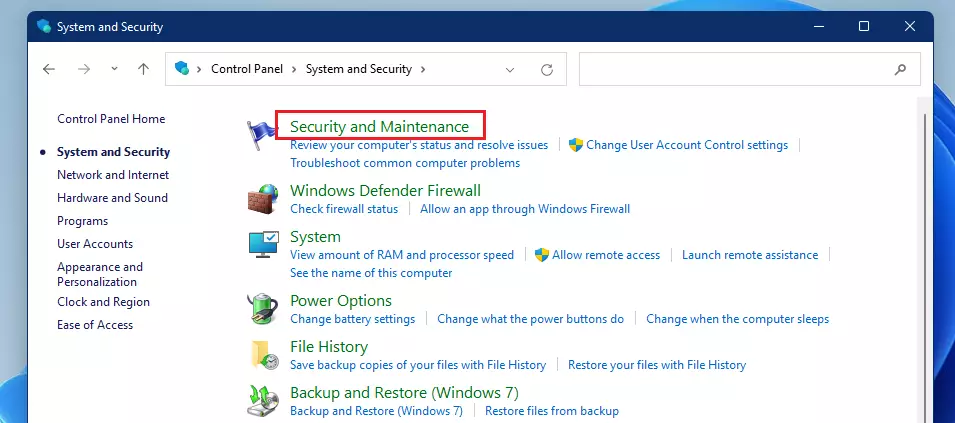
- Go to System and Security, then Security and Maintenance.
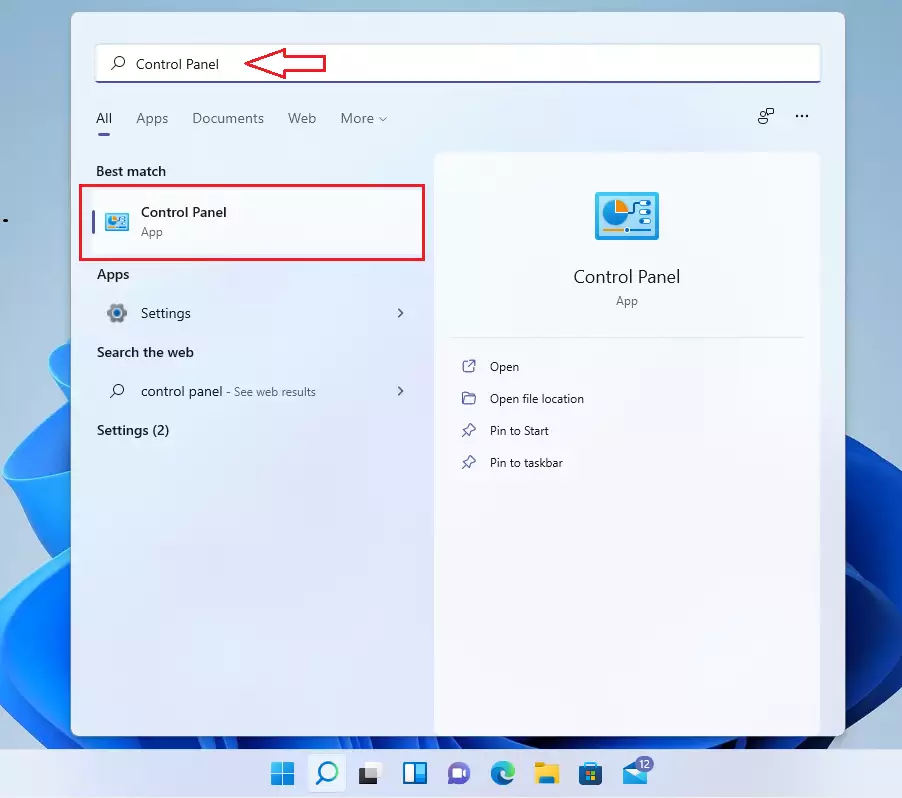
windows 11 control panel search - Click the arrow to expand the Maintenance section.
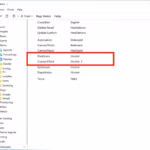
windows 11 automatic system maintenance - Click Change maintenance settings.
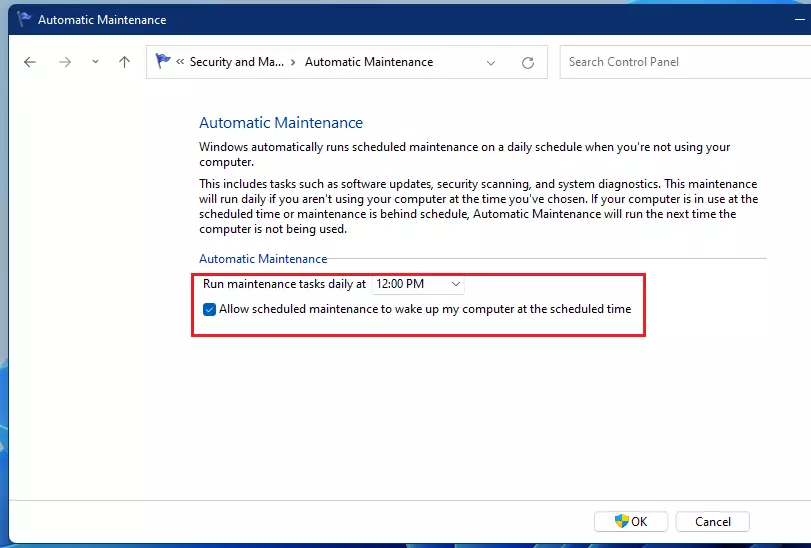
windows 11 change maintenance settings - Pick your preferred time and click OK.
windows 11 automatic maintenance time changed
Advanced Configuration and Troubleshooting
Microsoft\Windows\TaskScheduler. You can force maintenance to run immediately using the command prompt. Open Command Prompt as an administrator and type: mschedexe.exe /run.Registry and Power Settings
Summary
Windows 11 automatic maintenance is vital for system performance. By configuring the Task Scheduler and ensuring your power settings allow for idle wake-ups, you keep your PC optimized. For more details, visit the official Microsoft documentation.” }
Does Automatic Maintenance run if the PC is in sleep mode?
Yes, if your power settings allow it. Windows can wake your computer from sleep to perform maintenance tasks if the ‘Allow scheduled wake-up’ option is enabled in your power plan settings. Ensure your PC is plugged into a power source for this to function reliably.
Why does Automatic Maintenance run multiple times a day?
If a maintenance task is interrupted or fails, Windows will reschedule it to run during the next available idle period. This ensures that critical security updates and system health checks are eventually completed, even if you frequently use your computer during the primary scheduled window.
Was this guide helpful?

About the Author
Richard
Tech Writer, IT Professional
Richard, a writer for Geek Rewind, is a tech enthusiast who loves breaking down complex IT topics into simple, easy-to-understand ideas. With years of hands-on experience in system administration and enterprise IT operations, he’s developed a knack for offering practical tips and solutions. Richard aims to make technology more accessible and actionable. He's deeply committed to the Geek Rewind community, always ready to answer questions and engage in discussions.


The Box that needs checking is greyed out. I cannot activate this.
The check box “Allow scheduled maintenance to wake up my computer…” IS USELESS.
It will wake up regardless, at least on DELL Precision Laptop.
Same for me on a thinkpad. Did you ever find a solution?