How to Start or Stop Windows Automatic Maintenance

Windows Automatic Maintenance is a built-in Windows feature that runs background tasks to keep your PC running smoothly. These tasks include things like checking for updates, defragmenting your hard drive, and running security scans.
This feature helps your computer stay in good shape without you needing to do anything. It normally runs once a week, usually when your PC is idle.
You can choose to start or stop Windows Automatic Maintenance if you need to. This can be useful if you want to control when these tasks run or if you suspect they are slowing down your computer. The process involves adjusting settings within the Task Scheduler.
You can start or stop Windows Automatic Maintenance via the Control Panel. Navigate to Security and Maintenance, then click Start maintenance or Stop maintenance as needed. Alternatively, use the Windows Terminal with commands like MSchedExe.exe Start or MSchedExe.exe Stop.
Understanding Windows Automatic Maintenance
Windows Automatic Maintenance, often called WAM, is a handy built-in tool that keeps your computer running well by doing important jobs in the background.
How to Start or Stop Windows Automatic Maintenance
Windows Automatic Maintenance performs background tasks to keep your PC running smoothly. You can manually start or stop Windows Automatic Maintenance tasks. To manage these background tasks, open the Control Panel, making it manageable to control when these background jobs run.
- Open the Control Panel .
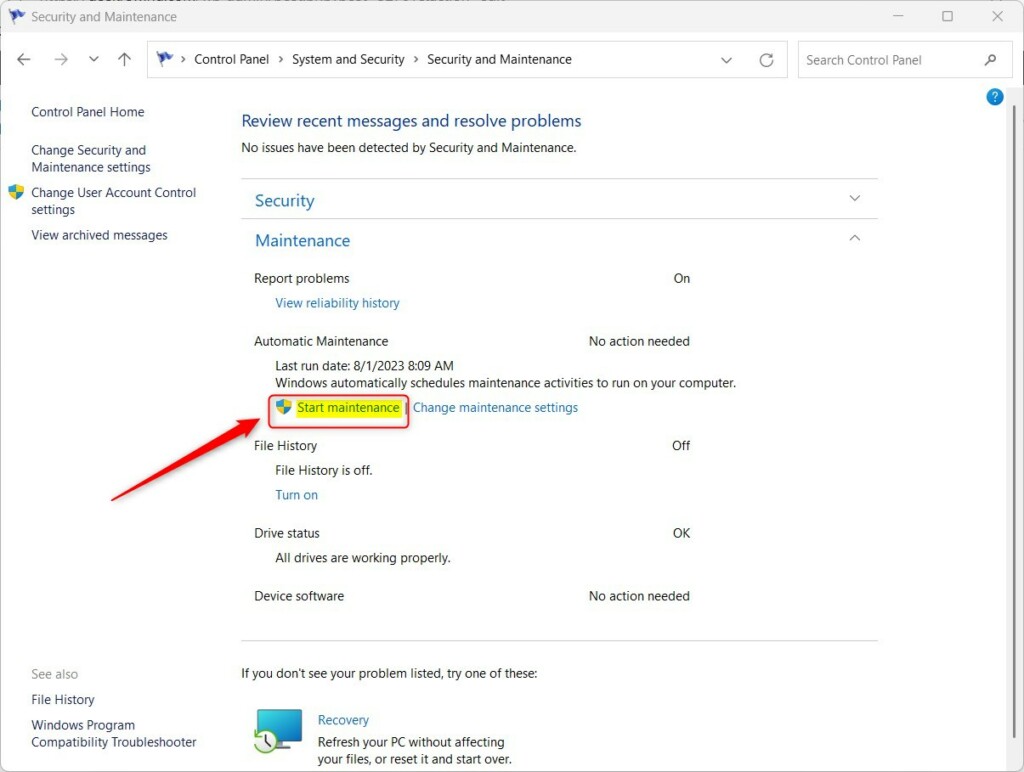
- Go to System and Security > Security and Maintenance > Automatic Maintenance.
- If the task is not running, click the Start maintenance link.
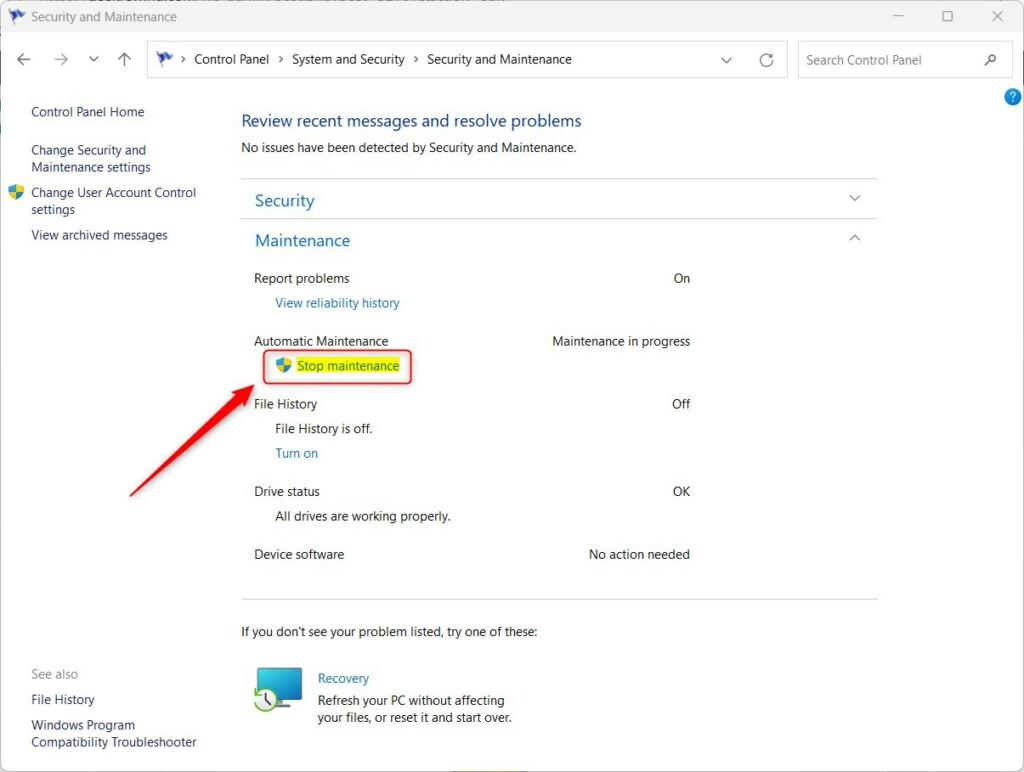
If the task is already running, you’ll see a Stop maintenance link. Click that to end the process.
Advanced Control via Windows Terminal
Windows Terminal provides a fast method for managing Windows Automatic Maintenance for users comfortable with command lines. This tool, which includes Command Prompt and PowerShell, lets you start or stop the maintenance process with specific commands. For advanced control over when background maintenance tasks run, try Windows Terminal.
- Open the Windows Terminal as an administrator.
- To start the maintenance, type the following command and press Enter:
MSchedExe.exe Start - To stop the maintenance, type the following command and press Enter:
MSchedExe.exe Stop
Registry and Group Policy Alternatives
For those comfortable with advanced system settings, disabling Windows Automatic Maintenance can be done via the Registry Editor or the Group Policy Editor.
Pros and Cons of Disabling Maintenance
| Pros | Cons |
|---|---|
| Prevents performance drops during heavy use. | System updates may fail to install. |
| Stops background disk activity. | Security scans might be missed. |
| Saves battery life on laptops. | System performance may degrade over time. |
Summary
Windows Automatic Maintenance keeps your system healthy by ensuring your machine stays updated and secure. When Windows Automatic Maintenance runs, it optimizes your system for better performance. You can manage these maintenance tasks through the Control Panel or command-line tools. Advanced changes to Windows Automatic Maintenance require administrator privileges.
Is it safe to disable Windows Automatic Maintenance?
Disabling it is generally not recommended. While it stops background noise, it prevents Windows from performing critical disk cleanup and security updates. If you disable it, you must perform these tasks manually to ensure your computer remains secure and does not experience performance issues or file system errors.
Why does my computer freeze during automatic maintenance?
Your computer may freeze during automatic maintenance because these tasks can consume significant system power and resources.
Was this guide helpful?

About the Author
Richard
Tech Writer, IT Professional
Richard, a writer for Geek Rewind, is a tech enthusiast who loves breaking down complex IT topics into simple, easy-to-understand ideas. With years of hands-on experience in system administration and enterprise IT operations, he’s developed a knack for offering practical tips and solutions. Richard aims to make technology more accessible and actionable. He's deeply committed to the Geek Rewind community, always ready to answer questions and engage in discussions.

[…] can change the default run time or manually trigger it to start. The Automatic Maintenance feature is enabled by default in Windows, but you can disable it if you […]
[…] If you want, you can change the time it runs or start it manually whenever you like. […]