How to Remove Windows 11 Device from Link to Windows App on Phone

Unlinking a Windows 11 PC from the Link to Windows app on your phone removes old computers from your device list, so you only see the hardware you currently use. Link to Windows is a companion app that connects your Android phone to your PC. Once linked, you can view text messages, make phone calls, and open mobile photos directly on your monitor.
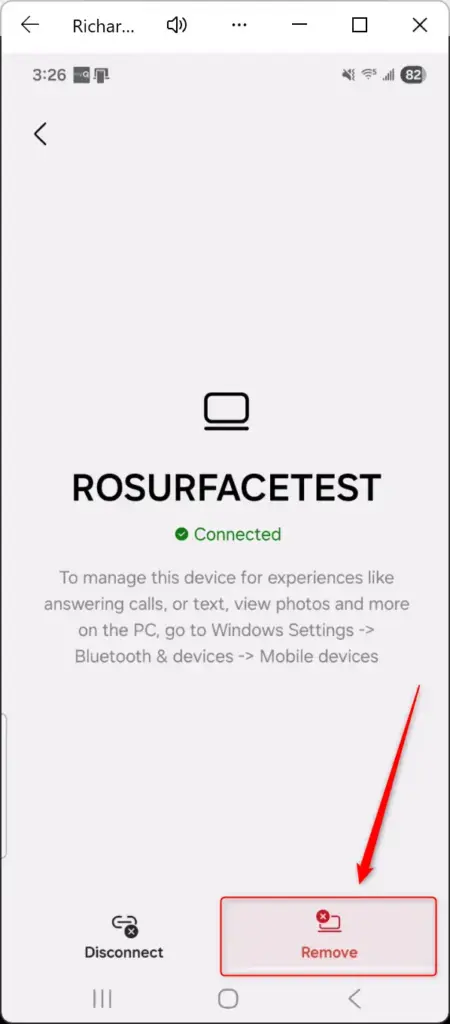
Open the Link to Windows app on your phone, tap Profile, then Settings. Under Device control, tap the gear icon next to your Windows computer and select Remove twice to confirm.
You need to clear out old links when you sell a laptop, buy a new computer, or want a tidier phone screen. Removing the connection takes your PC name off the app menu immediately.
This guide is written for the current Link to Windows app on Android and Windows 11. App menus change with updates, and some Samsung phones ship their own version of the app. A label on your phone may differ slightly from what I describe.
Before you start, here is what unlinking does and does not do:
- It stops that PC from showing your phone’s messages, calls, and photos.
- It does not delete anything from your phone. Your texts, call history, and photos stay where they are.
- It does not touch your Microsoft account or the files on the PC.
- It affects only the PC you remove. Other linked PCs keep working.
If you are selling or giving away a PC, unlink it first while you still have access to it. That way the new owner can never see content from your phone. If you change your mind later, you can undo this. Pair the phone with the PC again from the Link to Windows app on the phone and the Phone Link app on the PC, signing in with the same Microsoft account.
Here’s How:
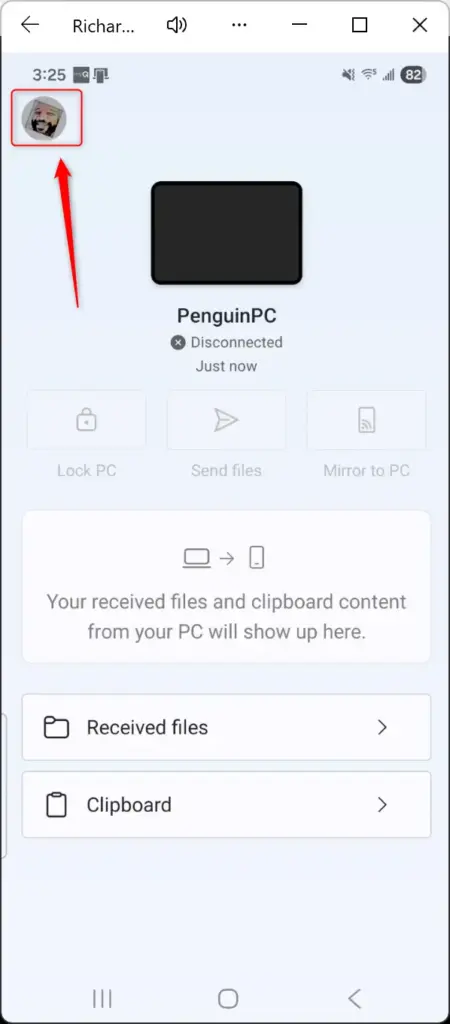
You can remove a Windows device from the Link to Windows app on your phone by opening the application, going to your profile settings, and choosing the computer you want to disconnect. This process lets you manage all linked computers and completely unlink any PC you no longer use with your phone in just a few taps.- Open the Link to Windows app (this is the name of the Android application) on your Android phone.
- Tap the Profile icon in the top left corner.
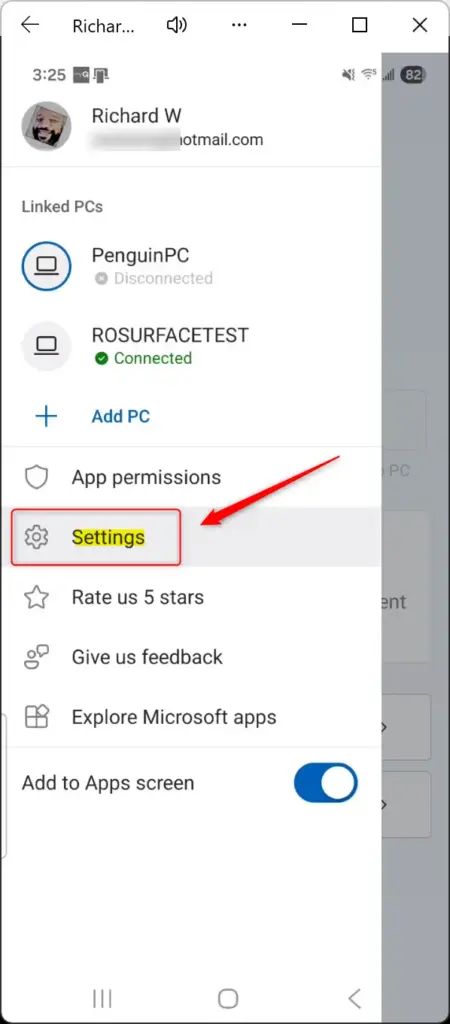
- Tap on Settings.
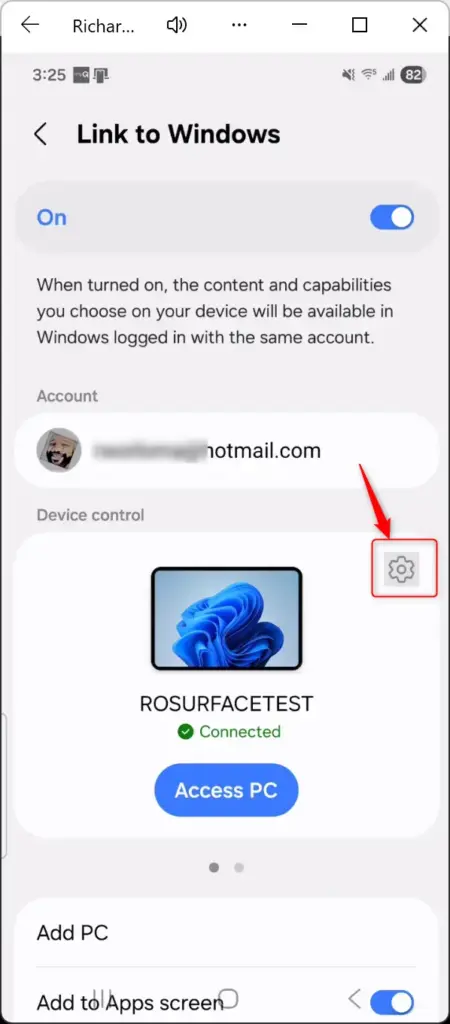
- Look for the section named Device control. Swipe through the devices until you see the Windows 11 computer you want to remove (for example, “RichardS23”). Then, tap the Settings (gear) icon next to it.
- Tap on Remove.
- Tap Remove again to confirm you want to remove the device.
- Your Windows computer will now be removed from the Link to Windows app (this is the name of the Android application).
- You can close the Link to Windows app (this is the name of the Android application) when you are done.
Summary
Unlinking a Windows computer from your phone takes just a few steps inside the Link to Windows app on your Android device. You need to open your profile settings, find the device control section, and tap the gear icon next to the computer you want to remove before confirming the choice to successfully disconnect it.
Was this guide helpful?

About the Author
Richard
Tech Writer, IT Professional
Richard is a writer at Geek Rewind who turns complex IT tasks into clear, step-by-step guides. He draws on years of hands-on experience in system administration and enterprise IT operations, focusing on Windows, Linux and WordPress: the problems people actually run into, and the fixes that work. His server and WordPress guides come from systems he runs himself. Richard builds and maintains the platform behind Geek Rewind, from its Ubuntu servers and Nginx configuration to its custom WordPress plugins. Many new tutorials start with readers' questions, and he's always glad to answer them in the comments.


No comments yet — be the first to share your thoughts!