How to Manage Dropbox Backups on Windows 11
Managing Dropbox backups on Windows 11 involves selecting specific folders to sync with the cloud and adjusting settings within the desktop app.
Dropbox acts as a secure cloud storage for your important files, protecting them from computer problems and letting you access them from anywhere.
On Windows 11, picking which folders get backed up is important, especially if you use the free 2GB Dropbox plan, so you don’t run out of space.
This control stops big or unnecessary files from syncing, helps you use your cloud storage wisely, and keeps your digital information safe.
Configure your Dropbox backups by opening the app, going to Settings > Preferences > Backups > Manage backups. Select or deselect folders under “This PC” and click Save to manage what syncs.
Dropbox Backup vs. Windows Native Tools
| Feature | Dropbox Backup | Windows File History |
|---|---|---|
| Cloud Sync | Yes | No (Local only) |
| Access Anywhere | Yes | No |
| Setup Difficulty | Easy | Moderate |
| Cost | Subscription based | Free |
How to Manage Your Backups
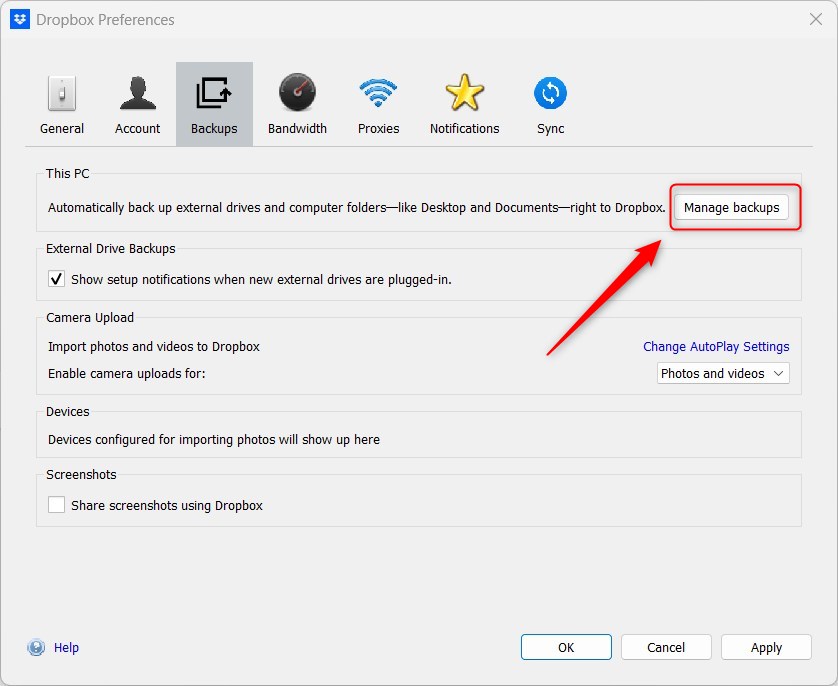
You can easily manage your Dropbox backups on Windows 11 to choose exactly which folders sync to the cloud. This gives you complete control over what gets saved. To start, open the Dropbox app from your taskbar notification area, click the gear icon for Settings, and then select Preferences. Next, go to the Backups tab and click ‘Manage backups’ under the ‘This PC’ section.
- Open the Dropbox app from your taskbar notification area.

Windows 11 turn on start Dropbox on system startup - Click the Settings (gear icon) and select Preferences.

Windows 11 turn on start Dropbox on system startup - Click the Backups tab. Under the “This PC” section, click Manage backups.
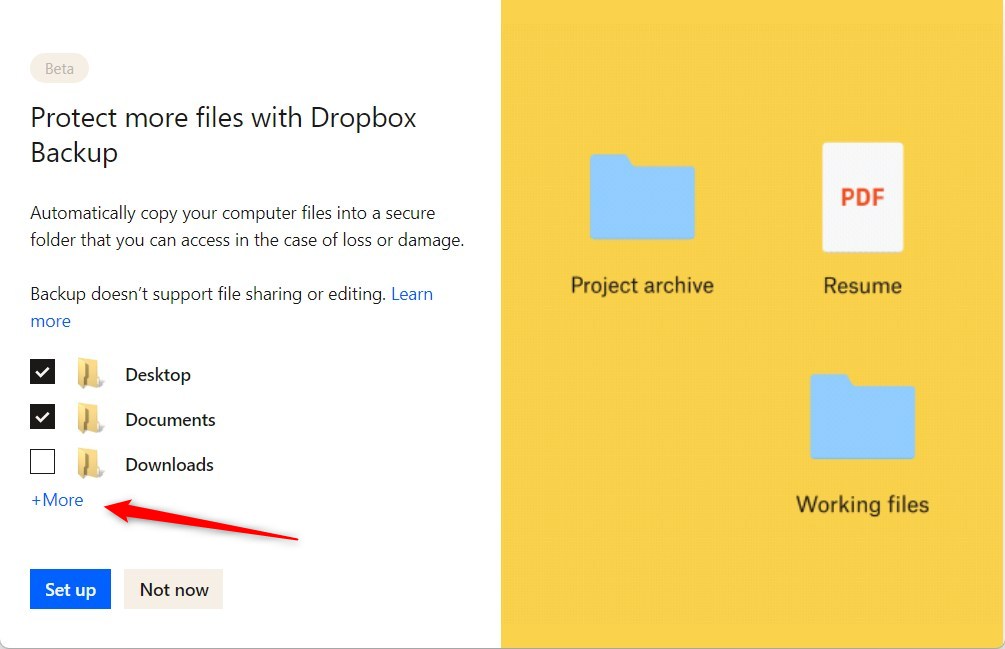
Manage backups in Dropbox on Windows 11 - Select or unselect the folders you want to sync to Dropbox.
- Click More if you need to add specific folders from your computer.
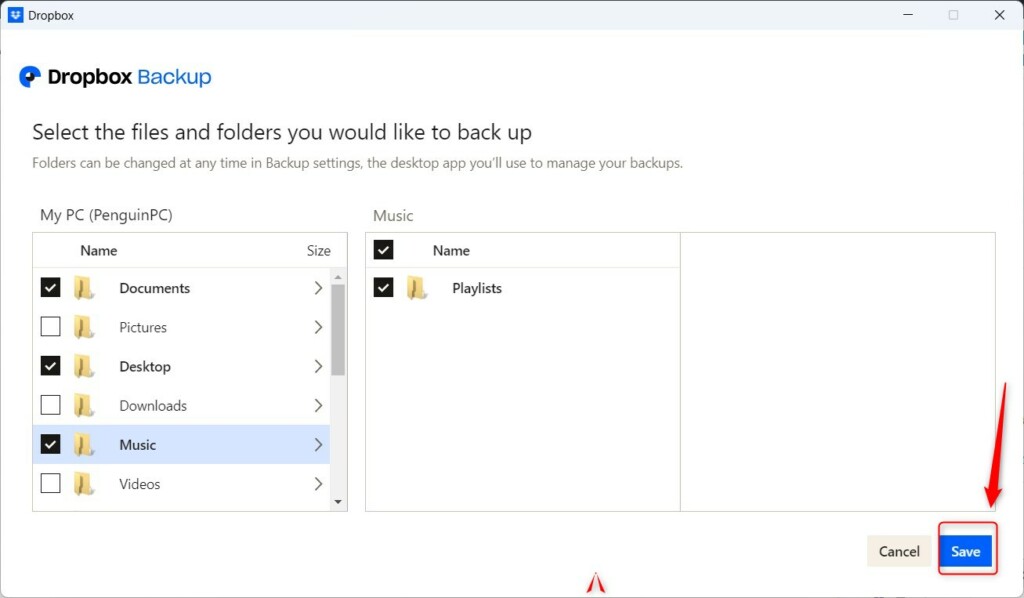
Dropbox settings menu showing folders to select for Windows 11 backups - Choose the folders you want to include and click Save.
Manage backups in Dropbox on Windows 11 - Click the Set up button to confirm your changes.
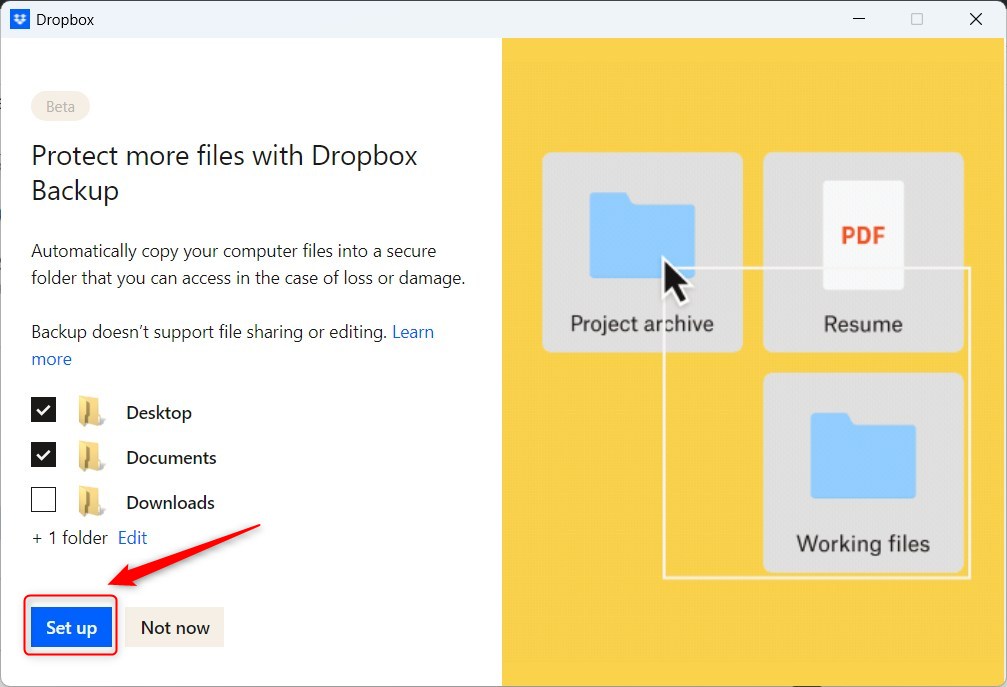
Manage backups in Dropbox on Windows 11 - Your files will now begin syncing. You can check the status of your backup at any time in the Manage backups menu.
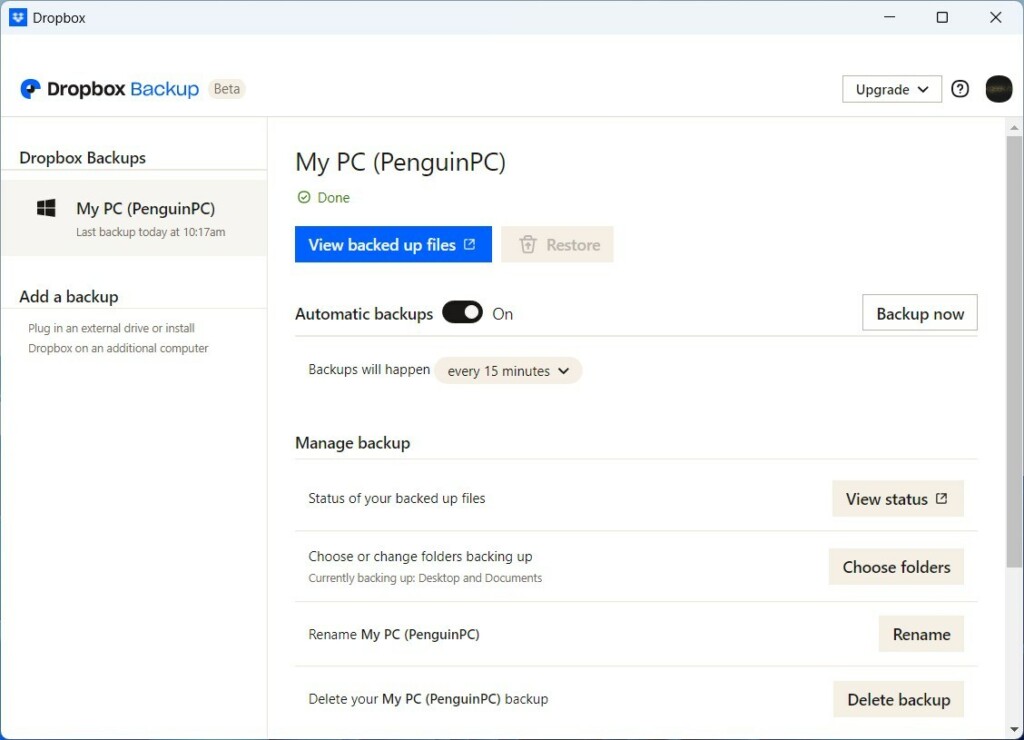
Manage backups in Dropbox on Windows 11
Troubleshooting Sync and Storage Errors
If your Dropbox backups on Windows 11 aren’t syncing, start by checking your internet connection and making sure the Dropbox app is running.
Backup Status Checklist
- Check for the green checkmark icon on synced folders.
- Verify your storage quota in the Dropbox account settings.
- Ensure the Dropbox app is set to launch on system startup.
- Regularly review the “Manage backups” menu to confirm active folders.
Summary
Dropbox helps protect your important files on Windows 11 by letting you easily select what to back up.
Does Dropbox Backup replace 🪟 Windows 11 File History?
Dropbox Backup and Windows File History serve different purposes. File History is a local backup tool for restoring previous versions of files from an external drive. Dropbox Backup is a cloud-based service that syncs your files to the internet, allowing you to access them from any device, anywhere.
How do I check if my 🪟 Windows 11 files are successfully backed up?
You can check if your Windows 11 files are successfully backed up by looking for green checkmark icons next to them in File Explorer.
What happens to my backups if I cancel my Dropbox subscription?
If you cancel your Dropbox subscription, your account switches to a free plan, and files exceeding the free storage limit will stop syncing on Windows 11.
Can I back up external hard drives connected to my 🪟 Windows 11 PC?
Yes, you can back up external hard drives. Connect the drive to your PC, then go to the Dropbox Preferences menu. Under the Backups tab, you can select the external drive as a source to include in your automatic cloud backup routine, ensuring your external data is also protected.
Was this guide helpful?

About the Author
Richard
Tech Writer, IT Professional
Richard, a writer for Geek Rewind, is a tech enthusiast who loves breaking down complex IT topics into simple, easy-to-understand ideas. With years of hands-on experience in system administration and enterprise IT operations, he’s developed a knack for offering practical tips and solutions. Richard aims to make technology more accessible and actionable. He's deeply committed to the Geek Rewind community, always ready to answer questions and engage in discussions.


[…] folder. If you want your backup synced to the cloud, save it into a backup folder like OneDrive, Dropbox, or Google […]
[…] startup in the background, adding Microsoft Office add-in, turning notifications on or off, managing backups, turning automatic backups on or off, renaming backup device name, changing backup […]
[…] you use cloud services like OneDrive or Dropbox, some files may be stored only in the cloud to save space on your computer. These are called […]
[…] Dropbox startup in the background, adding Microsoft Office add-in, turning notifications on or off, managing backups, automatic backups on or off, renaming backup device name, changing backup frequency, choosing back […]