Install VirtualBox Guest Additions on Windows 11
VirtualBox Guest Additions install on a Windows 11 virtual machine to improve its performance and integration with your main computer.
Guest Additions is a special software package that makes your virtual Windows 11 computer work better with your physical computer (the “host”). Without it, your virtual machine might feel slow, and features like copying files or using your mouse smoothly won’t work well.
Installing these additions right after setting up Windows 11 on VirtualBox is crucial. It boosts graphics, lets you share folders between your main computer and the virtual one, and allows easy copy-pasting of text and files.
Mount the Guest Additions ISO from the VirtualBox Devices menu, then run the VBoxWindowsAdditions.exe installer from the virtual CD drive. Follow the on-screen prompts to complete the installation and restart your virtual machine.
How to add VirtualBox guest additions software to 🪟 Windows 11 VM
As mentioned, VirtualBox Guest Additions provide tight integration between your host and virtual machine operating systems. This improves VM graphics performance, enables shared folders between host and guest machines, and allows copying/pasting of text, images, and files. For the best experience, install this tool in all your VirtualBox VMs.
If you haven’t already installed VirtualBox, the guide below will help you get it set up on Windows.
How to install VirtualBox on Windows 11
Once VirtualBox is installed, you can create a VM for Windows 11. If you haven’t done this yet, check out the post below.
How to create a Windows 11 virtual machine with VirtualBox
After creating the VM, you can install Windows 11 on it. For help with this, read the post below.
How to install Windows 11 on VirtualBox VM
With Windows 11 installed, you can now install the Guest Additions software within it.
To install the Guest Additions software, launch VirtualBox on your host computer and start the newly created Windows 11 VM.
After logging into Windows 11, click on Device > Insert Guest Additions CD Image… in the VM window, as shown below.

Once clicked, the software inserts and mounts its virtual CD into Windows. Windows will then show an autoplay notification, similar to the one below.
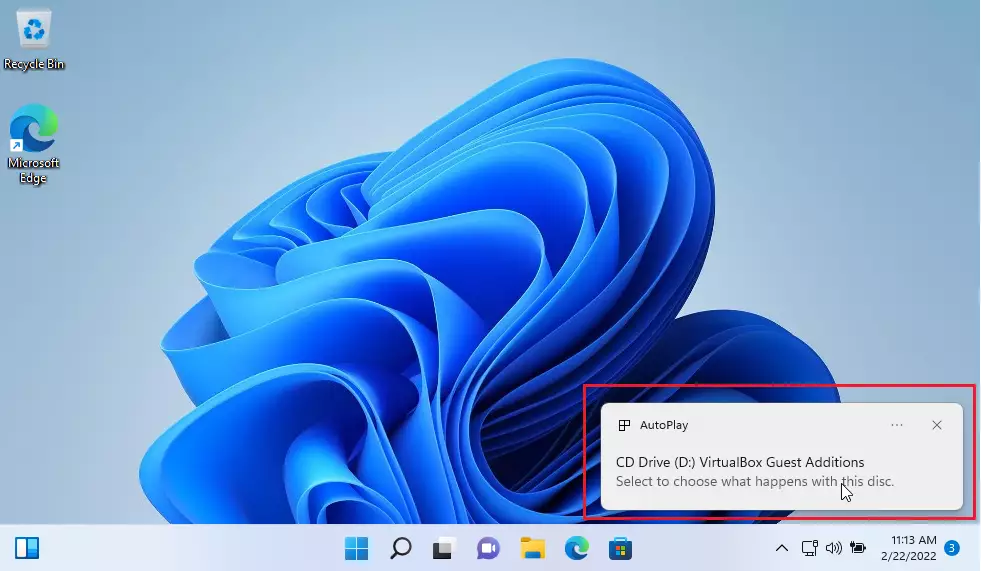
If you don’t see an autoplay notification, open File Explorer. Navigate to This PC in the left-hand menu. Then, double-click the mounted CD Drive labeled VirtualBox Guest Additions software.

This action launches the installation. Follow the prompts, accepting the default settings, and install all necessary packages.
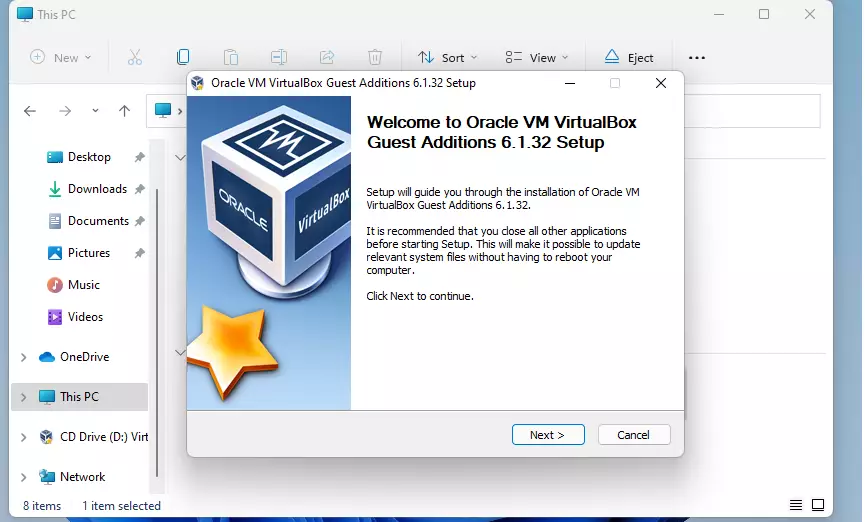
When finished, restart the VM as prompted.
That should do it!
Related:
- How to install VirtualBox on Windows 11
- How to create Windows 11 VirtualBox VM
- How to install Windows 11 on VirtualBox
Conclusion:
Installing VirtualBox Guest Additions on your Windows 11 virtual machine is essential for an optimized experience. Here are the key takeaways:
- VirtualBox guest additions enhance graphics performance and system integration between the host and guest operating systems.
- The installation process is straightforward: inserting the Guest Additions CD image and following the setup prompts.
- Ensure that you restart the VM after the installation to complete the process.
- Always install guest additions on every VM created using VirtualBox for best results.
- Refer to related guides for assistance installing and creating VMs with VirtualBox on Windows 11.
Was this guide helpful?

About the Author
Richard
Tech Writer, IT Professional
Richard, a writer for Geek Rewind, is a tech enthusiast who loves breaking down complex IT topics into simple, easy-to-understand ideas. With years of hands-on experience in system administration and enterprise IT operations, he’s developed a knack for offering practical tips and solutions. Richard aims to make technology more accessible and actionable. He's deeply committed to the Geek Rewind community, always ready to answer questions and engage in discussions.


No comments yet — be the first to share your thoughts!